120
Selecting
Trimming
Settings
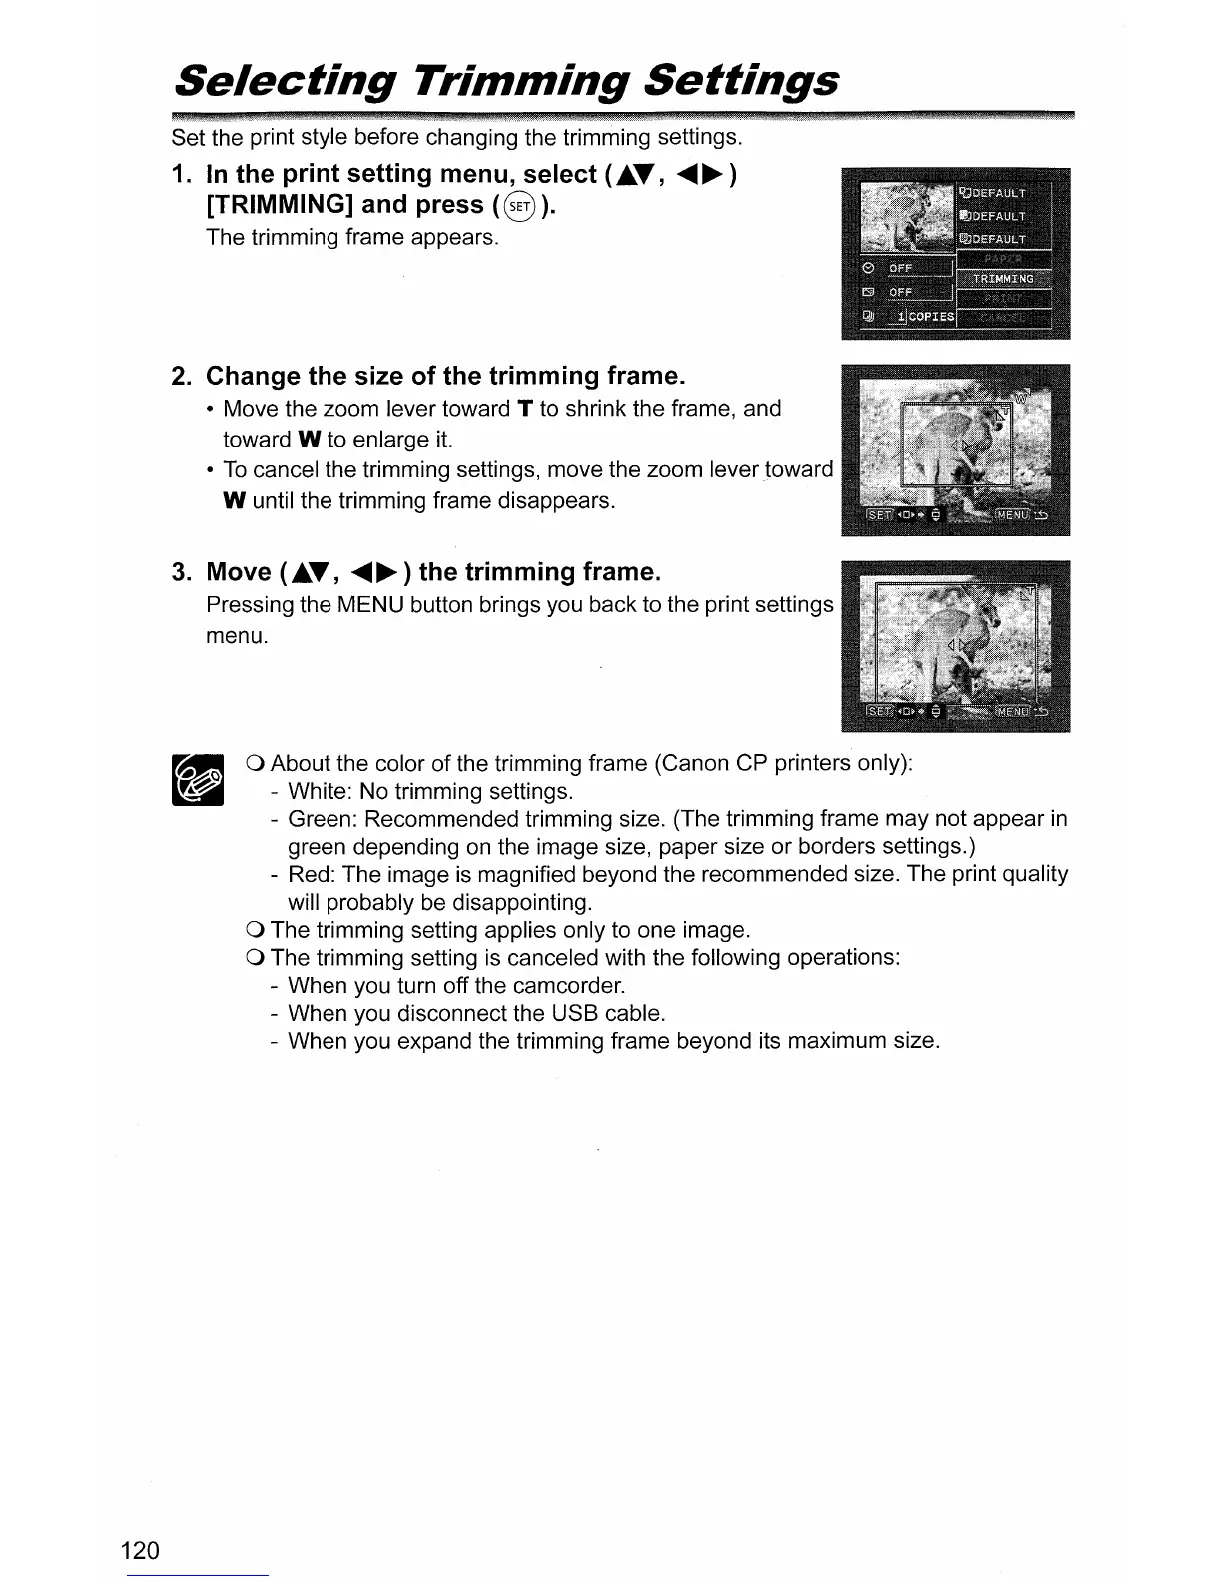
Set the print style before changing the trimming settings.
1.
In
the print setting menu, select (i..
..
,
.....
~)
[TRIMMING] and press
(§
).
The trimming frame appears.
2.
Change the size of the trimming frame.
• Move the zoom lever toward T to shrink the frame, and
toward
W to enlarge it.
•
To
cancel the trimming settings, move the zoom levertoward
W until the trimming frame disappears.
3.
Move (i..
..
,
.....
~)
the trimming frame.
Pressing the MENU button brings you back to the print settings
menu.
o About the color
of
the trimming frame (Canon CP printers only):
- White: No trimming settings.
- Green: Recommended trimming size. (The trimming frame may not appear
in
green depending on the image size, paper size
or
borders settings.)
- Red: The image is magnified beyond the recommended size. The print quality
will probably be disappointing.
o The trimming setting applies only to one image.
o The trimming setting is canceled with the following operations:
- When you turn off the camcorder.
- When you disconnect the USB cable.
- When you expand the trimming frame beyond its maximum size.