Recording
Still
Images
Before using a memory card for the first time, be sure to initialize it with this camcorder
(OJ 97).
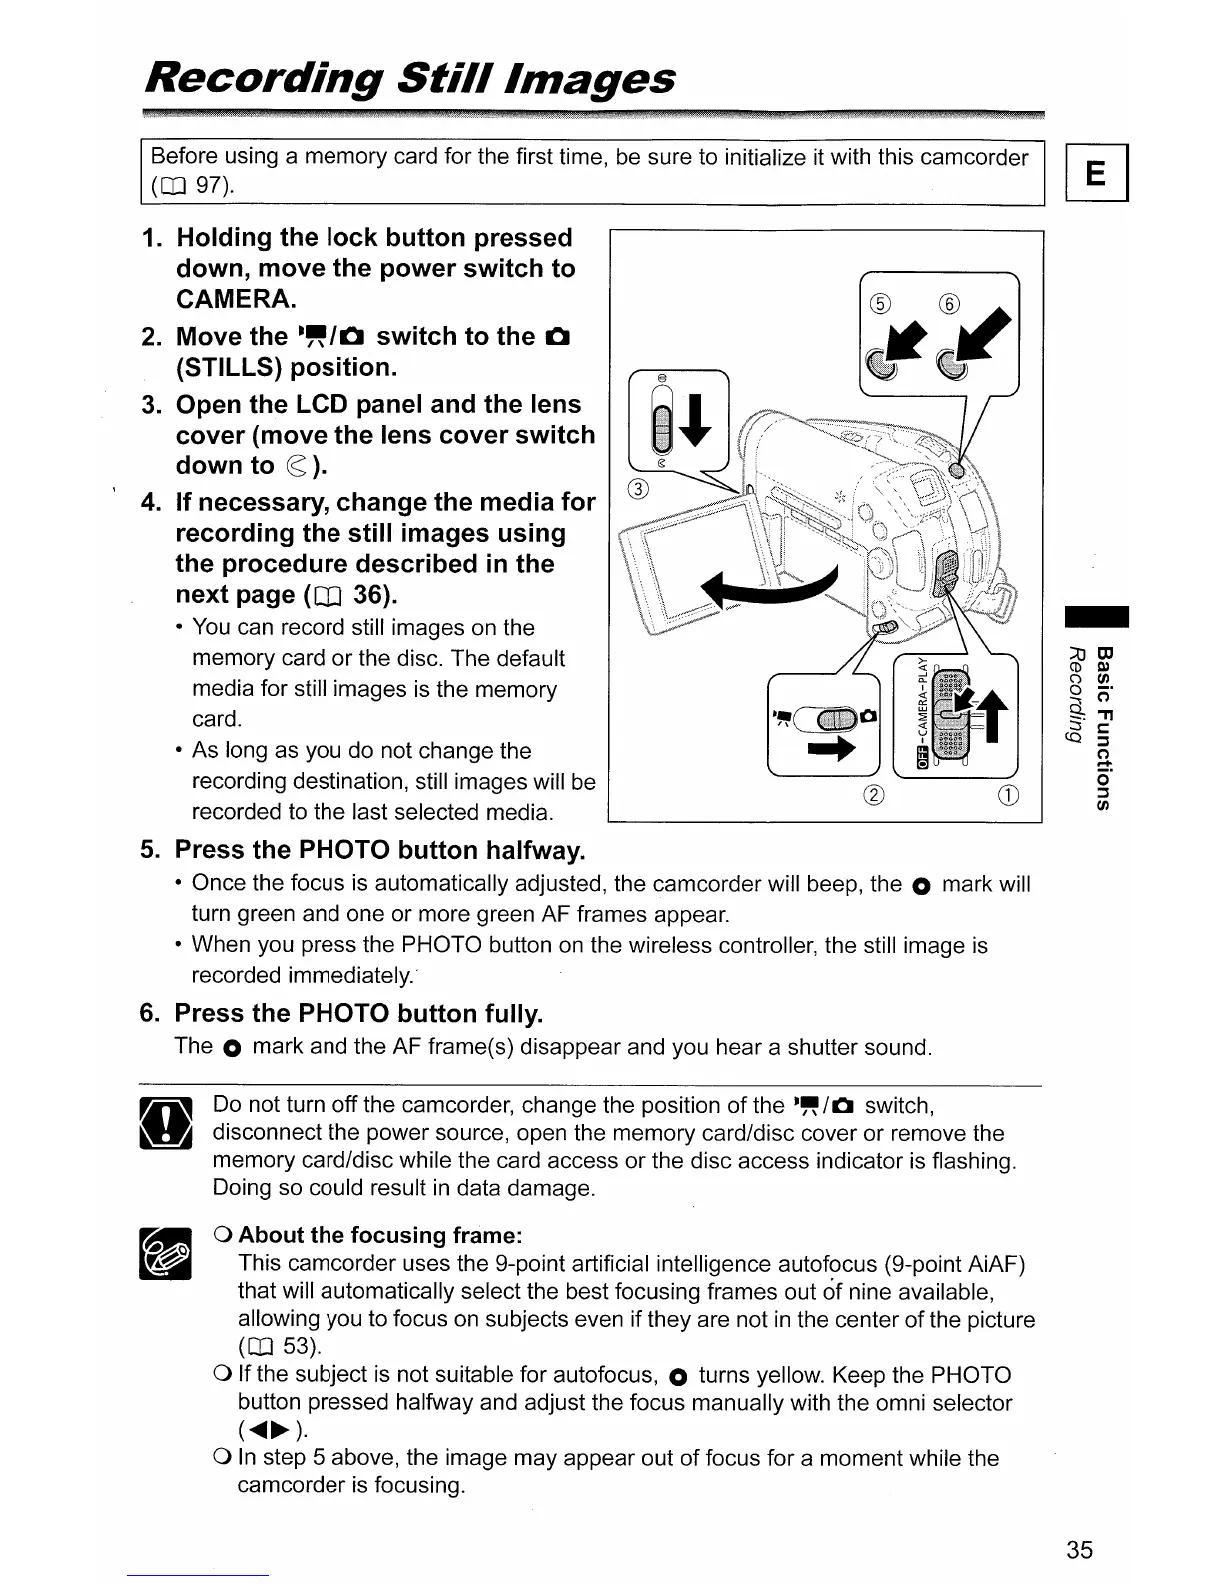
1.
Holding
the
lock
button
pressed
down,
move
the
power
switch
to
CAMERA.
2.
Move
the
-"/0
switch
to
the
0
(STILLS)
position.
3.
Open
the
LCD panel and
the
lens
cover
(move
the
lens
cover
switch
down
to
(S:).
4.
If
necessary,
change
the
media
for
recording
the
still
images
using
the
procedure
described
in
the
next
page
(CD
36).
• You can record still images on the
memory card
or
the disc. The default
media for still images is the memory
card.
• As long as you do not change the
recording destination, still images will be
recorded to the last selected media.
5.
Press
the
PHOTO
button
halfway.
• Once the focus is automatically adjusted, the camcorder will beep, the 0 mark will
turn green and one or more green AF frames appear.
• When you press the PHOTO button on the wireless controller, the still image is
recorded immediately.-
6.
Press
the
PHOTO
button
fully.
The 0 mark and the AF frame(s) disappear and you hear a shutter sound.
Do not turn off the camcorder, change the position
of
the
.~
/0
switch,
disconnect the power source, open the memory card/disc cover or remove the
memory card/disc while the card access
or
the disc access indicator is flashing.
Doing so could result in data damage.
o
About
the
focusing
frame:
This camcorder uses the 9-point artificial intelligence autofocus (9-point AiAF)
that will automatically select the best focusing frames out
of
nine available,
allowing you to focus on subjects even if they are not
in
the center
of
the picture
(OJ 53).
o If the subject is not suitable for autofocus, 0 turns yellow. Keep the PHOTO
button pressed halfway and adjust the focus manually with the omni selector
(
....
~).
o
In
step 5 above, the image may appear out
of
focus for a moment while the
camcorder is focusing.
-
35