125
Overriding Schedule Actions
Using the schedule setup screen the operator can temporarily override scheduling actions. The active lead
list, active schedule, and active group can be changed. Overrides may be altered after a schedule change
occurs but may only last until the next scheduled activity occurs.
Alarm and Failure Setpoints
The control parameter used to sequence compressors is monitored by the Viltech for alarm processing. High alarm
and high failure setpoints can be defined by the operator using the high alarm setpoint screen under the SEQ hot-
key. Low alarm and failure setpoints are set on the control group select screen and can be changed using schedul-
ing.
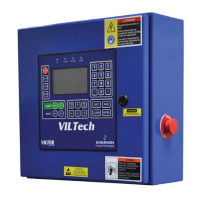
Setting Up VILTech Panels for Sequencing
Sequencing can be done using up to 8 VILTech panels. The VILTech panels are connected using a daisy chain
wired to COMM 0 in the VILTech panels, as shown in wiring diagram 682017. Each compressor in the sequence
must have the Sequence Option enabled in the “Control Configuration” screen that is found by pressing the
“Menu” hot key then press number 4 for “System Setup” then press number 5 for “Configure Hardware”. Now
setup the safety setpoints for each compressor. Next, the Dip switches on the microprocessor board must be
configured for the master and trim (slave) VILTech panels. The master VILTech panel will have the 8
th
dip switch in
the “ON” position, this identifies the panel as the master, and the rest of the dip switches will identify to the
master how many trim panels are in the sequence by putting the dip switch in the “ON” position for the correct
binary sum value that corresponds to that number of trim panels. Then the dip switches on the trim panels must be
set up sequentially in the order that each will turn on by the command of the master. For example, if there is a
master and 3 trim compressors then dip switch 1, 2, and 8 are in the “ON” position and the trim compressors will
have their own unique address starting with 1. Shown below is a chart on how this example would be set up. (If
there are more than 4 trim panels then those would be set up like it is shown below.)
Now on the master panel the ON/OFF switch on the I/O board can be used to reboot the microprocessor. Next
press the SETPT key and press the number 6 for Sequencer. On the Sequencer screen, the Control screen has the
enable, disable, and automatic options. Disabling the sequencer will not allow the master to communicate with the
other trim panels even if the “SEQ” key is pressed. Enabling the sequencer will allow the master to communicate
with the trim compressors when the “SEQ” key is pressed. Now if the sequencer control is put to Automatic then a
remote signal tied into channel 12 will start/stop the master panel and then it will automatically control the other
trim panels according to capacity needs. When all the setpoints are configured then the panels can be put on-line
by pressing the “SEQ” button in the Mode section of the keypad.
Binary Value 1248163264
Dip Switch 12345678
Master on on off off off off off on
Trim 1 on off off off off off off off
Trim 2 off on off off off off off off
Trim 3 on on off off off off off off
Trim 4 off off on off off off off off
Trim 5 on off on off off off off off
Trim 6 off on on off off off off off
Trim 7 on on on off off off off off