Euphonix Max Air Mixing Console Operation Manual Touchscreen
75
Select the channels to assign by touching them individually, touching and dragging
through a continuous set, or by using the three utility buttons (Select All, Select None,
Select Range) on the bottom-left of the Assign View (see below for a discussion of
these buttons). Select the Main, Swap, or Center tabs to assign the channels to the de-
sired strip type.
Touch a single strip to assign the selected channels sequentially from that strip upwards.
If the channels are not contiguous (i.e., 2–3, 5), they will still be assigned to sequential
strips, even if some of the strips already have channel assignments.
To control the Super Channel from the Center Strip, select the Super Channel button
and select a strip.
Touch the 1:1 button to assign channels 1–48 to Strips 1–48 Main.
Select Range
Use the Select Range button at the bottom-right of the Assign View to select a channel,
then select a higher or lower numbered channel to select all channels in between. The
range can include channels in another tab (i.e., C25–C55, C15–M25). The range is set
by each pair of selections.
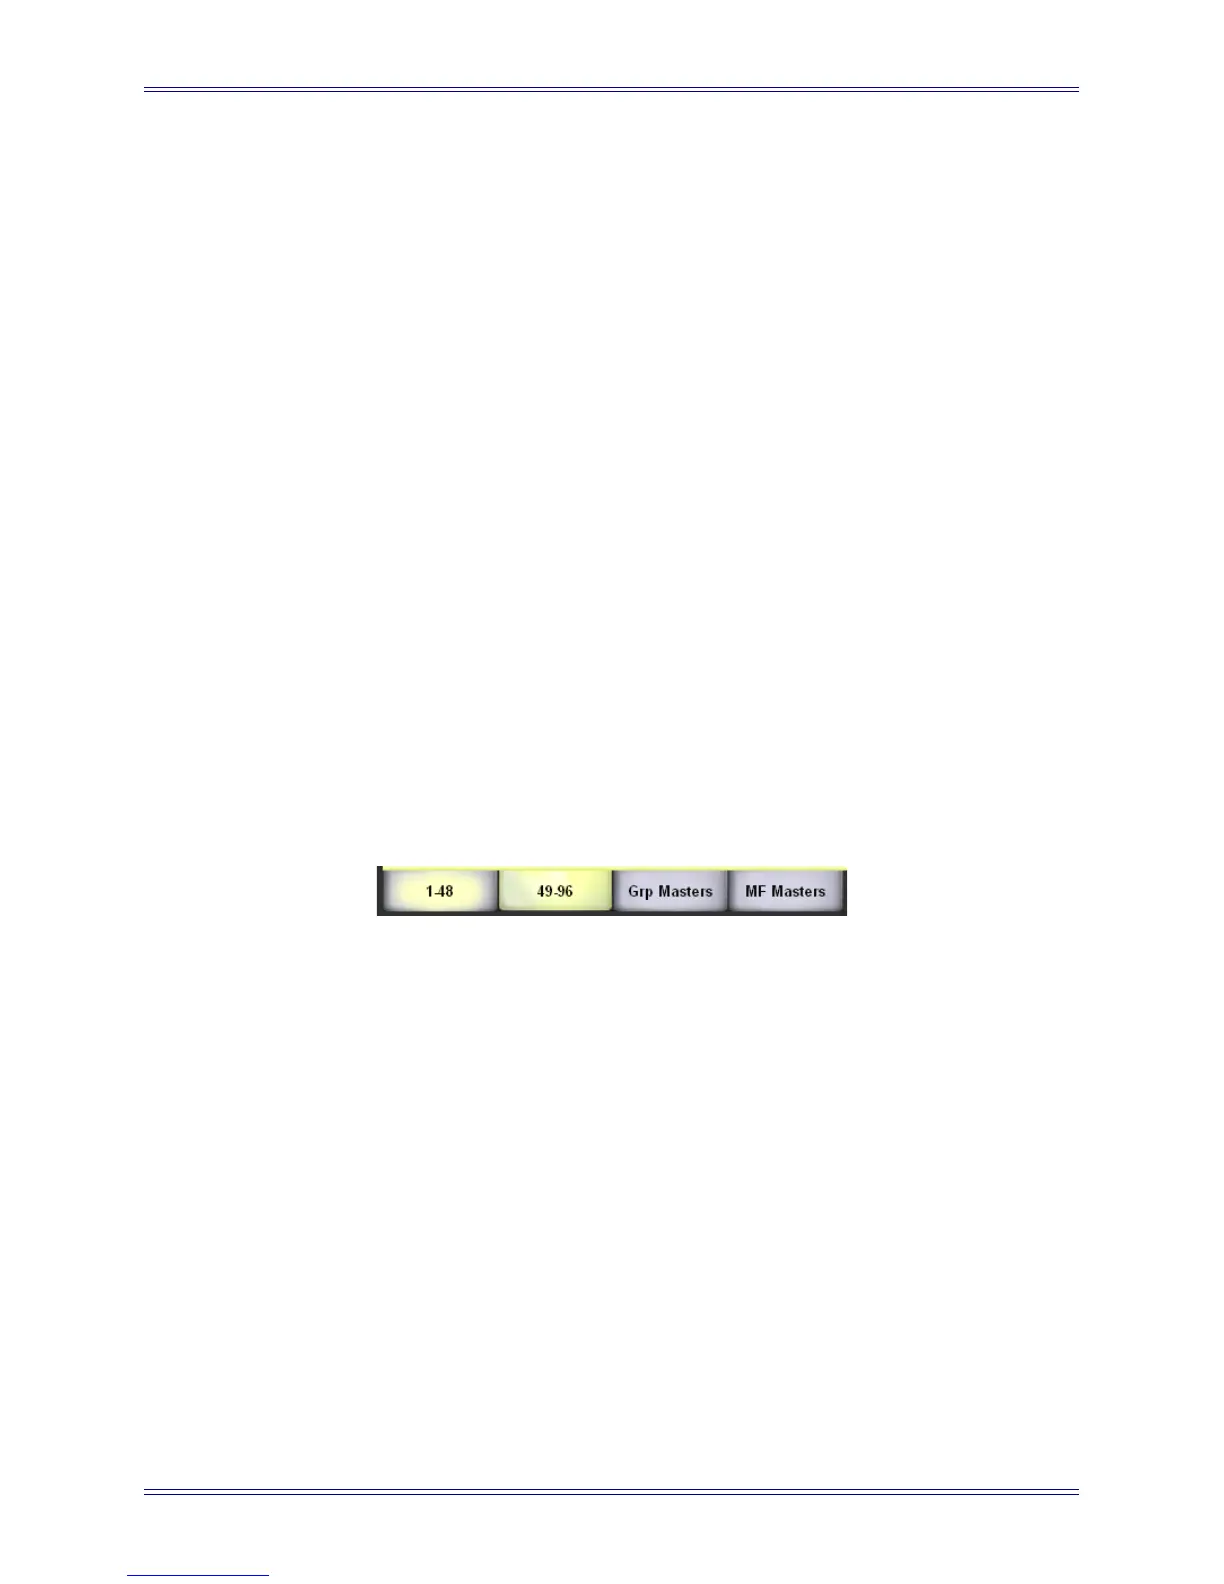
When a channel is selected in a tab other than the selected tab, that tab highlights dimly
around the edges. In the figure below, 49–96 is the selected tab but channels are also
selected in 1–48.
Select All
Use the Select All button to select all channels across all tabs (1–48, 49–96, Grp Mas-
ters, and MF Masters).
Select None
Use the Select None button to deselect all selected channels.
4.7.4 Layouts and Snapshots
See Chapter 9: Layouts and Snapshots.