10.2 Toolbars
10.2.1 Measurement toolbar
NOTE
The measurement toolbar becomes visible when you push the Measure button
and select Advanced.
■
■
You use the measurement toolbar to set up measurement tools in the advanced
mode, or when editing a saved image in the archive mode.
■
To navigate on the toolbar, use either the joystick or the stylus pen.
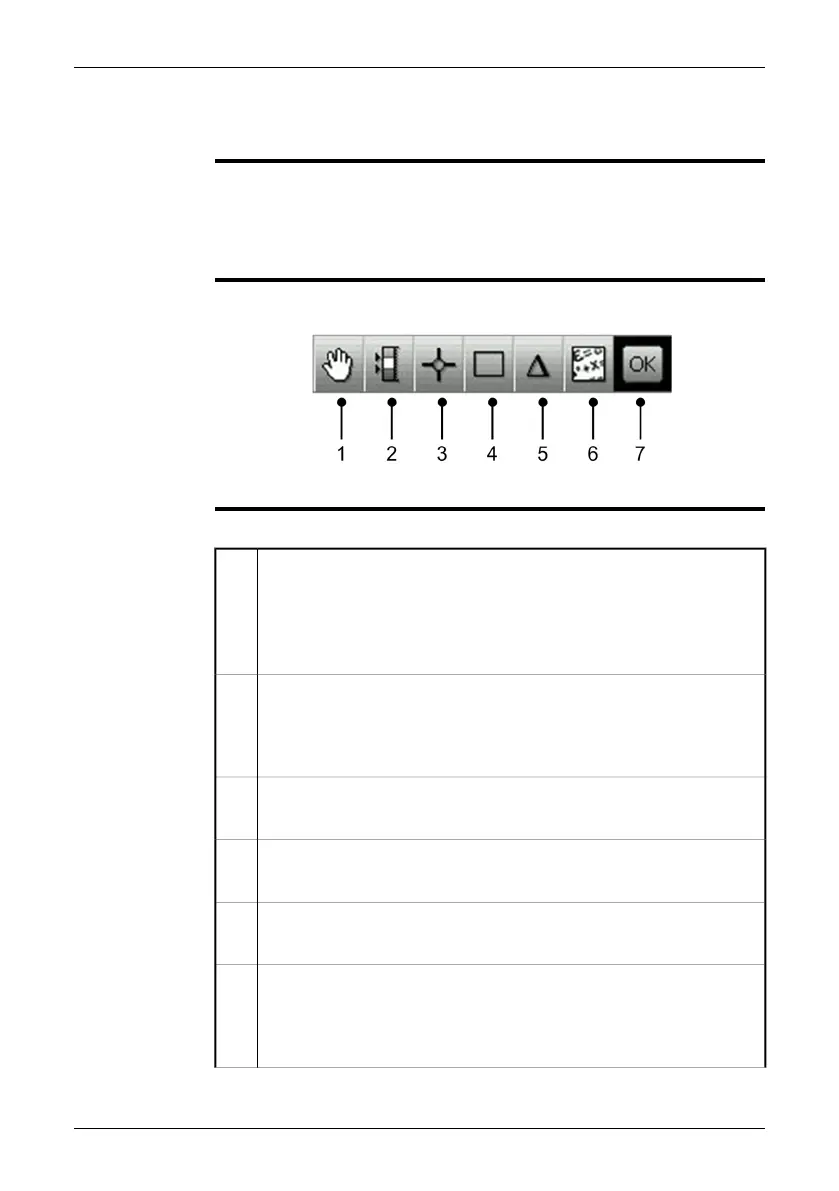
Figure
10760803;a3
Explanation
This table explains the figure above:
You select this toolbar button to do one or more of the following:
■
Move measurement tools
■
Remove measurement tools
■
Turn on and turn off alarms (only for spotmeters and areas).
■
Set alarm levels (only for spotmeters and areas).
1
Isotherm toolbar button
You select this toolbar button to set up different types of isotherms. The
isotherm command colors all pixels with a temperature above, below, or
between one or more preset temperature levels.
2
Spotmeter toolbar button
You select this toolbar button to create a spotmeter.
3
Area toolbar button
You select this toolbar button to create a measurement area.
4
Difference calculation toolbar button
You select this toolbar button to set up a difference calculation.
5
Object parameters toolbar button
You select this toolbar button to change object parameters. Setting the
correct object parameters is important if precise measurement results are
required.
6
28 Publ. No. 1558792 Rev. a460 – ENGLISH (EN) – July 1, 2010
10 – Toolbars and work areas
 Loading...