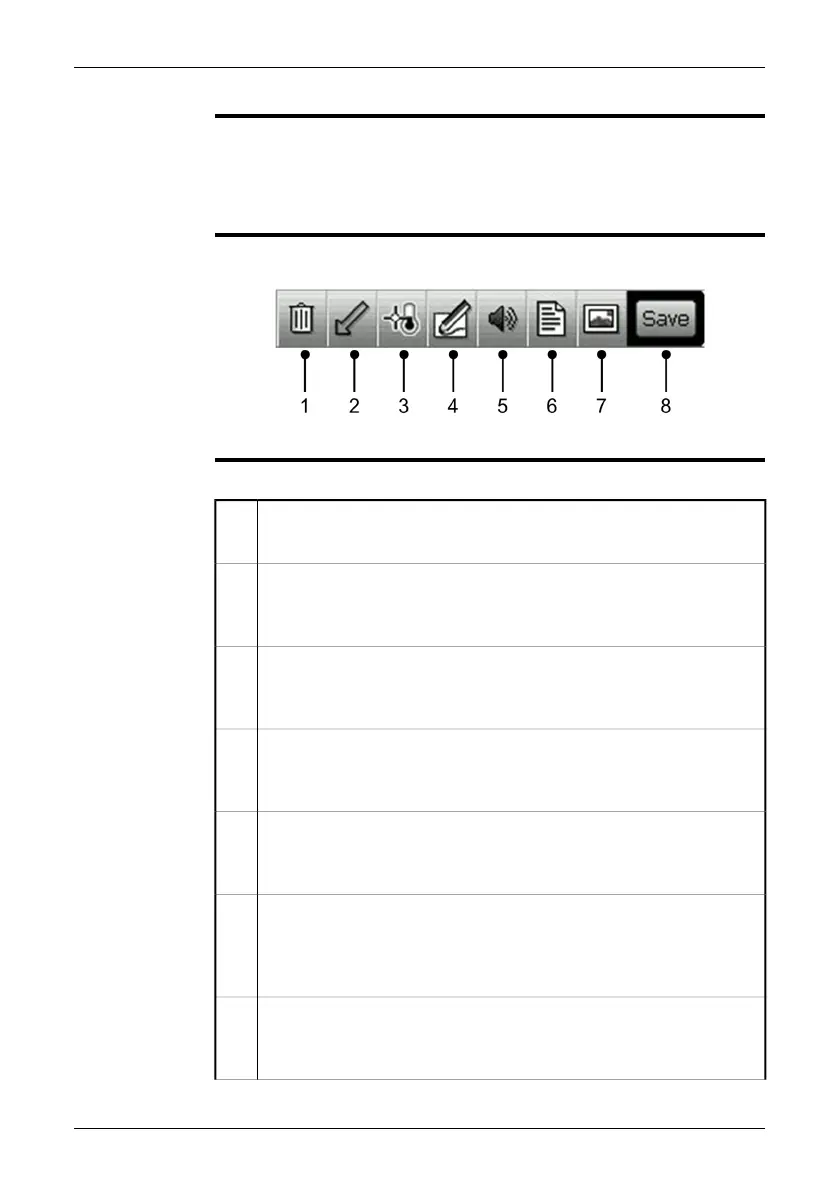
10.2.2 Documentation toolbar
NOTE
The documentation toolbar becomes visible when you preview an image, or when
you edit an image from the image archive.
■
■
To preview an image, push and hold down the Save button for more than one
second.
■
To navigate on the toolbar, use either the joystick or the stylus pen.
Figure
10760903;a2
Explanation
This table explains the figure above:
Delete image toolbar button
You select this toolbar button to discard the image that you are previewing.
1
Add markers toolbar button
You select this tool to add arrow markers to points of interest in an infrared
image. The arrow marker will be saved in the infrared image.
2
Measurement toolbar button
You select this tool to go to the measurement toolbar, where you can change
a variety of parameters before you save the image.
3
Add sketch toolbar button
You select this toolbar button to add a freehand sketch to an infrared image.
The sketch will be linked to the infrared image.
4
Add voice annotation toolbar button
You select this toolbar button to add a voice annotation to an infrared image.
The voice annotation will be saved in the infrared image.
5
Add text annotation toolbar button
You select this toolbar button to add text annotations and/or image descrip-
tions to an infrared image. Text annotations and image descriptions will be
saved in the infrared image.
6
Add digital photo toolbar button
You select this toolbar button to add a digital photo to the infrared image.
The digital photo will be linked to the infrared image.
7
30 Publ. No. 1558792 Rev. a460 – ENGLISH (EN) – July 1, 2010
10 – Toolbars and work areas
 Loading...