Configuring a physical access point Wireless Controller
FortiGate Version 4.0 MR1 Administration Guide
706 01-410-89802-20090903
http://docs.fortinet.com/ • Feedback
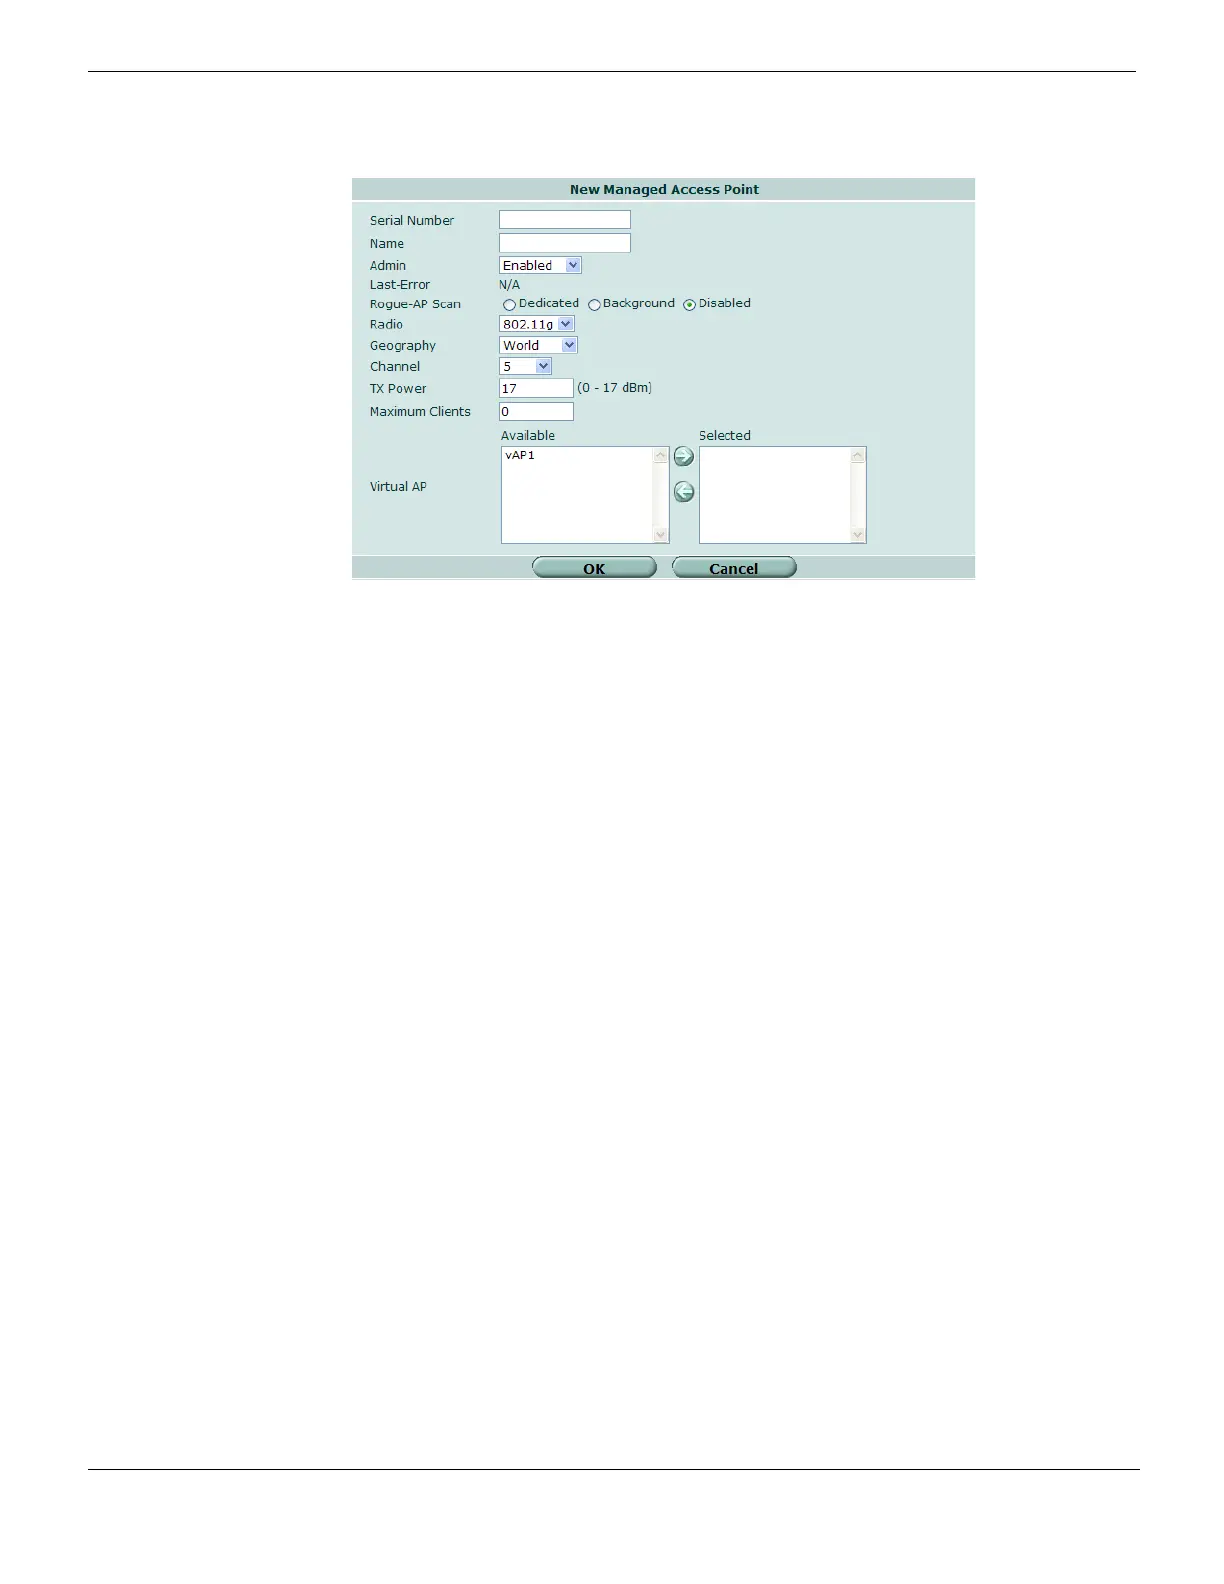
Figure 438: Configuring a physical access point
2 Select OK.
Serial Number Enter the serial number of the FortiWiFi unit. This field is completed
automatically if the AP discovers this AC and registers itself.
Name Enter a name for the physical AP.
Admin Select one of the following:
Discovery — This is the setting for APs that have discovered this AC and
registered themselves. To use such an AP, select Enabled.
Disabled — Do not manage this AP.
Enabled — Manage this AP.
Last Error The last error message, if any, for this AP.
Rogue AP Scan Rogue AP scanning detects other APs and reports them on the Wireless
Controller > Rogue AP page.
Select one of the following:
Dedicated — AP performs scanning only and does not provide service.
Background — AP performs scanning during idle periods while acting as
an AP.
Disabled — Do not perform scanning. Scanning can reduce performance.
Radio Select the wireless frequency band. Keep in mind the capabilities of your
users’ wireless cards or devices.
Geography Select your country or region. This determines which channels are
available.
Channel Select a channel for your wireless network or select Auto. The channels
that you can select depend on the Geography setting.
TX Power Set the transmitter power level. The higher the number, the larger the area
the AP will cover.
Maximum Clients Enter the maximum number of clients permitted to connect simultaneously
to this physical AP. Enter 0 for no limit.
Virtual AP In the Available list, select the virtual APs to be carried on this physical AP
and then select the right-arrow button to move them to the Selected list.

 Loading...