Do you have a question about the GE 745 and is the answer not in the manual?
Covers initial setup and important procedures before operating the relay.
Explains the structure of the manual and how setpoints and actual values are indicated.
Details how to navigate the relay's menus and access setpoints and actual values.
Describes the key sequences for navigating through menus, setpoints, and actual values.
Provides an example illustrating the key-press sequence to access and change setpoints.
Explains how to edit and store different types of setpoint values.
Details how to use the HELP key to view setpoint range, minimum, maximum, and step values.
Describes methods for editing and storing numerical setpoint values using keypad or value keys.
Covers security features including installation and passcode management.
Explains how to set the relay to the 'Programmed' state after installation.
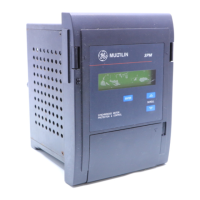
Provides an overview of the 745 Transformer Protection System and its features.
Describes the 745 system as a multi-processor relay for transformer protection and management.
Lists the protection features available for windings and common protection elements.
Details the applicability, inputs, outputs, and miscellaneous specifications of the 745.
Specifies the transformers and frequencies for which the 745 is applicable.
Provides detailed specifications for control power, phase current, ground current, and voltage inputs.
Describes the drawout case and its role in mechanical protection and electrical connections.
Details the case description, mechanical protection, and electrical connections for the drawout relay.
Provides dimensions for single and double 745 relay panel cutouts for mounting.
Explains the procedure for mounting the relay case into the supporting panel.
Provides step-by-step instructions for safely removing and inserting the relay unit from its case.
Describes how to connect the Ethernet cable for communication, including precautions.
Covers important aspects of interconnections, including instrument transformer inputs and outputs.
Introduces the typical wiring section covering interconnections for various applications.
Illustrates the layout of the rear terminals for connecting wiring to the relay.
Provides typical wiring diagrams for two-winding and three-winding transformers.
Explains the importance of phase sequence and transformer polarity for relay features.
Details the 745's AC current inputs, including primary CT ratings and ground input associations.
Describes the single AC voltage divider input for measuring system voltage.
Explains how to connect external contacts to the 16 logic inputs, including dry and wet contacts.
Details the control power supply requirements and potential voltage mismatch warnings.
Describes the general purpose DC current input for monitoring external quantities and its configuration.
Explains the input for monitoring the onload tap changer position and its relation to CT ratio mismatch.
Details the connections for RTD devices using two or three wires for temperature monitoring.
Describes the eight output relays, their contact types, and programmability via FlexLogic™.
Describes the high-speed solid state output for keying communication channels.
Details the seven analog output channels, their ranges, and programming for measured parameters.
Explains the two rear communication ports implementing Modbus protocol for monitoring and control.
Describes the 9-pin RS232C serial port on the front panel for programming via PC.
Explains IRIG-B as a standard time code format for synchronizing events within 1 millisecond.
Discusses the dielectric strength test performed at the manufacturer and its necessity at the customer site.
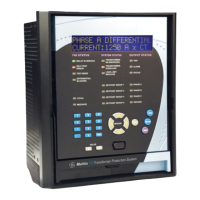
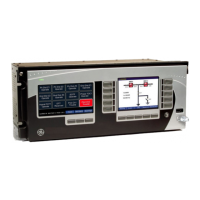
Details the front panel interface including display, LEDs, control keys, and program port.
Describes the front panel's local operator interface with LCD, LEDs, keys, and RS232 port.
Explains the 40-character LCD display, its messages, and how trip/alarm conditions override defaults.
Categorizes front panel indicators into Relay, System, and Output status with color coding for importance.
Details the meaning of various status indicators like Relay In Service, Self-Test Error, and Test Mode.
Describes the front panel program port for RS232 communications using EnerVista 745 Setup software.
Explains the organization of display messages into menus, pages, and sub-pages, and navigation keys.
Details the process of editing and storing text setpoints using the decimal, VALUE, and ENTER keys.
Explains the requirements for setpoint entry, including access terminals and passcode features.
Introduces the EnerVista 745 Setup software as a GUI for configuration, monitoring, and maintenance.
Describes the EnerVista 745 Setup software's capabilities for managing relay functions.
Provides minimum computer requirements and procedures for installing the EnerVista 745 Setup software.
Details the configuration of serial and Ethernet communications for connecting EnerVista 745 Setup to the relay.
Explains how to set up serial communications, including RS232 and RS485 connections.
Describes the Quick Connect button for establishing a fast connection through the front panel RS232 port.
Details the steps to configure Ethernet communications by connecting the Ethernet cable and setting IP addresses.
Explains how to connect to the relay via the EnerVista 745 Setup software after configuring communications.
Covers engaging a device and entering setpoints using the EnerVista 745 Setup software.
Explains how to use EnerVista 745 Setup in online mode to communicate directly with a 745 relay.
Illustrates entering setpoints, specifically current sensing setpoints, using the system setup page.
Describes how EnerVista 745 Setup files are managed, added to the tree, and sorted alphabetically.
Explains the three ways EnerVista 745 Setup handles changes to relay settings and organizes setting files.
Details the procedure for saving setpoint files to a local PC before firmware upgrades or changes.
Illustrates how to create new setpoint files independently of a connected device for later upload.
Explains how to upgrade setpoint files to match new firmware revisions.
Provides procedures for upgrading the 745 relay firmware with new files from the GE Multilin website.
Outlines the process of upgrading the 745 firmware to the latest version.
Emphasizes the importance of saving current 745 settings to a file before firmware upgrades.
Introduces advanced features like triggered events, waveform capture, and trending.
Explains how to view and analyze data from triggered events using the event recorder and oscillography.
Details how to capture waveforms (trace memory) from the 745 relay at the instance of a trip.
Describes the trending feature for sampling and recording actual values, and graphing parameters.
Explains how to view the event recorder using EnerVista 745 Setup to review stored transformer and system information.
Describes the Modbus user map for programming 745 user map addresses (0180h to 01F7h).
Guides on how to view real-time relay data like input/output status and measured parameters.
Covers installing and using EnerVista Viewpoint software for accessing critical 745 information.
Illustrates the plug-and-play connection of EnerVista Viewpoint to the 745 relay.
Provides an overview of the 745 relay's programmable settings and how they are grouped.
Maps out the setpoint pages and their corresponding sections in the manual.
Describes methods for entering setpoints: front panel keypad, computer software, or SCADA.
Explains the hardware and passcode security features for protecting against unauthorized setpoint changes.
Explains the auto-configuration process for transformer differential protection using CT ratios and phase shifts.
Introduces auto-configuration for transformer differential protection, simplifying CT configuration.
Details how the 745 automatically corrects for CT mismatch based on voltage ratios and tap changer position.
Explains the requirement to identify winding terminals and phase relationships using phasor diagrams.
Describes how the 745 removes zero-sequence current from Wye/Delta transformers to prevent maloperation.
Provides a comprehensive table of transformer types and their associated voltage phasors and phase shifts.
Covers the S1 745 setup menu, including passcode, preferences, and communications.
Details the passcode feature for security, including enabling, restricting, and changing the passcode.
Explains preferences like flash message time and default message timeout for user customization.
Covers communication settings including DNP, Network, and Port setup for relay connectivity.
Overview of the main communications menu, including DNP and Network setup options.
Details settings for communication ports (COM1, COM2, Front) like slave address, baud rate, and parity.
Explains how to program up to five message screens for identification or operator instructions.
Describes how the relay prevents operation until setpoints are programmed, indicated by LED status.
Covers settings for enabling features like analog I/O, loss of life, restricted ground fault, and entering passcodes for upgrades.
Covers critical setpoints for transformer characteristics, inputs, and system configuration.
Introduces the S2 System Setup group for configuring transformer and system parameters.
Details setpoints for transformer characteristics like frequency, phase sequence, type, and ratings for accurate protection.
Describes setpoints for each transformer winding and connected CTs, including voltage, load, and CT primary ratings.
Explains settings to configure tap position input for dynamic CT ratio mismatch correction.
Covers settings for calculating harmonic components and total harmonic distortion (THD).
Details the settings for three programmable custom FlexCurves™ for time overcurrent elements.
Describes the voltage input for energization detection, overexcitation, and frequency protection.
Covers ambient temperature sensing using RTD or monthly average values for insulation aging calculations.
Details the general purpose DC current input for monitoring external quantities and its configuration.
Explains setpoints for monitoring current demand using thermal, rolling, or block interval methods.
Covers logic inputs and virtual inputs for activating functions like protection blocking and energization detection.
Introduces the two types of digital inputs: logic inputs with physical terminals and virtual inputs.
Details setpoints for logic inputs, including function, target, name, and asserted state.
Explains setpoints for virtual inputs, including function, target, name, and programmed state.
Covers configuration of protection and monitoring elements like differential, overcurrent, and frequency.
Introduces protection and monitoring elements and common setpoints across all elements.
Details how setpoints are organized into four groups, with one active at a time, and how to manage them.
Covers settings for the percent differential element and its associated harmonic inhibit features.
Overview of the differential element settings, including harmonic inhibit features.
Details settings for the percent-slope characteristic of the differential element to prevent maloperation.
Covers percent differential harmonic inhibit settings to prevent maloperation due to harmonics.
Details the harmonic inhibit feature used during energization and sympathetic inrush.
Covers the 5th harmonic inhibit feature to prevent maloperation during intentional overexcitation.
Details settings for the instantaneous differential element for protection under high magnitude internal faults.
Covers phase time overcurrents and two levels of phase instantaneous overcurrent for each phase of each winding.
Overview of phase overcurrent settings, including time and instantaneous overcurrents for each winding.
Explains the available inverse time overcurrent curve shapes and the use of FlexCurves™ and Definite Time.
Details the setpoints for phase time overcurrent elements, including pickup, shape, multiplier, reset, and block.
Details setpoints for phase instantaneous overcurrent elements for windings 1 to 3.
Covers neutral time overcurrent and instantaneous overcurrent elements for each winding.
Overview of neutral overcurrent settings, including time and instantaneous overcurrents.
Details setpoints for neutral time overcurrent elements, including pickup, shape, multiplier, and reset.
Details setpoints for neutral instantaneous overcurrent elements, including pickup, delay, and block.
Covers ground time and instantaneous overcurrent elements for each associated winding.
Overview of ground overcurrent settings, including time and instantaneous overcurrents for associated windings.
Details setpoints for ground time overcurrent elements, including pickup, shape, multiplier, and reset.
Details setpoints for ground instantaneous overcurrent elements, including pickup, delay, and block.
Covers setpoints for restricted ground fault protection, intended for impedance grounded wye transformers.
Introduces restricted ground fault protection and its application for impedance grounded wye transformers.
Details setpoints for the winding 1 restricted ground fault element, including pickup, slope, and delay.
Covers negative sequence time and instantaneous overcurrent elements for each winding.
Overview of negative sequence overcurrent settings, including time and instantaneous overcurrents.
Details setpoints for negative sequence time overcurrent elements, including pickup, shape, and multiplier.
Details setpoints for negative sequence instantaneous overcurrent elements, including pickup and delay.
Covers underfrequency, frequency rate-of-change, and overfrequency elements for load shedding and system restoration.
Overview of frequency elements: underfrequency, frequency decay, and overfrequency.
Details setpoints for underfrequency elements, including function, target, sensing, and pickup.
Details setpoints for frequency decay elements, including function, target, sensing, and rate.
Details setpoints for overfrequency elements, including function, target, sensing, pickup, and delay.
Covers overexcitation monitoring elements: 5th harmonic level and two volts-per-hertz elements.
Overview of overexcitation monitoring elements: 5th harmonic level and volts-per-hertz.
Details setpoints for the 5th harmonic level element, including minimum current, pickup, and delay.
Details setpoints for volts-per-hertz elements, including function, shape, delay, and reset.
Covers settings for total harmonic distortion (THD) level and harmonic derating factor.
Overview of harmonic monitoring elements: THD level and harmonic derating.
Details setpoints for THD level elements, including minimum current, pickup, and delay.
Details setpoints for the harmonic derating function, including minimum current, pickup, and delay.
Covers elements for insulation aging: hottest-spot limit, aging factor limit, and loss of life limit.
Overview of insulation aging features: hottest-spot limit, aging factor limit, and loss of life limit.
Details setpoints for the hottest-spot limit element for detecting abnormal transformer hot spots.
Details setpoints for the aging factor limit element, used to detect when a transformer is aging faster than normal.
Details setpoints for the loss of life limit element, computing expended transformer life based on aging factor.
Details setpoints for analog input levels, used to monitor external quantities via auxiliary current input.
Covers setpoints for current demand monitoring elements for each winding.
Details setpoints for the transformer overload element, based on phase A current and transformer loading.
Details setpoints for the tap changer failure element, which monitors resistance for potential failures.
Contains settings to configure all outputs, including digital outputs and FlexLogic™ equations.
Introduces the S5 Outputs page for configuring all output settings and programmable FlexLogic™ equations.
Explains how output auxiliary relays can be assigned directly from element settings or via FlexLogic™.
Introduces FlexLogic™ as a flexible equation format for assigning protection and monitoring elements to outputs.
Details settings for output relays 1 to 8, including name, operation, type, and FlexLogic™ equations.
Describes trace memory (oscillography) settings, including pre-trigger cycles and FlexLogic™ equations for triggering.
Explains how virtual outputs use FlexLogic™ equations and can be used as inputs to other equations.
Details the ten independent timers available for implementing custom schemes and their start/pickup/dropout delays.
Covers diagnostic tools for verifying relay functionality, including output relay and analog output testing.
Introduces diagnostic tools for verifying relay functionality, including output overrides and simulation.
Explains how to override normal output relay functions for testing purposes, enabling the Test Mode LED.
Describes how to override analog transducer outputs, forcing them to any level of their output range.
Covers simulation features for testing relay functionality with programmed conditions without external inputs.
Overview of simulation features, including simulation setup and fault/prefault values.
Details simulation function modes (Disabled, Prefault, Fault, Playback) and blocking of outputs.
Details setpoints for prefault values, including phase current magnitude and voltage input magnitude.
Details setpoints for fault values, including phase and ground current magnitudes and angles.
Provides an overview of actual values, including measured values, event records, and product information.
Maps out the actual value sections accessible via the front panel, program port, or RS485/RS422 ports.
Explains how actual value messages are organized into logical groups or pages for easy reference.
Covers status information including network status, date and time, logic inputs, virtual inputs, and output relays.
Details the status of the Ethernet link, connection, and diagnostics, including link and connection status.
Displays the current date and time of the relay, which is synchronized by IRIG-B if available.
Shows the states of logic inputs 1 through 16 and the setpoint access state.
Displays the states of virtual inputs 1 through 16.
Displays the states of output relays 1 through 8 and the self-test relay.
Displays the states of virtual outputs 1 through 5.
Displays FLEXLOGIC EQN ERROR and BAD SETTINGS ERROR values indicating the source and cause of errors.
Covers metering functions including current, harmonic content, frequency, tap changer, voltage, demand, power, and energy.
Details the measurement of fundamental frequency current magnitudes and phase angles for windings and sequence components.
Overview of current metering, including phase, sequence, differential, restraint, and ground currents.
Displays fundamental frequency current magnitudes and phase angles for winding 1 phases A, B, C, neutral, and ground.
Shows positive-sequence current magnitudes and phase values, referenced to winding 1 phase A.
Displays negative-sequence current magnitudes and phase values, referenced to winding 1 phase A.
Displays zero-sequence current magnitudes and phase values for windings 1, 2, and 3.
Shows differential current magnitudes and angles for phases A, B, and C, referenced to winding 1 phase A.
Displays restraint current magnitudes for phases A, B, and C.
Displays ground differential current magnitudes for windings 1 through 3.
Covers measurement of harmonic components, total harmonic distortion (THD), and harmonic derating factor.
Overview of harmonic content measurements: 2nd harmonic, 21st harmonic, THD, and harmonic derating.
Details the display of harmonic components, showing magnitudes for phases A, B, C of windings.
Explains THD calculation and display, showing distortion as a percentage of the fundamental frequency component.
Displays the harmonic derating factor for each winding, showing the effect of non-sinusoidal load currents.
Covers system frequency calculation from voltage or current input, and frequency decay rate.
Displays the actual tap position, showing 'n/a' if tap position sensing is disabled.
Displays system line-to-line voltage and volts-per-hertz values, referenced to winding 1 phase A current.
Covers current demand measurement per phase and winding, including maximum demand since last clear.
Overview of demand metering: current demand, and demand data clear functionality.
Explains how to clear maximum demand data and displays the date and time of the last clear.
Displays current demand for winding 1 phases A through C, including maximum demand and date/time.
Monitors ambient temperature via an RTD connected to the 745.
Displays hottest-spot winding temperature, insulation aging factor, and total accumulated loss of life.
Details setpoints for analog input levels, used to monitor external quantities via auxiliary current input.
Calculates and displays real, reactive, and apparent power, and power factor for available windings.
Calculates and displays watthours and varhours for source and load currents for all available windings.
Explains how to clear all energy data and displays the date and time of the last clear.
Displays source and load watthours and varhours for winding 1, repeated for windings 2 and 3.
Covers event data clearing and detailed event records, including date, time, cause, and measured values.
Explains how to clear all event recorder data and assign a logic input for remote clearing.
Details the information displayed for each event, including current, harmonic content, frequency, and voltage.
Covers target messages indicating active targets and flash messages for warnings or errors.
Explains target messages displayed when protection, monitoring, or self-test targets are activated.
Describes major and minor self-test errors, their interpretation, and causes.
Lists and describes flash messages displayed in response to key presses, including their duration and causes.
Provides an introduction to verification procedures, safety precautions, and conventions for commissioning the 745 relay.
Introduces the commissioning chapter, outlining tests for verifying relay operation and features.
Explains the testing philosophy, focusing on calibration and cursory verification of features.
Outlines essential safety precautions to be observed before testing the relay to prevent injury or damage.
Covers preliminary tasks before testing, including reviewing the manual, verifying installation, and setting the relay.
Describes preliminary work steps: familiarizing with the relay, verifying installation, and setting the relay.
Details dielectric strength testing procedures and precautions to prevent damage during tests.
Covers testing of logic inputs and output relays, including dry/wet contact connections and output relay forcing.
Explains how to test logic inputs by connecting switches and verifying their states via actual values.
Details how to verify output relay functioning using the Force Output Relays feature and a multimeter.
Covers verification of AC current and voltage inputs, sequence components, and transformer type selection.
Introduces metering verification, comparing readings with specifications and checking instrumentation accuracy.
Describes verifying AC current inputs by supplying rated currents and reading values under A2 Metering.
Explains how the 745 automatically configures for CT ratio mismatch and phase shift using transformer data.
Illustrates automatic configuration routines examining CT ratios, voltage ratios, and phase shifts.
Explains how transformation removes zero-sequence current from Wye/Delta signals and its effect on unbalanced conditions.
Details basic calibration of RTD input and preferred approach for ambient temperature sensing.
Guides on enabling ambient temperature sensing and connecting an RTD for verification.
Describes how to verify analog output settings by connecting a milliammeter and applying input signals.
Explains how to verify tap changer operation by connecting a variable resistor and observing the tap position display.
Covers testing of protection schemes including harmonic restraint percent differential and instantaneous differential.
Emphasizes tracking and restoring settings modifications made during commissioning.
Details procedures for testing the harmonic restrained percent differential element's minimum pickup and operating time.
Introduces the harmonic restrained percent differential element and its setpoints.
Explains how to measure the minimum pickup of the phase A element by applying AC current.
Guides on measuring the slope of the differential element using displayed actual values.
Details the procedure for measuring the approximate kneepoint location of the differential element.
Describes testing the 5th harmonic restraint by generating fundamental and 5th harmonic current signals.
Details testing the energization detection feature using current-level enabling and setpoint adjustments.
Covers settings and testing for the instantaneous differential element for protection under high magnitude internal faults.
Introduces the instantaneous differential element settings and testing procedures.
Explains how to measure the operating level of the phase A instantaneous differential element.
Verifies phase time overcurrent performance against in-service settings and timing curves.
Introduces phase time overcurrent verification, emphasizing the need for expected operating times.
Details how to test phase time overcurrent elements for winding 1, disabling other features.
Verifies phase instantaneous overcurrent 1 performance against in-service settings and test procedures.
Describes the procedure to verify phase instantaneous overcurrent 1 performance.
Details how to test phase instantaneous overcurrent 1 elements for winding 1, disabling other features.
Explains how to measure the pickup level for the phase instantaneous overcurrent 1 element.
Guides on measuring the operating time for the phase instantaneous overcurrent 1 element.
Instructs to repeat pickup level tests for phases B and C of winding 1.
Explains the need to repeat tests for windings 2 and 3 due to potentially different parameters.
Verifies neutral time overcurrent performance against in-service settings and timing curves.
Introduces neutral time overcurrent verification, noting the use of zero-sequence current as input.
Details how to test neutral time overcurrent elements for winding 1, disabling other features.
Verifies neutral instantaneous overcurrent 1 performance against in-service settings and test procedures.
Describes the procedure to verify neutral instantaneous overcurrent 1 performance.
Details how to test neutral instantaneous overcurrent 1 elements for winding 1, disabling other features.
Explains that testing for neutral instantaneous overcurrent 2 is identical to element 1, with appropriate changes.
Verifies ground time overcurrent performance against in-service settings and timing curves.
Introduces ground time overcurrent verification, noting the use of ground current input CT.
Details how to test ground time overcurrent elements for winding 1, disabling other features.
Verifies ground instantaneous overcurrent 1 performance against in-service settings and test procedures.
Describes the procedure to verify ground instantaneous overcurrent 1 performance.
Details how to test ground instantaneous overcurrent 1 elements for winding 1, disabling other features.
Explains the need to repeat tests for windings 2 and 3 due to potentially different parameters.
Explains that testing for ground instantaneous overcurrent 2 is identical to element 1, with appropriate changes.
Verifies correct wiring of field CTs for restricted ground fault protection by checking fault current distribution.
Verifies restricted ground fault performance against in-service settings, measuring pickup, slope, and delay.
Introduces restricted ground fault testing and its setpoints found in the S4 Elements menu.
Details how to test the winding 1 restricted ground fault element, disabling other features.
Guides on measuring the slope for the restricted ground fault element by connecting current signals.
Verifies negative-sequence time overcurrent performance against in-service settings and timing curves.
Introduces negative-sequence time overcurrent verification and its associated timing curves.
Details how to test negative-sequence time overcurrent elements for winding 1, disabling other features.
Verifies negative-sequence instantaneous overcurrent performance against in-service settings and test procedures.
Describes the procedure to verify negative-sequence instantaneous overcurrent performance.
Details how to test negative-sequence instantaneous overcurrent elements for winding 1, disabling other features.
Explains how to measure the pickup level for the negative-sequence instantaneous overcurrent element.
Covers underfrequency, frequency decay rate, and overfrequency elements testing.
Outlines setup for frequency measurements using voltage or current inputs.
Details testing of the underfrequency 1 element using voltage or current inputs.
Instructs to repeat underfrequency 1 tests for the underfrequency 2 element, verifying settings.
Details testing of the overfrequency element using voltage input, including frequency and voltage checks.
Explains how to verify frequency decay rate elements using a programmable function generator.
Covers testing of volts-per-hertz elements and the fifth harmonic restraint scheme.
Details testing of volts-per-hertz elements by applying voltage and frequency signals and measuring operation.
Describes testing the 5th harmonic scheme by exceeding the threshold with fundamental and 5th harmonic current.
Covers testing of insulation aging elements: hottest-spot limit, aging factor limit, and loss of life limit.
Introduces insulation aging testing, requiring transformer data and ambient temperature programming.
Details testing the hottest-spot limit element by applying current to simulate load and observing temperature.
Details testing the aging factor limit element by applying current and observing the aging factor value.
Details setpoints for the loss of life limit element, computing expended transformer life based on aging factor.
Details testing the tap monitor failure element by simulating tap changer resistance.
Covers testing of auxiliary protection and monitoring functions like THD level and harmonic derating.
Details testing the THD level element, including minimum pickup, operating time, and target/message verification.
Explains how to test the THD level element's minimum pickup by increasing DC component to produce harmonics.
Explains how to program and verify THD elements for each winding of the transformer.
Covers testing the harmonic derating function, which uses computed derating factors for transformer loading.
Details testing the harmonic derating function's operating level by applying current with harmonics.
Covers testing the transformer overload element based on phase A current and transformer loading.
Details testing the transformer overload element's operating level by injecting current and checking LEDs/messages.
Outlines procedures for placing the relay into service after commissioning, including restoring settings and final checks.
Lists precautions for placing the 745 relay into service, excluding external equipment operation.
Provides a step-by-step procedure for placing the relay into service after all tests are completed.
Lists changes and revisions made to the 745 manual across different versions.
Provides a table of manual part numbers, revisions, and release dates.
Details major updates made to the manual for specific revisions (AG, AF, AE, AD, AC).
Provides the EU Declaration of Conformity for the 745 relay, listing applicable directives and standards.
States the warranty terms for GE manufactured products, including duration and details.
Provides the warranty statement for products shipped after October 1, 2013, and before.
| Input Frequency | 50/60 Hz |
|---|---|
| Amperage | 30A |
| Voltage | 208V |
| Input Voltage | 208V |
| Output Voltage | 208V |
| Maximum Current | 30A |
| Mounting | Rackmount |
| Operating Temperature | 0 to 50°C |
| Humidity Range | 5% to 95% non-condensing |