Creating the Digital Image 117
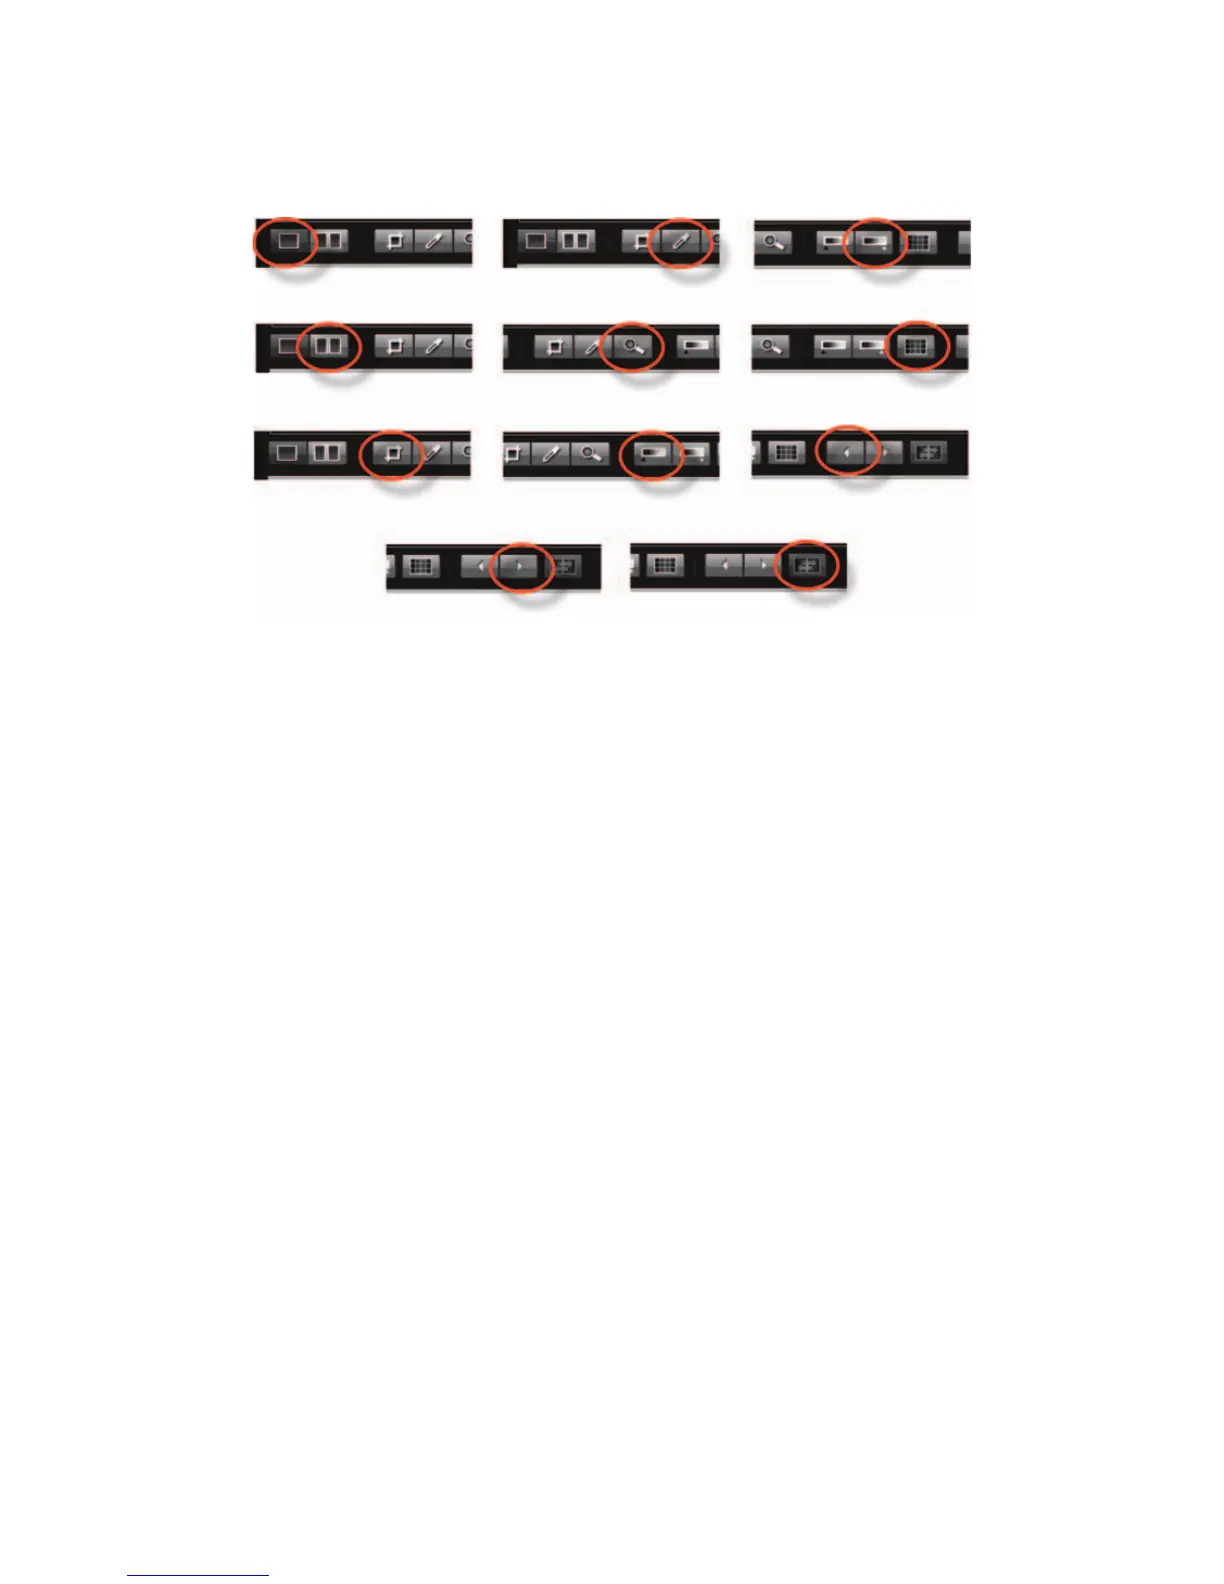
Figure 5-30 Viewer Toolbar. The viewer Toolbar has from top to bottom the following tools
encircled in the illustration: Normal View; Compare View; Crop Tool; Neutralizing Tool;
Zoom Tool; Mark Underexposed; Mark Overexposed; Grid; Previous Image; Next Image; and
switch compare images.
The Grid button adds a grid over the Viewer image to help in re-composing the image
and assuring perfectly straight verticals and horizontals. Go to Menu View Grid Options
to change the number and color of lines. The Grid Option menu will access the Grip Options
Dialog.
The Previous Image or the Next Image can always be viewed by pressing the left or right
arrow key. The new image replaces the previous one on the viewer.
Switch Compare Images switches the position of the two images in Compare View.
The Tool Area
In The Tool Area you have four tool collections called tabs — Capture, Browse, Adjust, and
Export with a pop-up menu in each list showing the available tools. All tools can be removed
or added to any list in any tab so you can customize each tab for your way of working. The
Capture tab lists all the information about the camera and capture information. The amount
of information, however, is somewhat dependent on the camera or digital back used for the
digital capture.
Besides seeing all the information about the existing image, the Tool Area allows you to
make the desired changes in the image to create a new preset. Tools are opened in the easiest
fashion by clicking the main disclosure triangle in each tool header which drops down a dia-
log that allows setting changes. Some tools use slider controls combined with a window for
numerical input so you can either key in a specifi c value or use the up/down controls to raise
or lower the values.