158 THE HASSELBLAD MANUAL
3. Make certain the fi lm rides under the side guide, not over it. I press my thumb against the paper
next to the guide to keep it under the guide. It eliminates the need for using the insert lock.
4. For proper spacing, the black arrow on the paper must be placed opposite the red triangle. Most
fi lm has only one arrow going across the paper backing. Some 220 fi lm has a black dotted line
followed by an unbroken black arrow a few inches later. Advance the fi lm to the line with an
arrow.
5. Before placing the insert into the magazine, ascertain once more that the edge of the fi lm is
underneath the side guide.
6. Make certain to turn the magazine’s winding crank until it stops and the number 1 is in the
frame counter window before you start to take pictures. At this point, the crank is locked and
cannot be turned again until after the fi rst exposure. Do not turn the fi lm winding crank until
the end of the fi lm.
With the fi lm properly loaded, all Hasselblad magazines should space images evenly from
the fi rst to the last picture with the space between images never exceeding 6 mm yet wide
enough to make a cut.
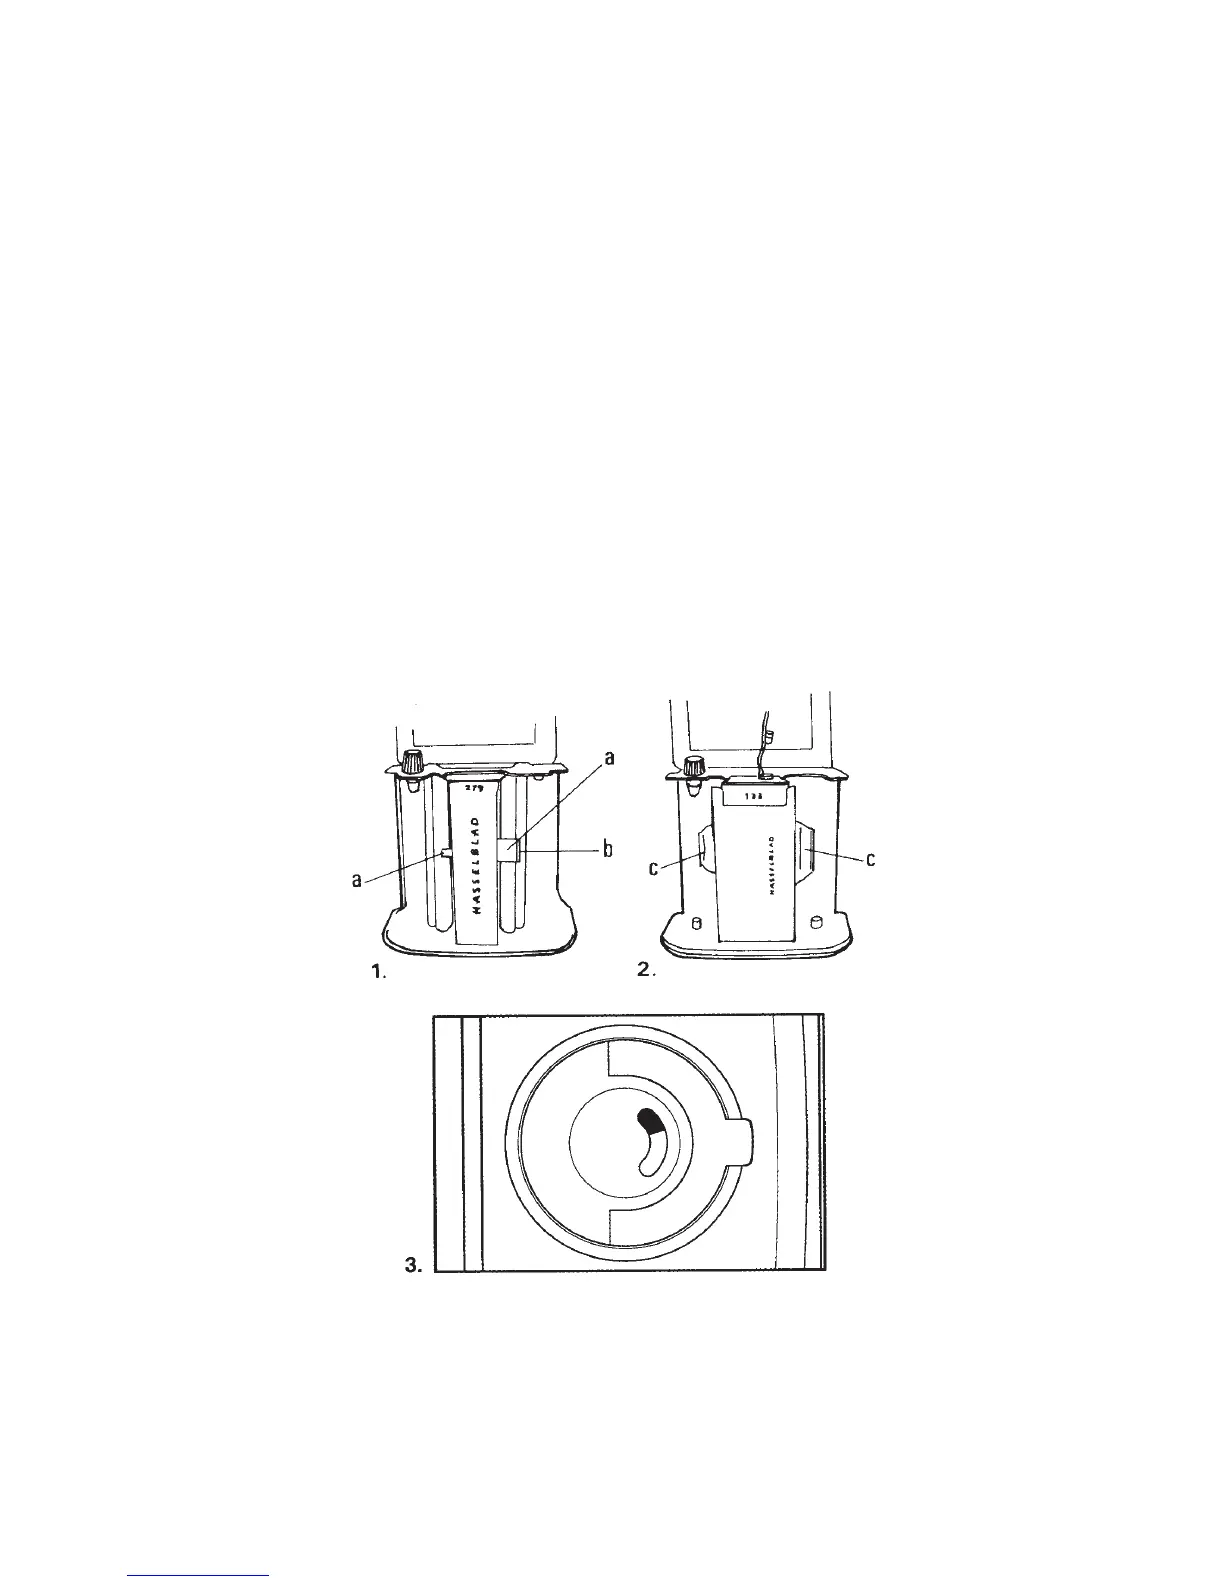
Figure 8-5 The fi lm holder–fi lm insert. The newer fi lm inserts (1) have a spring-loaded device
(a) that keeps the fi lm tight on both the feed and the take-up spools. The roller (b) on the
feed side rests against the fi lm to actuate the fi lm consumption signal. Two chrome strips (c)
served the same purpose on the older fi lm inserts (2). A fi lm consumption signal (3) that is
partially red and chrome indicates that a partially exposed roll of fi lm is in the magazine.