60 THE HASSELBLAD MANUAL
Setting the Drive Mode
On H3DII cameras, press MENU and then use the front wheel to select Drive. This gives you
the same Drive modes as described below for the other camera models.
On the other H camera models, the three options (see Figure 4-13) are set as follows:
1. After activating the camera, click the ISO/WB (Drive) button, and turn the front wheel until you
see SINGLE, CONTINUOUS (also MULTI EXP on original models only) on the display.
2. Lock the chosen setting by pressing the ISO/WB (drive) button. The original camera models had
a Multi Exposure mode which is not seen in later models because the Multi Exposure mode can-
not be used with digital cameras or digital backs. Double and multiple exposures today are made
in the computer not in the camera.
3. In the Multi Exposure mode, you set the number of images that should be superimposed by turn-
ing the rear wheel. For a double exposure with two images, turn the rear wheel to number 2.
The camera makes the fi rst exposure without advancing the fi lm but will advance the fi lm after
the second exposure or whatever number was programmed into the camera. If the programmed
multiple exposure drive mode is no longer desired, click the Esc (ON/OFF) button.
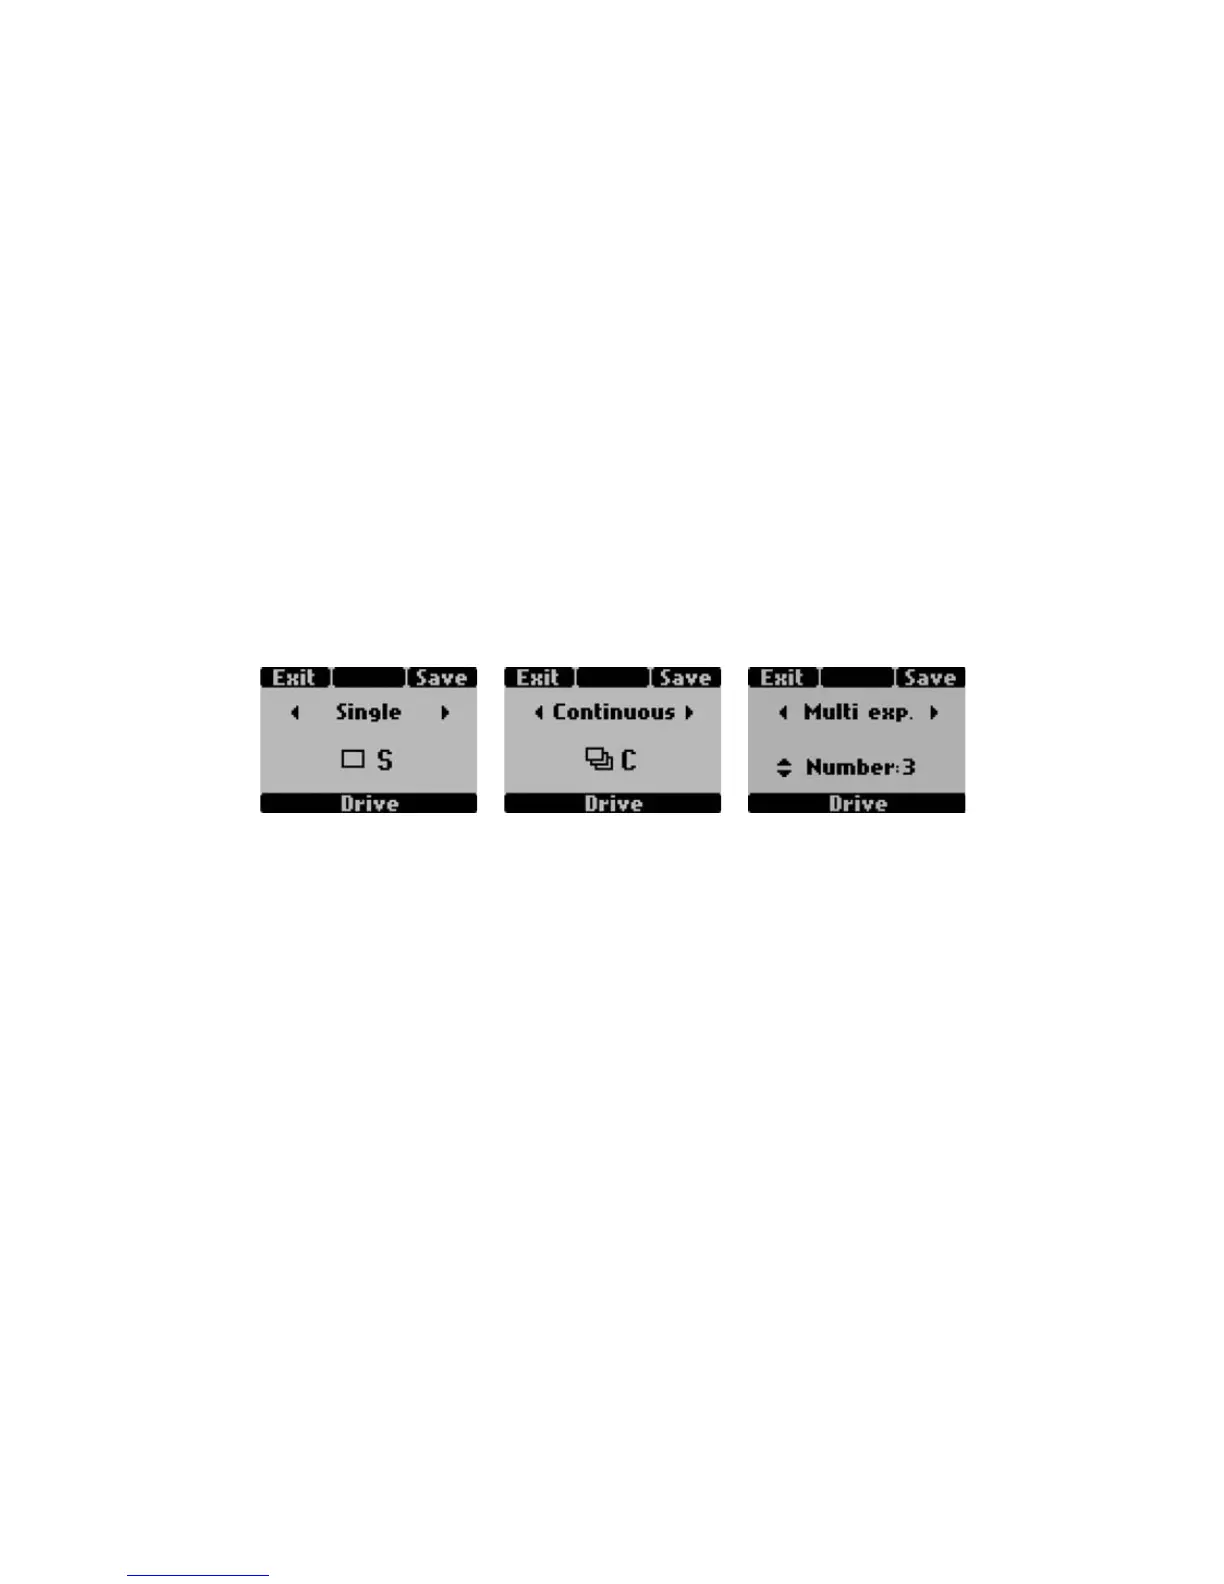
Figure 4-13 The grip LCD display for single exposures (left), for continuous operation (center),
and for multiple exposures set for three exposures (right).
Releasing the Camera
Before taking a picture, you also must decide whether the exposure should be made with
the release on the camera, with the built-in self-timer, or in the Interval mode. Pressing the
Release button halfway focuses the lens if the lens is set to Auto Focus. If it is set to AF-S
mode, the focus will also be locked as long as you keep the release pressed halfway. Pressed
halfway also saves any settings and returns the LCD display to the Home screen. When you
press the release completely, the picture is taken and the fi lm is advanced to the next frame
(unless the camera is set for multiple exposures).
Before you make the exposure, I suggest that you check, whenever possible, that the
aperture and shutter speed shown in the viewfi nder and on the display produce the desired
results.
The camera can also be released using a 0.5 m (20 in.) accessory release cord attached to
the release cord socket (item 21, Figure 4-1).
Operating the Self-Timer
The self-timer built into the H camera can be programmed for the desired delay time from 2
to 60 seconds. It can also be programmed so that the mirror lifts up the moment the release