SUEPT
CU
GENERATOR
--
, AND OTHER
,
B-B
J
DEVICES ,
L
-1--
J
1
FlATNE!is
I CORRECTED
, OUTPUT
PORT
2iTl-LL
-----
A
----
I I
DEVICE
UNDER
TEST
POUER METER
-P~ER%h&OR
)
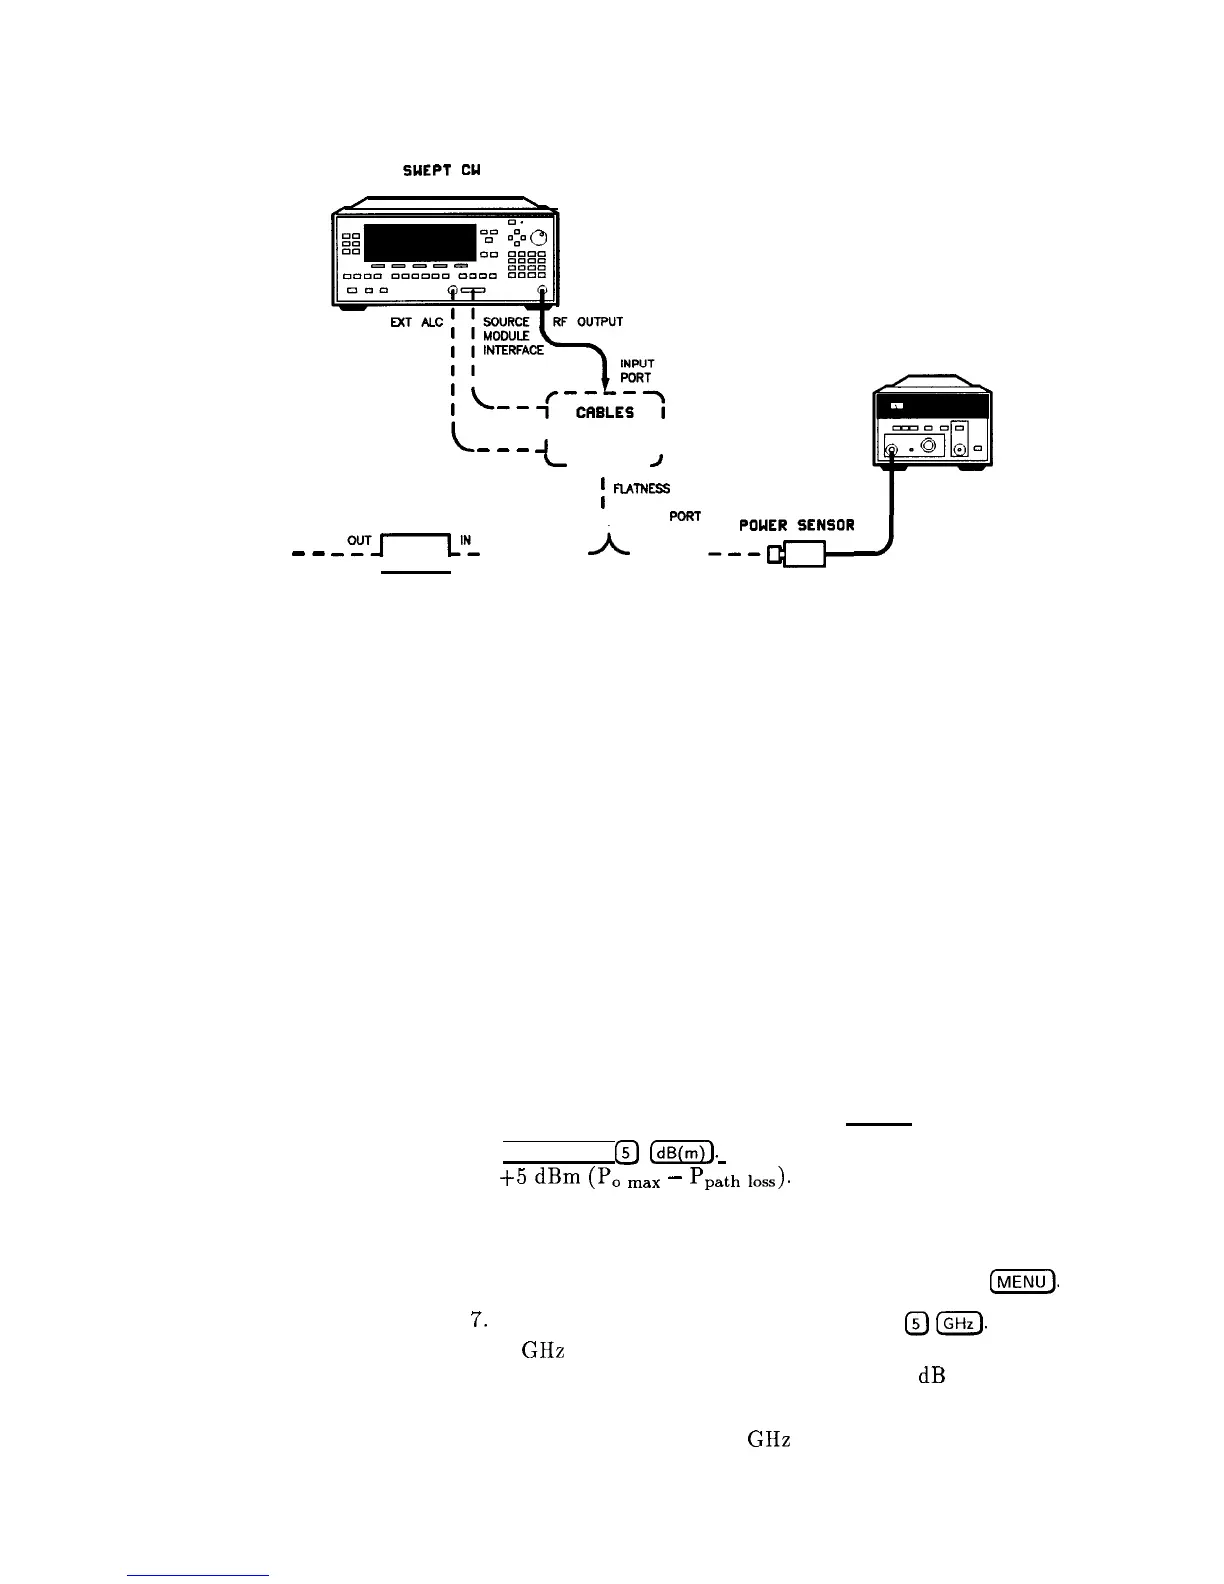
Figure 1-19. Creating a User Flatness Array
For this example, refer to menu map 5, POWER.
1. The equipment setup shown in Figure 1-19 assumes that if your
setup has an external leveling configuration, the steps necessary
to correctly level have been followed. If you have questions about
external leveling, refer to “Externally Leveling the Swept CW
Generator”.
Set up Power Meter
2. Zero and calibrate the power meter/sensor.
3. Connect the power sensor to the point where flatness corrected
power is desired.
Set up Swept CW Generator Parameters
4. On the swept CW generator, press (PRESET).
5. [POWER LEVEL]
@
0).
This sets the test port power to
+5
dBm
(PO
max
-
Ppath
loss>.
Create A Frequency List
6. On the swept CW generator, press FREQUENCY
(MENU).
7.
Select List Menu Enter List Freq
@m.
This enters
5 GHz as the first frequency in the list array. Entering a
frequency automatically sets the offset to 0 dB and the dwell to
10 ms.
8. Enter 18, 13, 11, and 20 GHz to complete this example array.
Getting Started Advanced 1-37

 Loading...