Hardware Options Installation
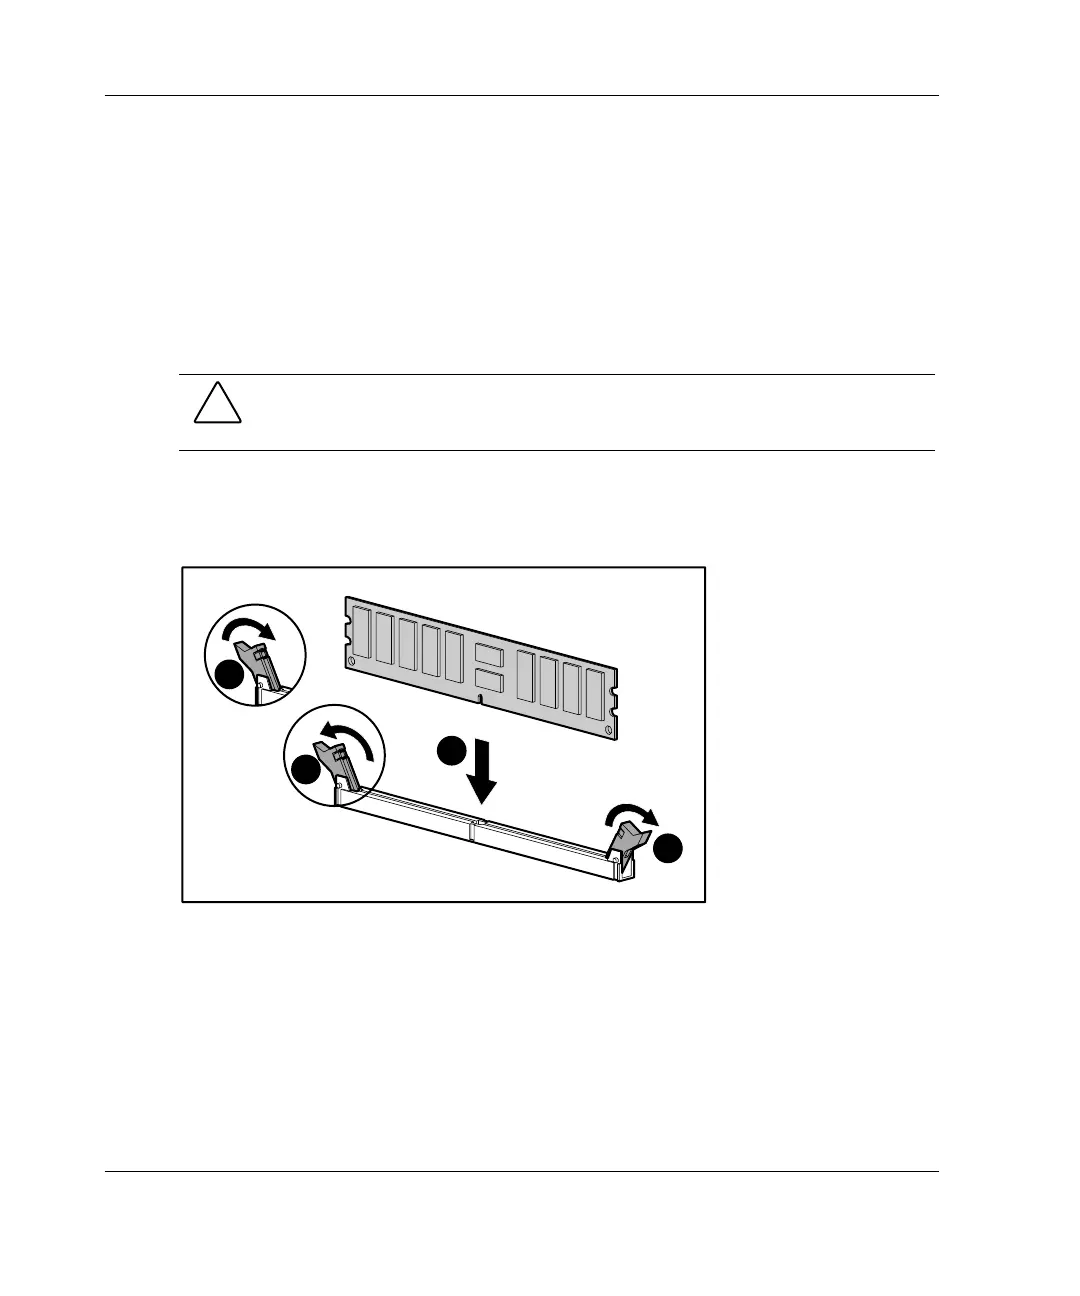
To install a DIMM:
NOTE: DIMMs may be installed one at a time. HP recommends that the DIMMs be installed
sequentially in slots 1, 2, 3, and then 4.
1. Follow the steps in “Removing the Access Panel” in this chapter.
2. Press outward on both latches of the DIMM socket at the same time (1).
3. Insert the DIMM into the socket (2).
CAUTION: A DIMM can be installed only one way or damage will result. Be sure to
match the key slot on the DIMM with the tab on the DIMM socket. Push the DIMM
down into the socket, ensuring that it is fully inserted and properly seated.
4. Return latches to the upright position (3).
NOTE: The latches may close automatically when the DIMM is properly inserted.
1
1
2
3
Figure 3-27: Installing a DIMM
3-30 HP ProLiant ML310 Server Setup and Installation Guide
HP CONFIDENTIAL
Writer: Ted Weiman File Name: d-ch3.doc
Codename: Son of Beast Part Number: 274431-002 Last Saved On: 11/22/02 1:58 PM