Service Procedures for the Cover, Panels, and Connectors
Powermax65/85 SYNC Service Parts and Procedures 810440 73
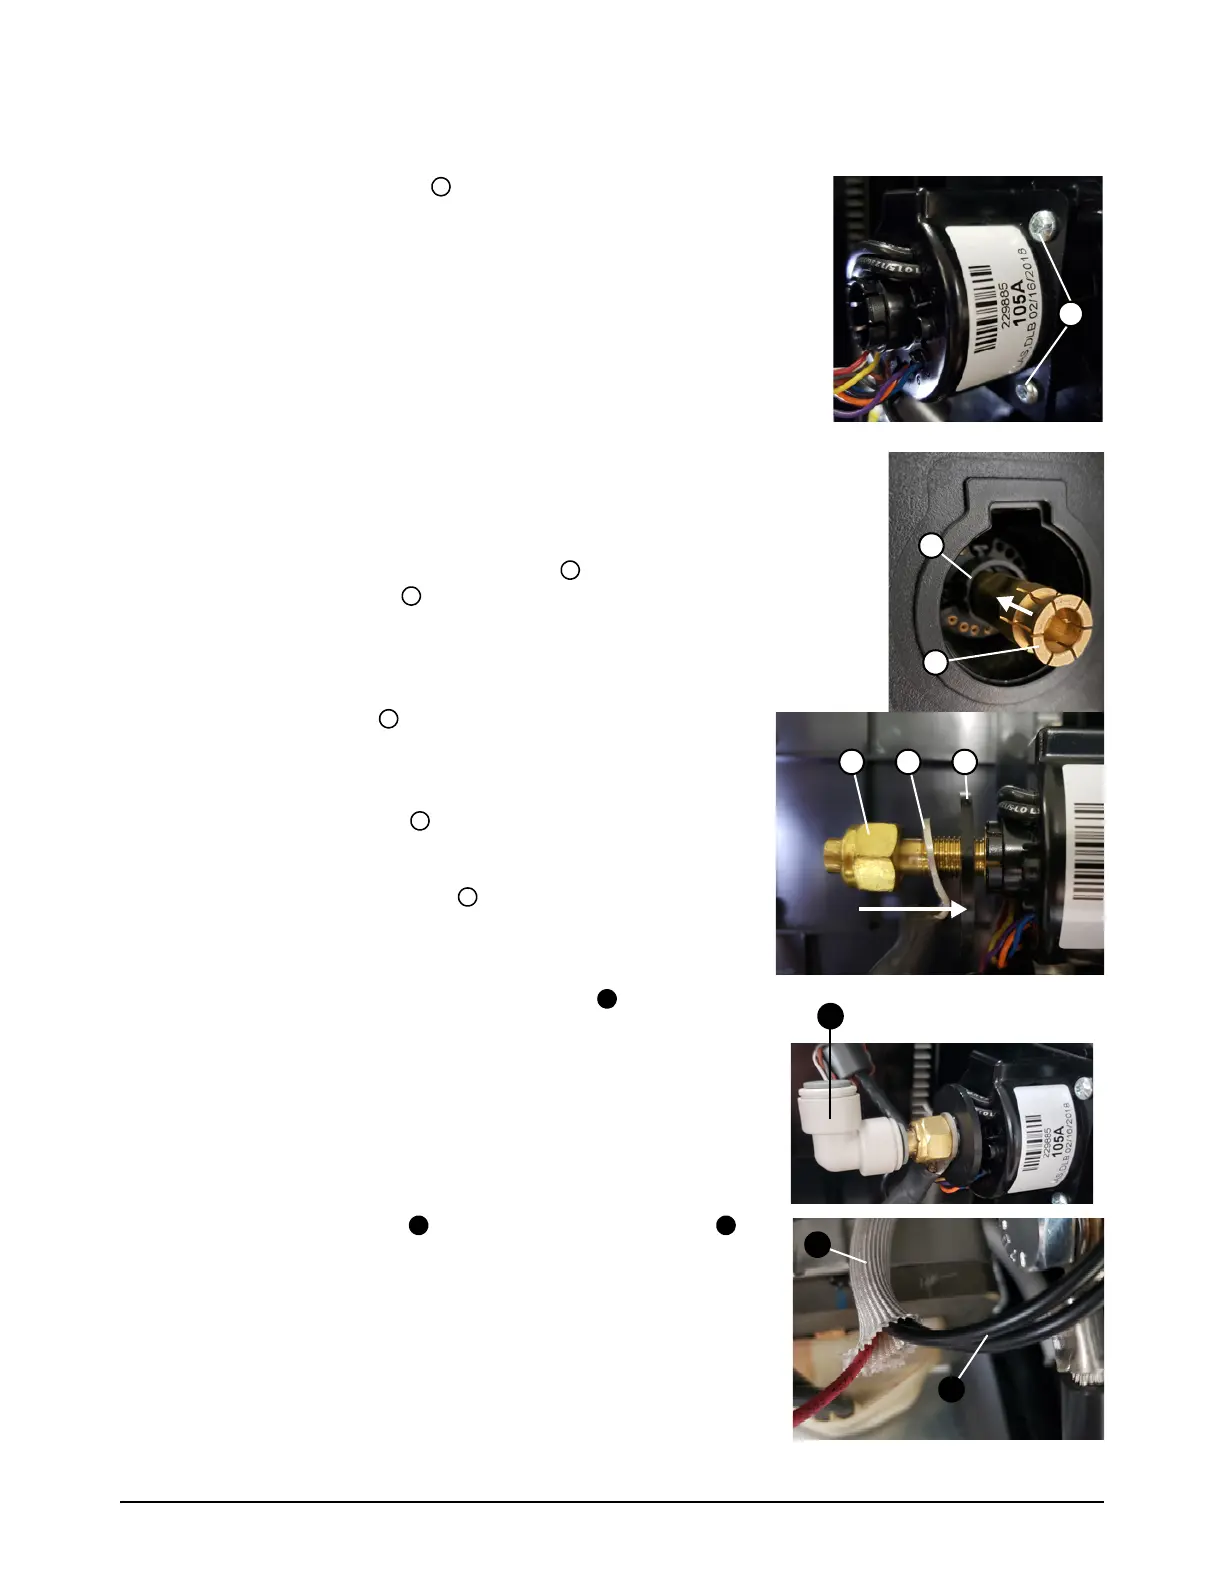
Install the torch quick-disconnect receptacle
1. Use the 4 new screws to install the new torch
quick-disconnect receptacle into the front panel. Tighten the
screws to 1.7 Nm (15 lbfin).
2. From the front panel, put the small end of the new torch
quick-disconnect receptacle into the center hole of the receptacle
housing. Align the hexagonal flats on the receptacle with the hexagonal
flats on the receptacle housing.
3. Push the receptacle in until the front is flush with the plastic
receptacle housing .
4. Push the washer onto the hub of the torch
quick-disconnect receptacle until the washer makes a
click.
5. Put the ring terminal on the torch quick-disconnect
receptacle.
6. Put the new retention nut onto the torch
quick-disconnect receptacle. Tighten the retention nut to
14.7 Nm (130 lbfin).
7. Push-to-connect the 90° gas inlet fitting .
8. Put the nozzle wires through the protective sheath in
the center panel.