Plasma Power Supply
32 809970 Field Service Bulletin XPR300
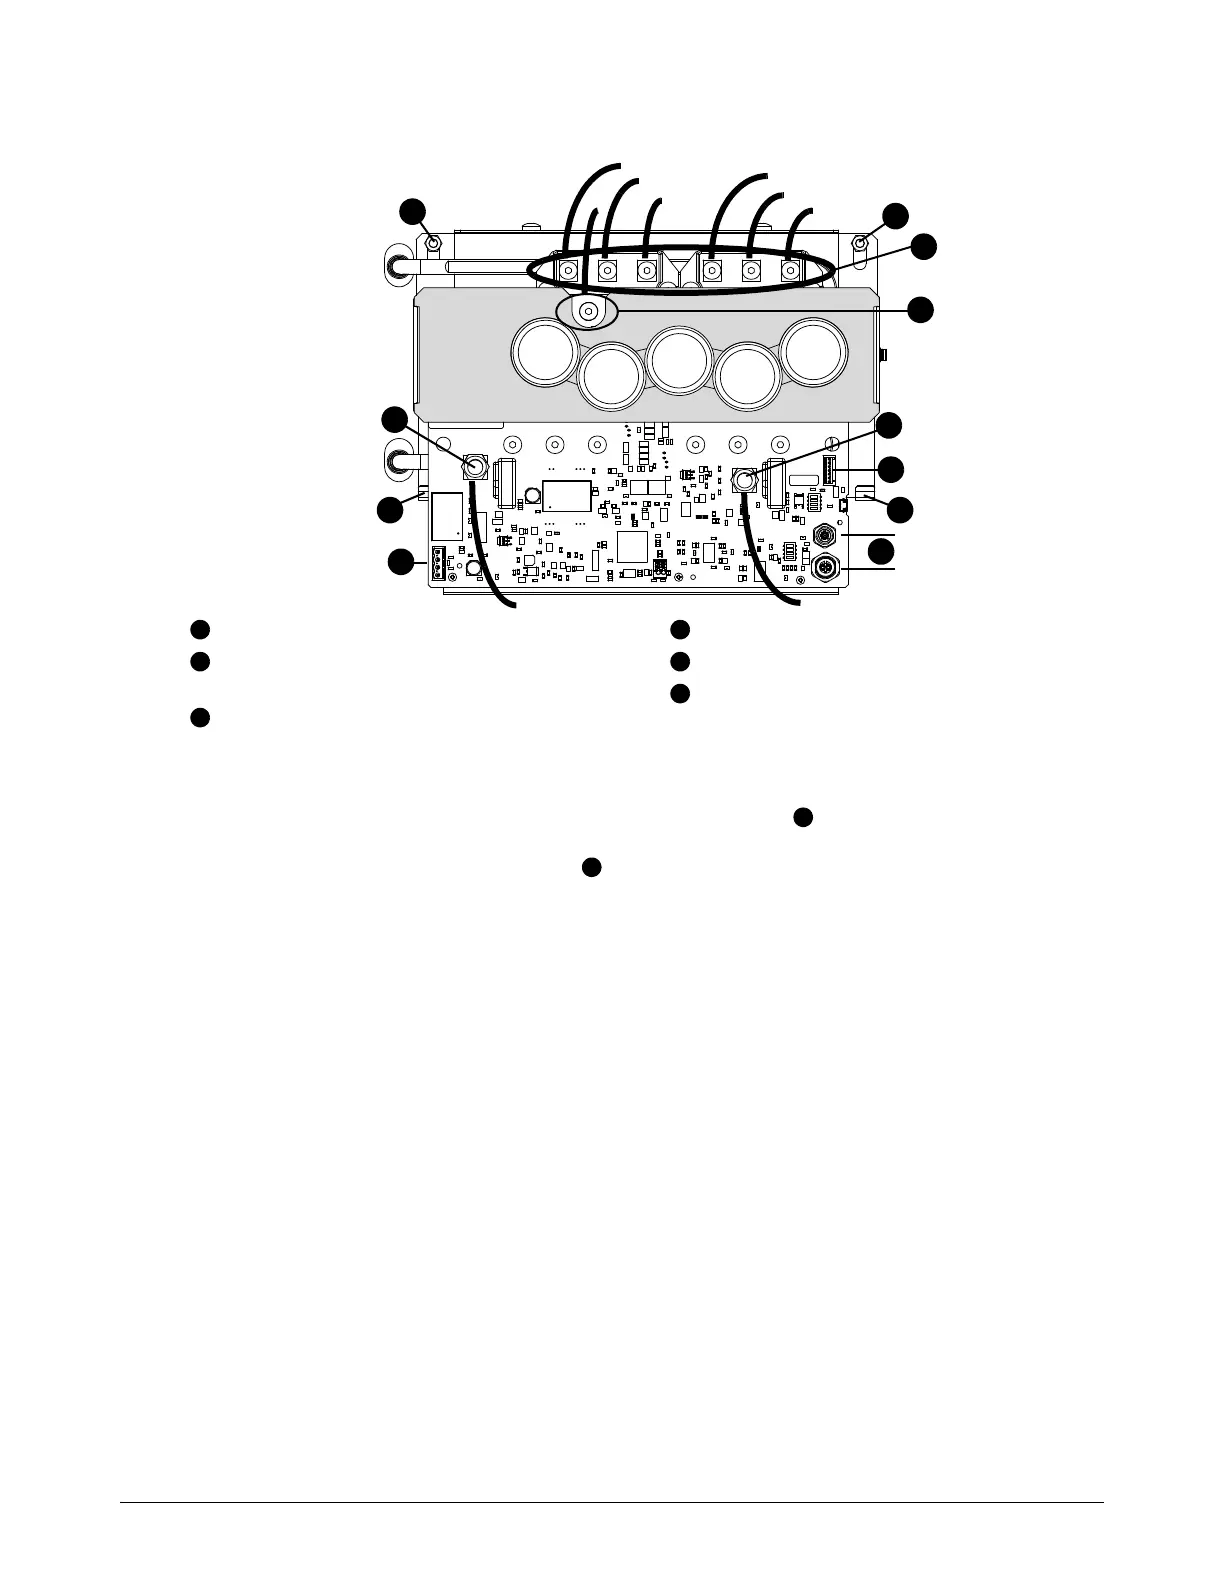
4. Remove the following wires and connectors:
5. Use a 10 mm, hexagonal-socket wrench to remove the 2 nuts .
6. Lift the chopper up and out of the tabs , then remove the chopper from the plasma power
supply.
J2
J3
J7
J8
J4
J5
6
5
4
3
2
1
3
2A/4A
2B/4B
2C/4C
1A/3A
1B/3B
1C/3C
7
7
8 8
3-phase wires. Use a T20 driver.
Positive lead. Use a 7/16 inch wrench with a
T20 driver.
Inductor leads (J4, J5). Use a 16 mm wrench.
Chopper ID key (J8)
CAN leads (J3, J4)
Power lead (J2)