Plasma Power Supply
54 809970 Field Service Bulletin XPR300
Rear-compartment parts
Replace the main contactor
See Rear compartment of the plasma power supply on page 128 for
location and part number.
1. Complete the following procedures:
a. Remove the power from the cutting system.
b. See Remove the rear panel on page 62.
Keep all nuts and screws that you remove.
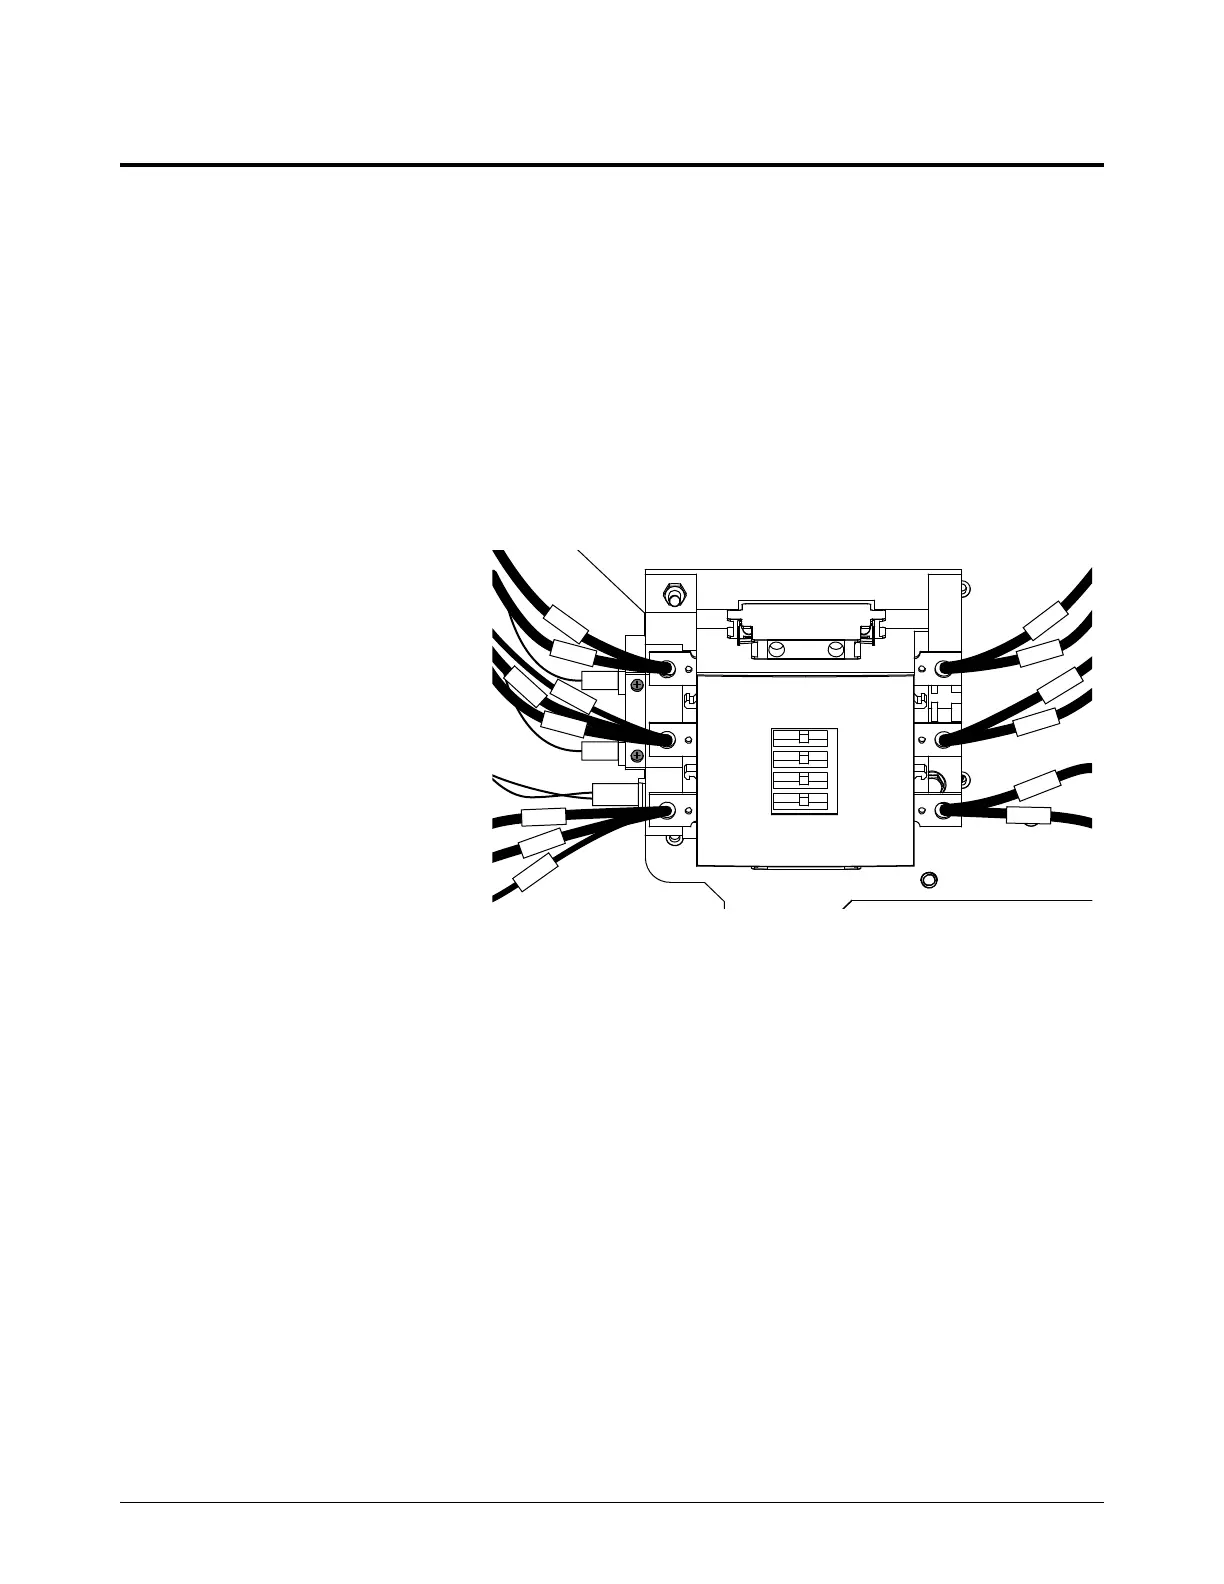
2. Remove all of the wires
from T3, T2, T1, L3, L2,
and L1.
3. Remove the wires from A1
and A2.
4. Disconnect J6.
5. Use a 10 mm,
hexagonal-socket wrench
to remove the nut and
screw that attach the main
contactor to the sheet
metal.
6. Remove the main contactor.
7. Make sure that the switch on the new main contactor is set to PLC mode (ON).
8. Use a 10 mm, hexagonal-socket wrench to install the nut on the upper left corner and the screw
on the lower right corner of the new main contactor. Tighten the nut and screw to 9 N∙m
(80 in∙lb).
9. Connect J6.
10. Install A1 and A2. Tighten the screws to 1 N∙m (10 in∙lb).
L3
L2
L1
T3
T2
T1
A2
L3
L3
L2
L2
L2
A1
L1
L1
L1
L3
L3
L2
L2
L1
L1
 Loading...


