Plasma Power Supply
36 809970 Field Service Bulletin XPR300
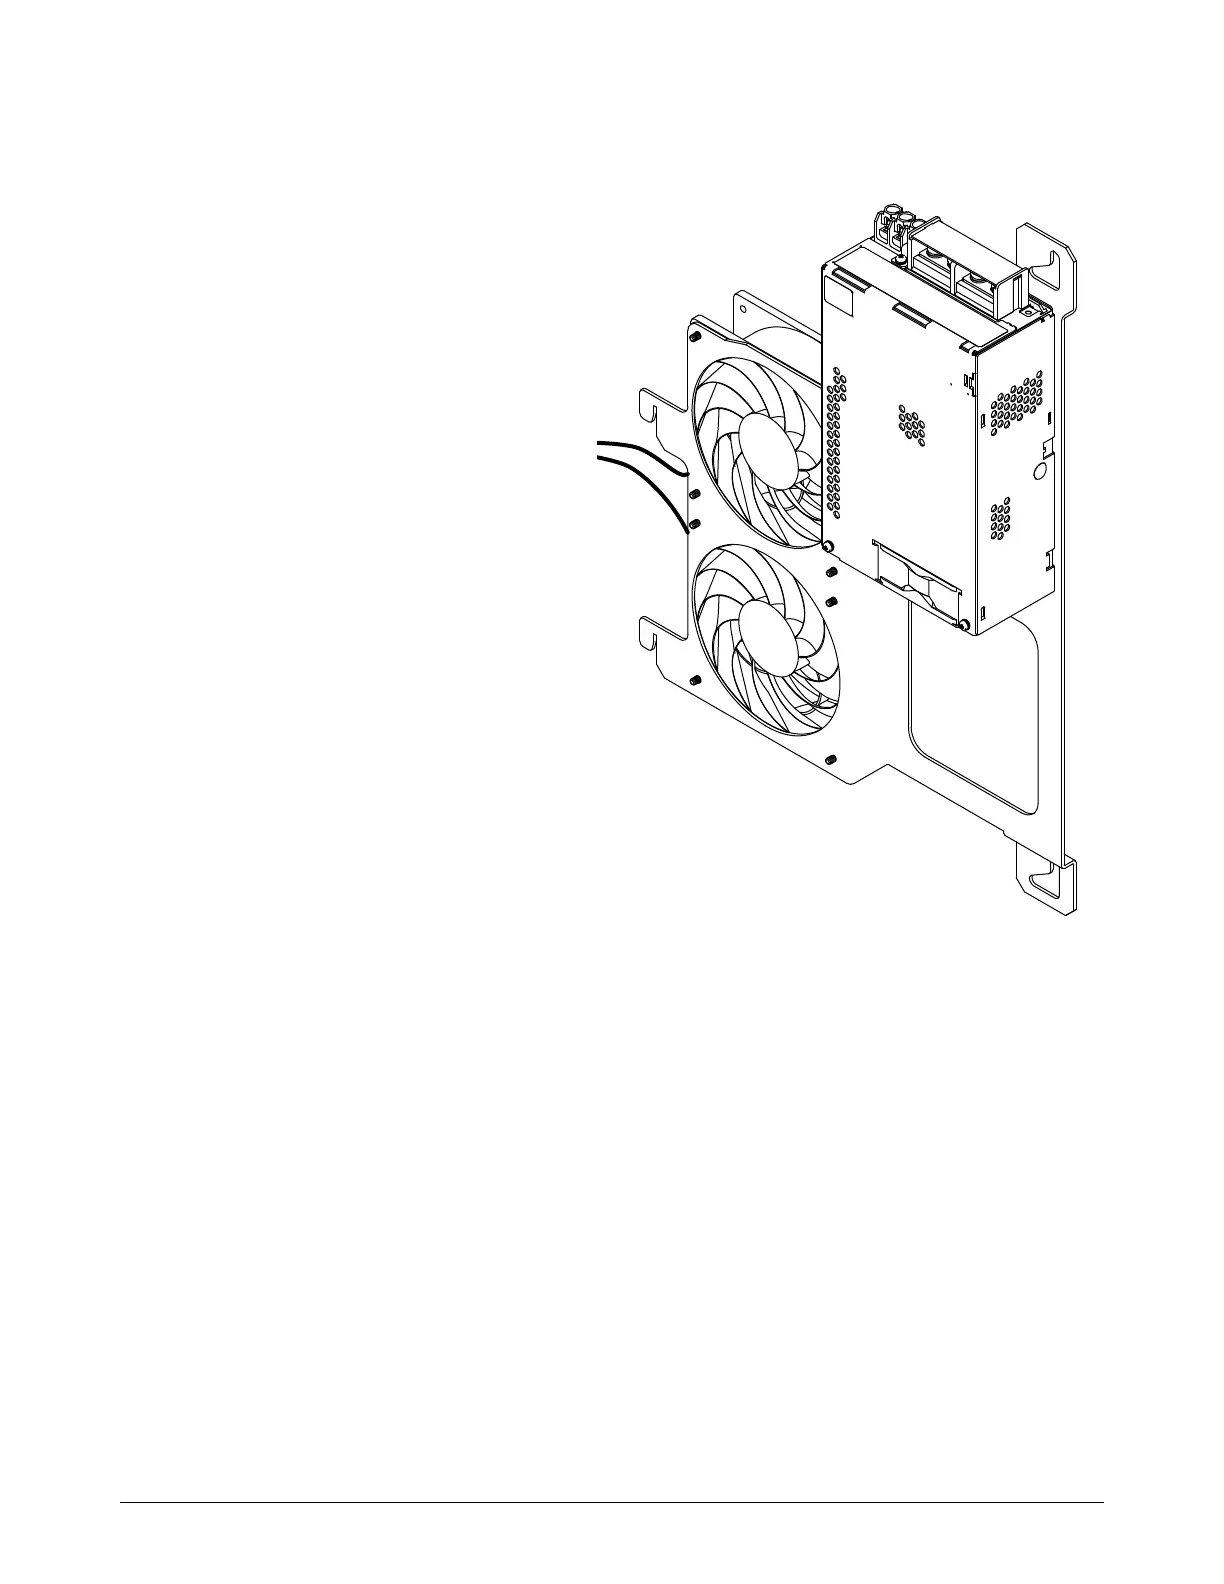
Install the control-side fans
1. Put the new control-side fan on the
bracket so that the flow of air goes
into the plasma power supply and the
wires are as shown.
There is an arrow on the fan
housing. The arrow must point
to the inside of the plasma
power supply.
2. Use the 2 screws to install the fan
onto the bracket.
3. Align the bracket assembly with the
studs in the front sheet metal panel
and the slots in the center panel.
4. Use a 10 mm, hexagonal-socket
wrench to install the 2 nuts.
5. Route the fan wires through the center
panel of the plasma power supply.
6. Connect the control-side fans to the
fan power distribution PCB:
J7 for the top fan
J8 for the bottom fan
7. Install the side panels.