EasyManuals Logo

Hypertherm XPR300 Replacement Part Procedures

Hypertherm XPR300
162 pages
To Next Page IconTo Next Page
To Previous Page IconTo Previous Page
Page #80 background imageLoading...
Page #80 background image
Gas Connect Consoles
2
80 809970 Field Service Bulletin XPR300
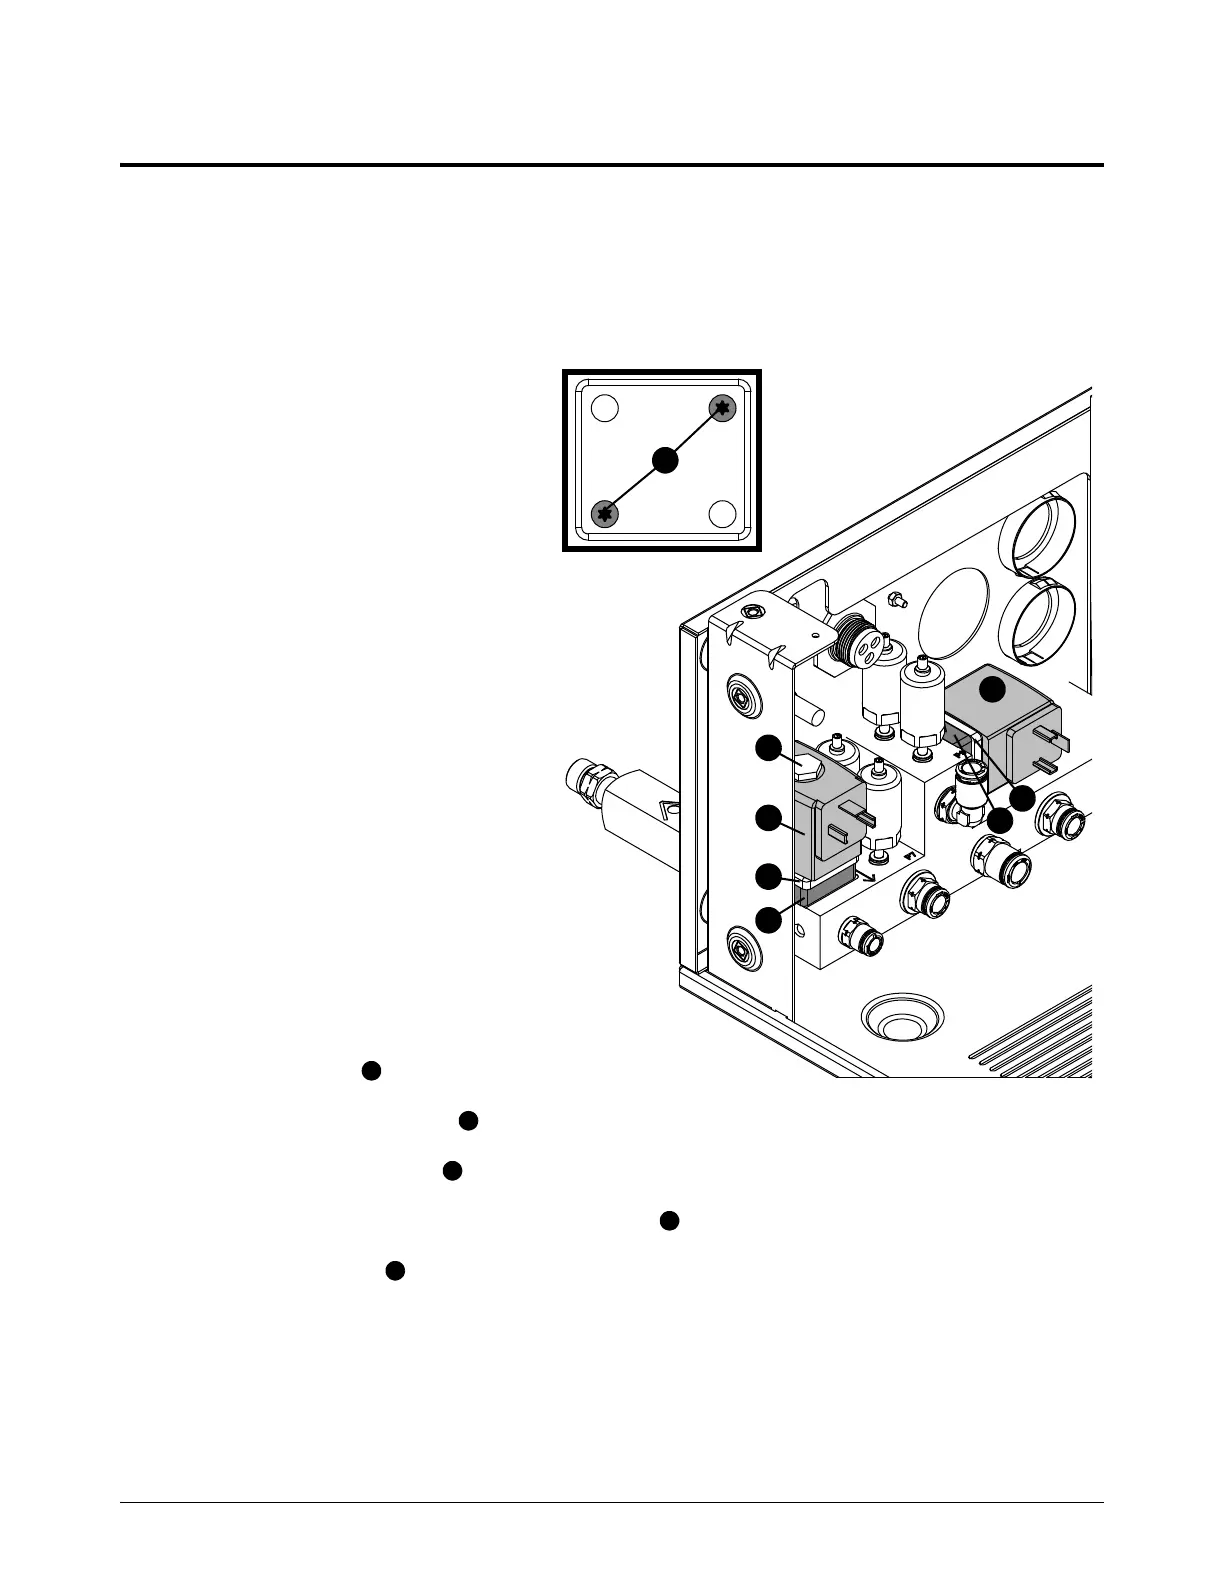
Replace a proportional valve
See VWI and OptiMix gas connect console mixer, transducers, and
valves on page 138 for location and part number.
Remove a proportional valve
1. Complete the following
procedures:
a. Remove the power from the
cutting system.
b. Remove the gas and fluid
pressure from the cutting
system.
c. Remove the top panel.
d. Remove the manifold-side
panel.
See Gas connect
console panels on
page 87.
Keep all nuts and screws
that you remove.
2. Remove the screw from
connector (not shown).
3. Remove the connector (not
shown).
4. Use a 14 mm socket wrench to
remove the nut .
5. Remove the coil/solenoid .
6. Remove the base cover .
7. Use a T20 screwdriver to remove the 2 screws .
8. Remove the base .
1
2
3
4
5
2
3
5
1
2
3
4
5

Table of Contents

Other manuals for Hypertherm XPR300

Questions and Answers:

Question and Answer IconNeed help?

Do you have a question about the Hypertherm XPR300 and is the answer not in the manual?

Hypertherm XPR300 Specifications

General IconGeneral
Cutting Current300 A
Duty Cycle100% at 300 A
TechnologyX-Definition Plasma
Gas SupplyOxygen, Nitrogen, Air
Cutting Capacity (Mild Steel)38 mm (1.5 in)
Severance Capacity (Mild Steel)75 mm (3 in)
Pierce Capacity (Mild Steel)50 mm (2 in)
Input Voltage200–480 V, 3-PH, 50/60 Hz

Related product manuals