EasyManuals Logo

Hypertherm XPR300 Replacement Part Procedures

Hypertherm XPR300
162 pages
To Next Page IconTo Next Page
To Previous Page IconTo Previous Page
Page #57 background imageLoading...
Page #57 background image
Plasma Power Supply
1
XPR300 Field Service Bulletin 809970 57
Replace the inrush resistor assembly
See Rear compartment of the plasma power supply on page 128 for
location and part number.
1. Complete the following procedures:
a. Remove the power from the cutting system.
b. See Remove the right-side (liquid-cooling-side) panel on page 60.
c. See Remove the rear panel on page 62.
Keep all nuts and screws that you remove.
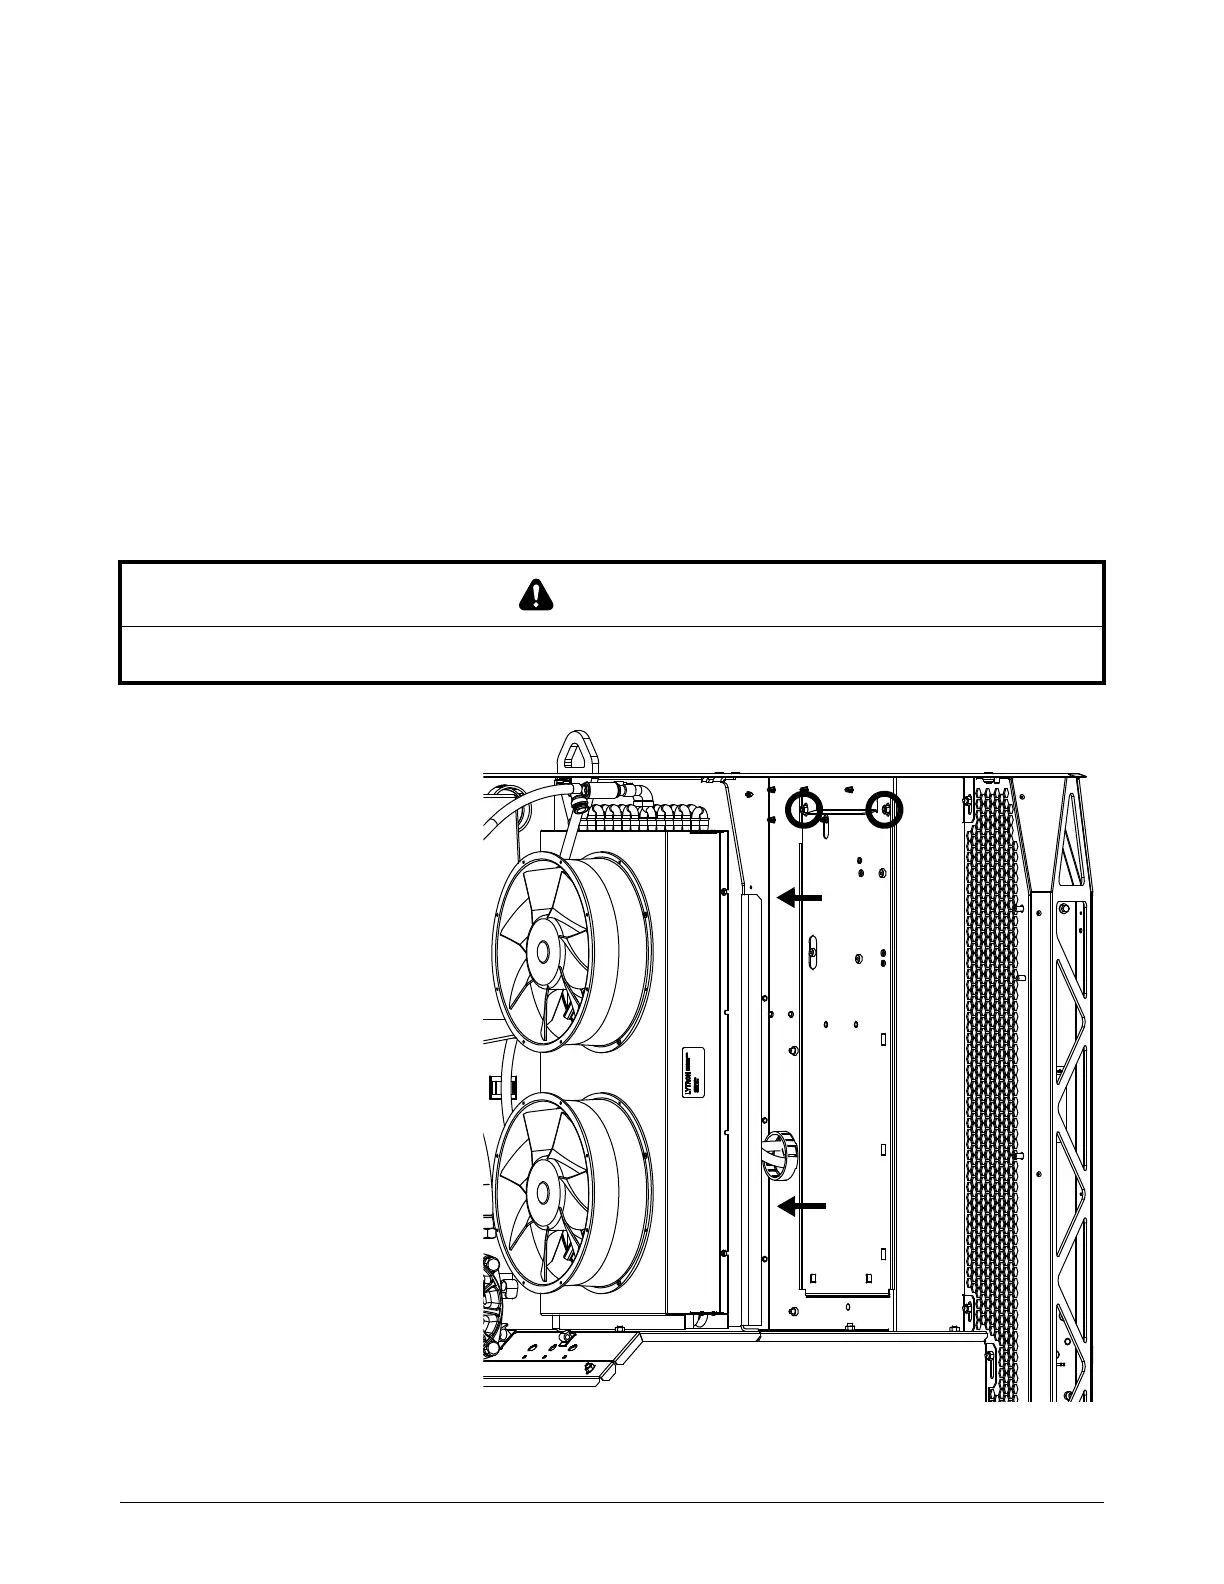
2. Use tape to attach protective material, such as cardboard, onto the rear of the heat-exchanger
assembly to protect the cooling fins.
3. Use a 10 mm,
hexagonal-socket wrench
to remove the 2 nuts on the
internal sheet metal.
4. Pull in the sheet metal to
access the inrush resistor.
CAUTION
Sharp cooling fins can cause cuts. Use caution when you work near the cooling fins.

Table of Contents

Other manuals for Hypertherm XPR300

Questions and Answers:

Question and Answer IconNeed help?

Do you have a question about the Hypertherm XPR300 and is the answer not in the manual?

Hypertherm XPR300 Specifications

General IconGeneral
Cutting Current300 A
Duty Cycle100% at 300 A
TechnologyX-Definition Plasma
Gas SupplyOxygen, Nitrogen, Air
Cutting Capacity (Mild Steel)38 mm (1.5 in)
Severance Capacity (Mild Steel)75 mm (3 in)
Pierce Capacity (Mild Steel)50 mm (2 in)
Input Voltage200–480 V, 3-PH, 50/60 Hz

Related product manuals