Gas Connect Consoles
68 809970 Field Service Bulletin XPR300
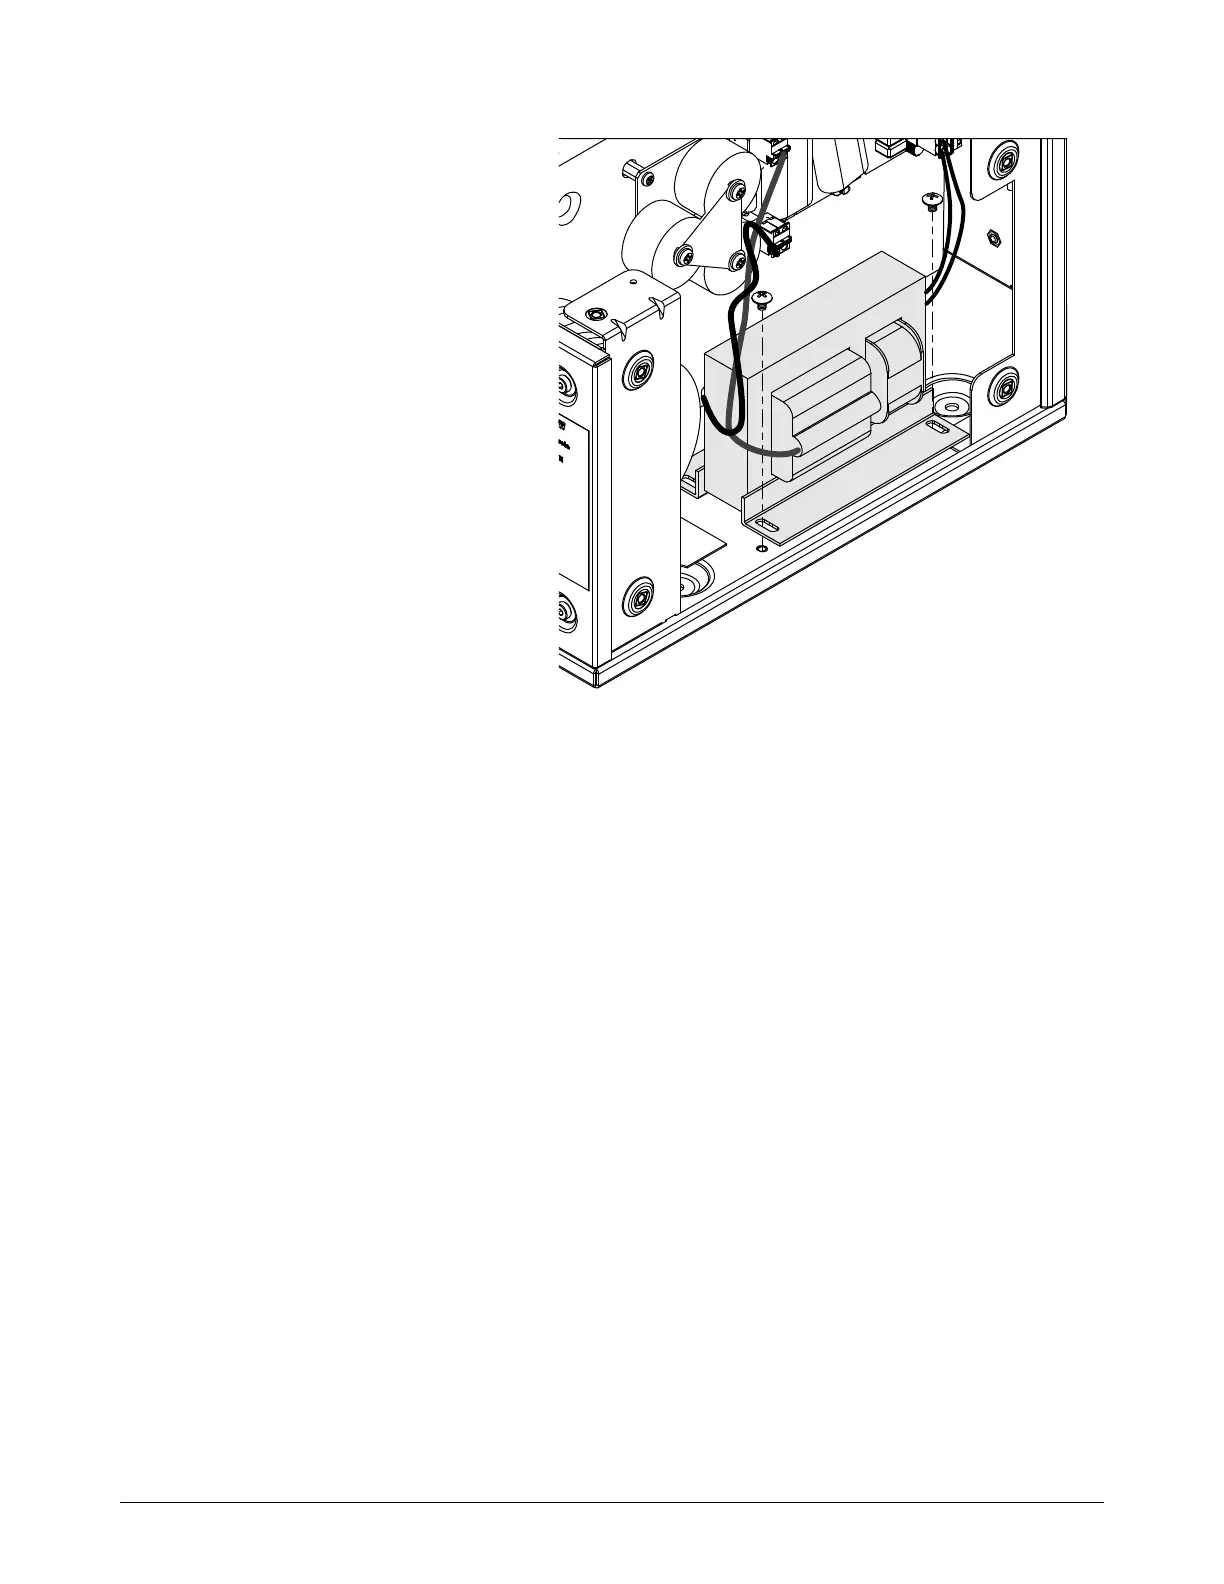
4. Remove the 2 screws.
5. Remove the transformer.
6. Use the screws to install the
transformer.
7. Install the wire from the coil to
pin 2 on J2.
8. Twist the red transformer wires
twice.
9. Connect the following connectors
to the high-frequency,
high-voltage PCB:
J1 - The wire from the
high-frequency, high-voltage
transformer.
J2 - The wire from the
high-frequency, high-voltage
transformer and wire from the
coil assembly.
J3 - The wire to the primary input of the high-frequency, high-voltage transformer.
10. Install the insulator panel.
11 . Install the high-voltage-side panel.
12. Install the top panel.