EasyManuals Logo
Home>Hypertherm>Welding System>XPR300

Hypertherm XPR300 Replacement Part Procedures

Hypertherm XPR300
162 pages
To Next Page IconTo Next Page
To Previous Page IconTo Previous Page
Page #83 background imageLoading...
Page #83 background image
Gas Connect Consoles
2
XPR300 Field Service Bulletin 809970 83
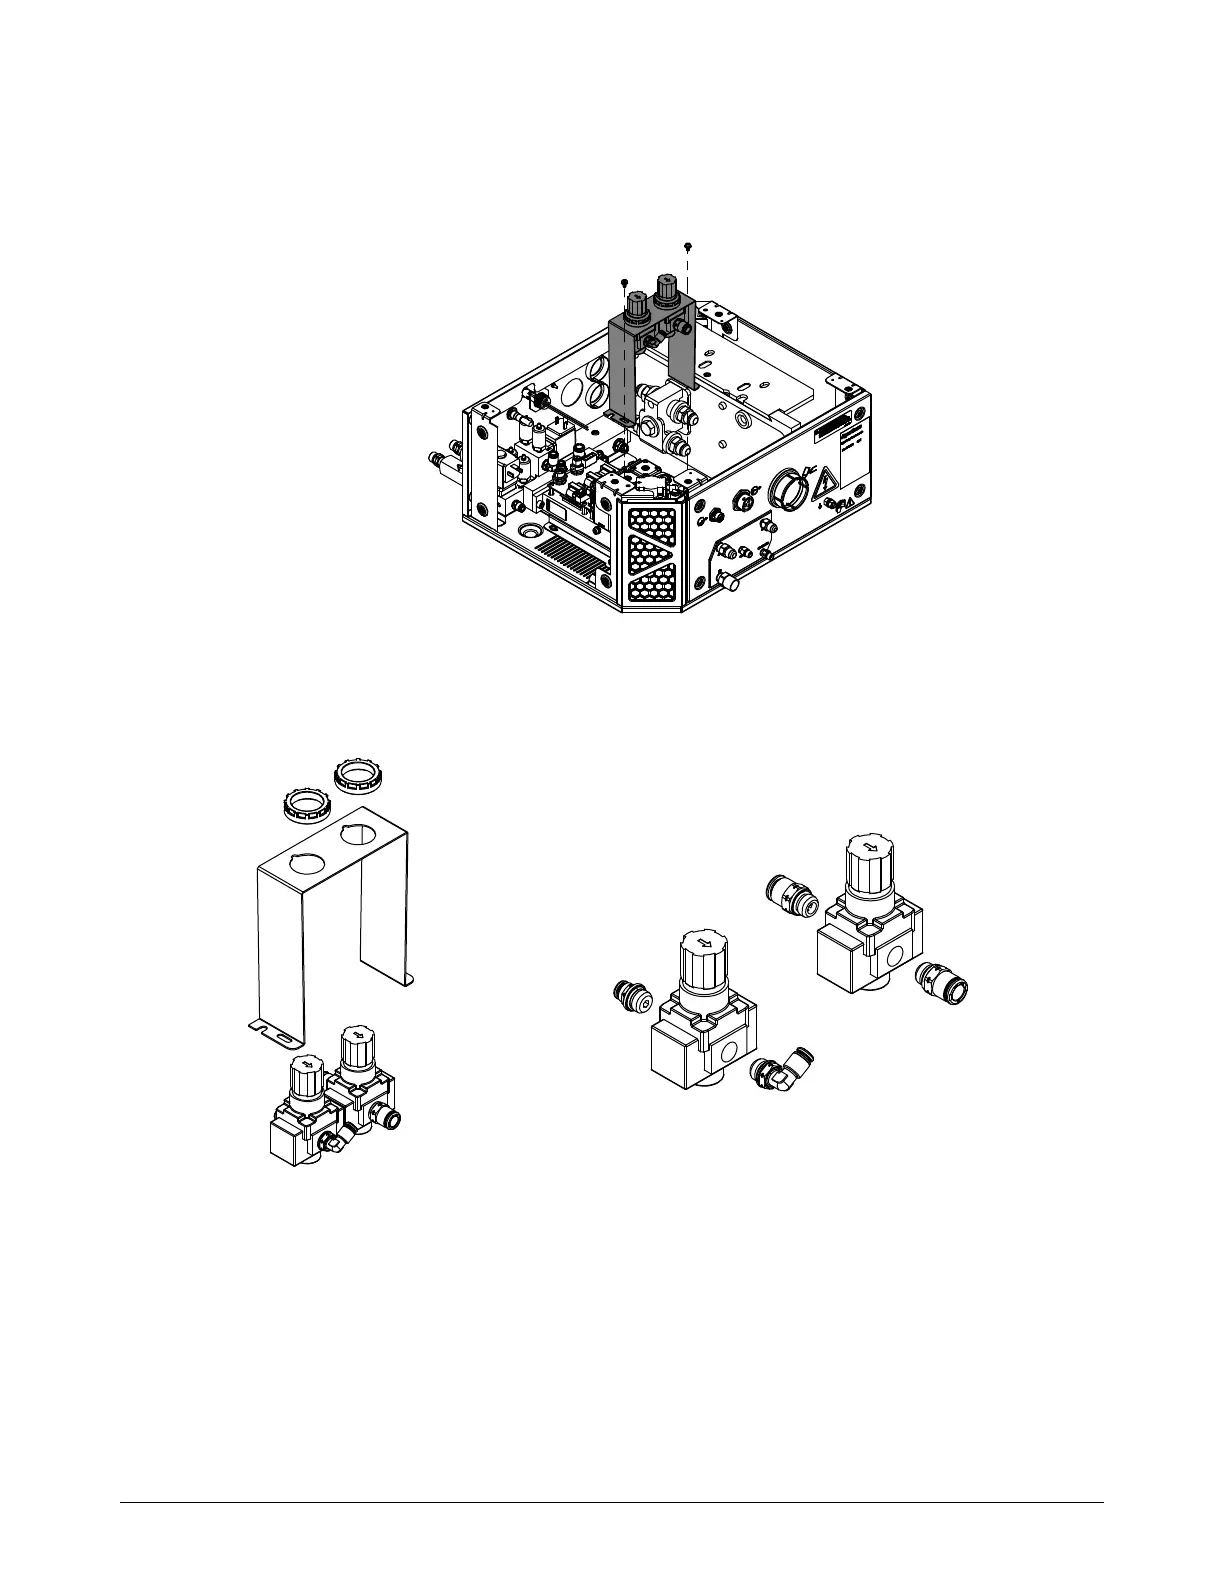
5. Do one of the following:
Use a Phillips screwdriver to remove the 2 mounting screws from the regulator bracket.
Use an 8 mm, hexagonal-socket wrench to remove the 2 nuts from the regulator bracket.
6. Remove the regulator and bracket assembly.
7. Remove the regulator nut from the regulator that you want to replace.
8. Remove the regulator from the bracket.
9. Remove the fittings from the regulator.
Keep the fittings.
14 mm wrench
16 mm wrench
16 mm wrench
12 mm wrench

Table of Contents

Other manuals for Hypertherm XPR300

Questions and Answers:

Question and Answer IconNeed help?

Do you have a question about the Hypertherm XPR300 and is the answer not in the manual?

Hypertherm XPR300 Specifications

General IconGeneral
BrandHypertherm
ModelXPR300
CategoryWelding System
LanguageEnglish

Related product manuals