Chapter 9. Administration - Logical Tab 259
Draft Document for Review March 28, 2011 12:24 pm 7914Admin_Logical.fm
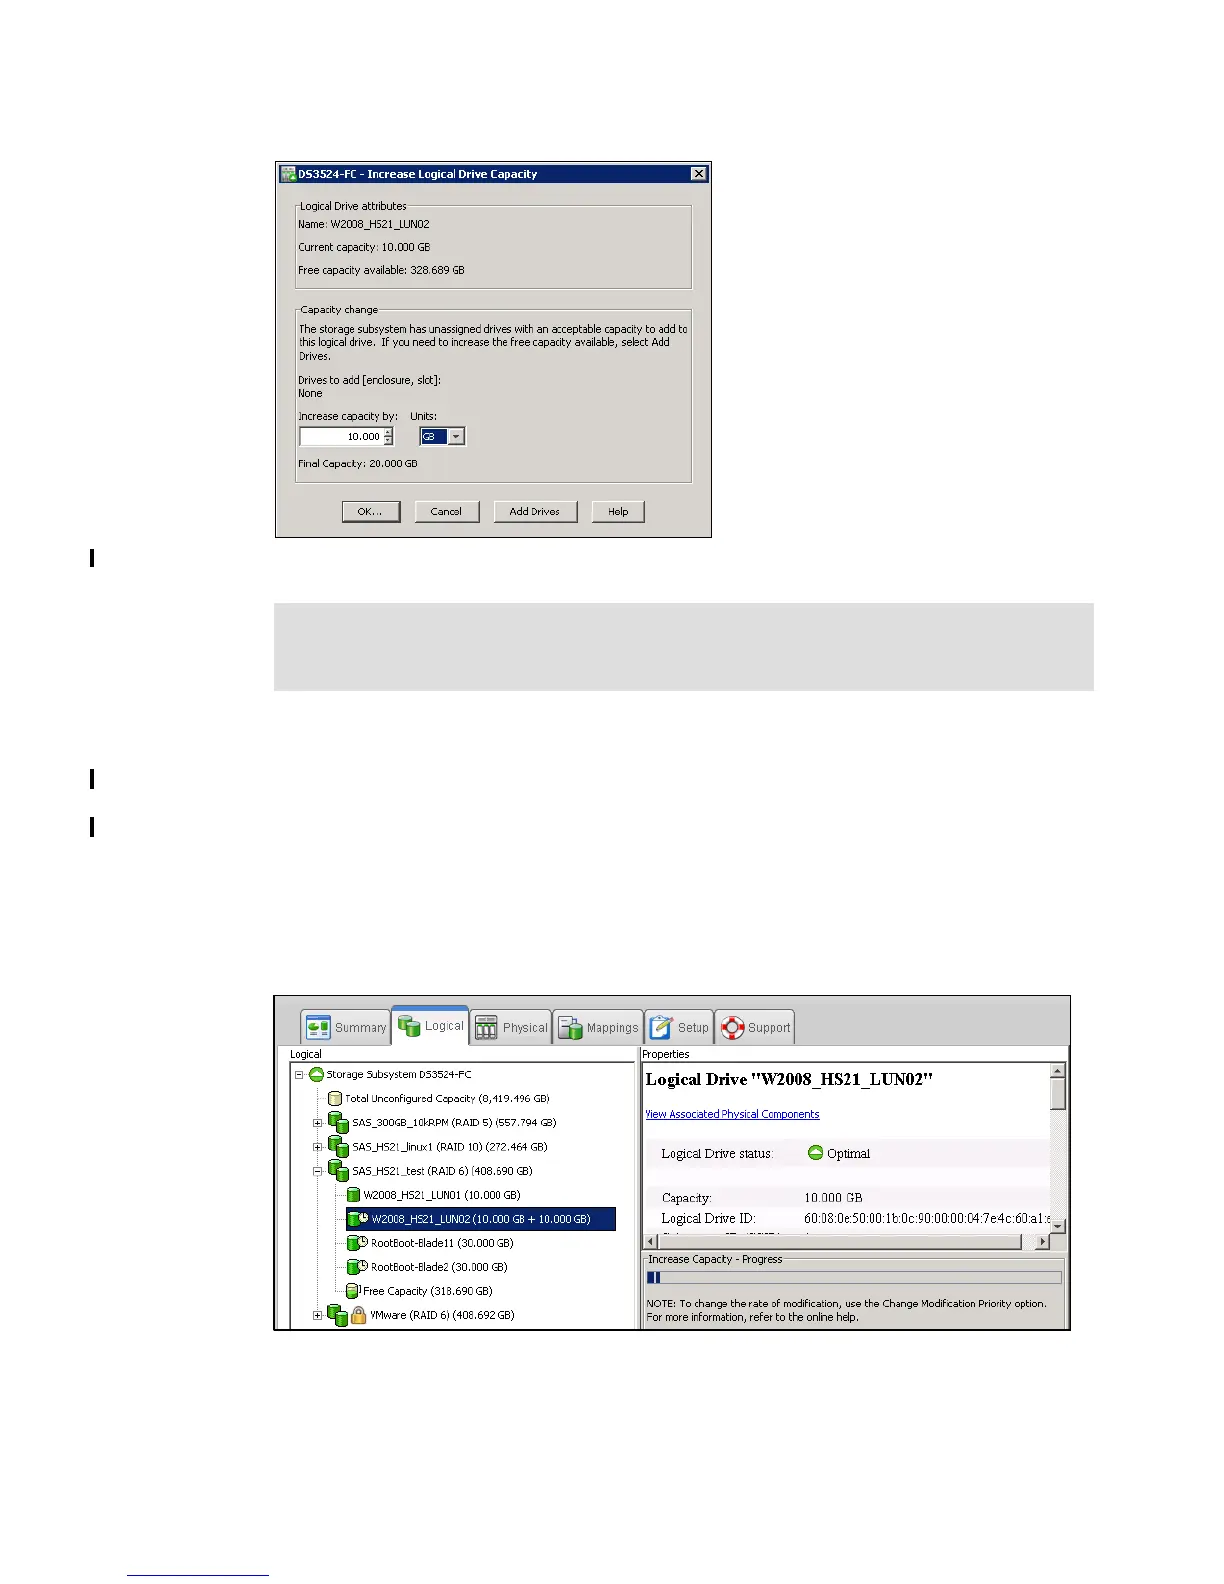
Figure 9-35 Increase Capacity - set amount
3. Click OK after selecting the capacity to add. A warning message appears indicating that
this operation cannot be stopped after it is started and that it may take a long time to
complete. However, the data on the selected logical drive and all other logical drives on
this Array (if new drives have been added) remains accessible during this time. As with all
operations requiring a redistribution of the data on the physical disks, the procedure may
affect the performance. From the host operating system, the administrator will then have to
perform a procedure in order to utilize the newly allocated space.
4. After a couple of seconds, operation starts, data on all following Logical Drives in Array are
redistributed, and they are marked by small clock icon. You can see progress of operation
in the Properties pane (Figure 9-36).
Figure 9-36 Increase Capacity - progress
Note: If the RAID level of the array is 3, 5, or 6, and the drive enclosure has enclosure loss
protection, the Add Drives option displays only drives that ensure enclosure loss
protection. If the RAID level is 1 or 10, a minimum of two drives must be added.

 Loading...