INSTALLATION and CONNECTION
3
39
UHK-430/CCU-430 1710 VER2 (E)
3.3 Connecting the CCU and Camera Head
3.3
Camera and Peripheral Installation and Connection
Mounting/Removing the Camera on/from the Tripod
■
Mounting the Camera on the Tripod
This section explains how to install the camera on the tripod. There are various types of tripods depending on the application and
purpose. See the user's manual of your tripod for details on the tripod. This section is based on using a VIDEO-18 as an example.
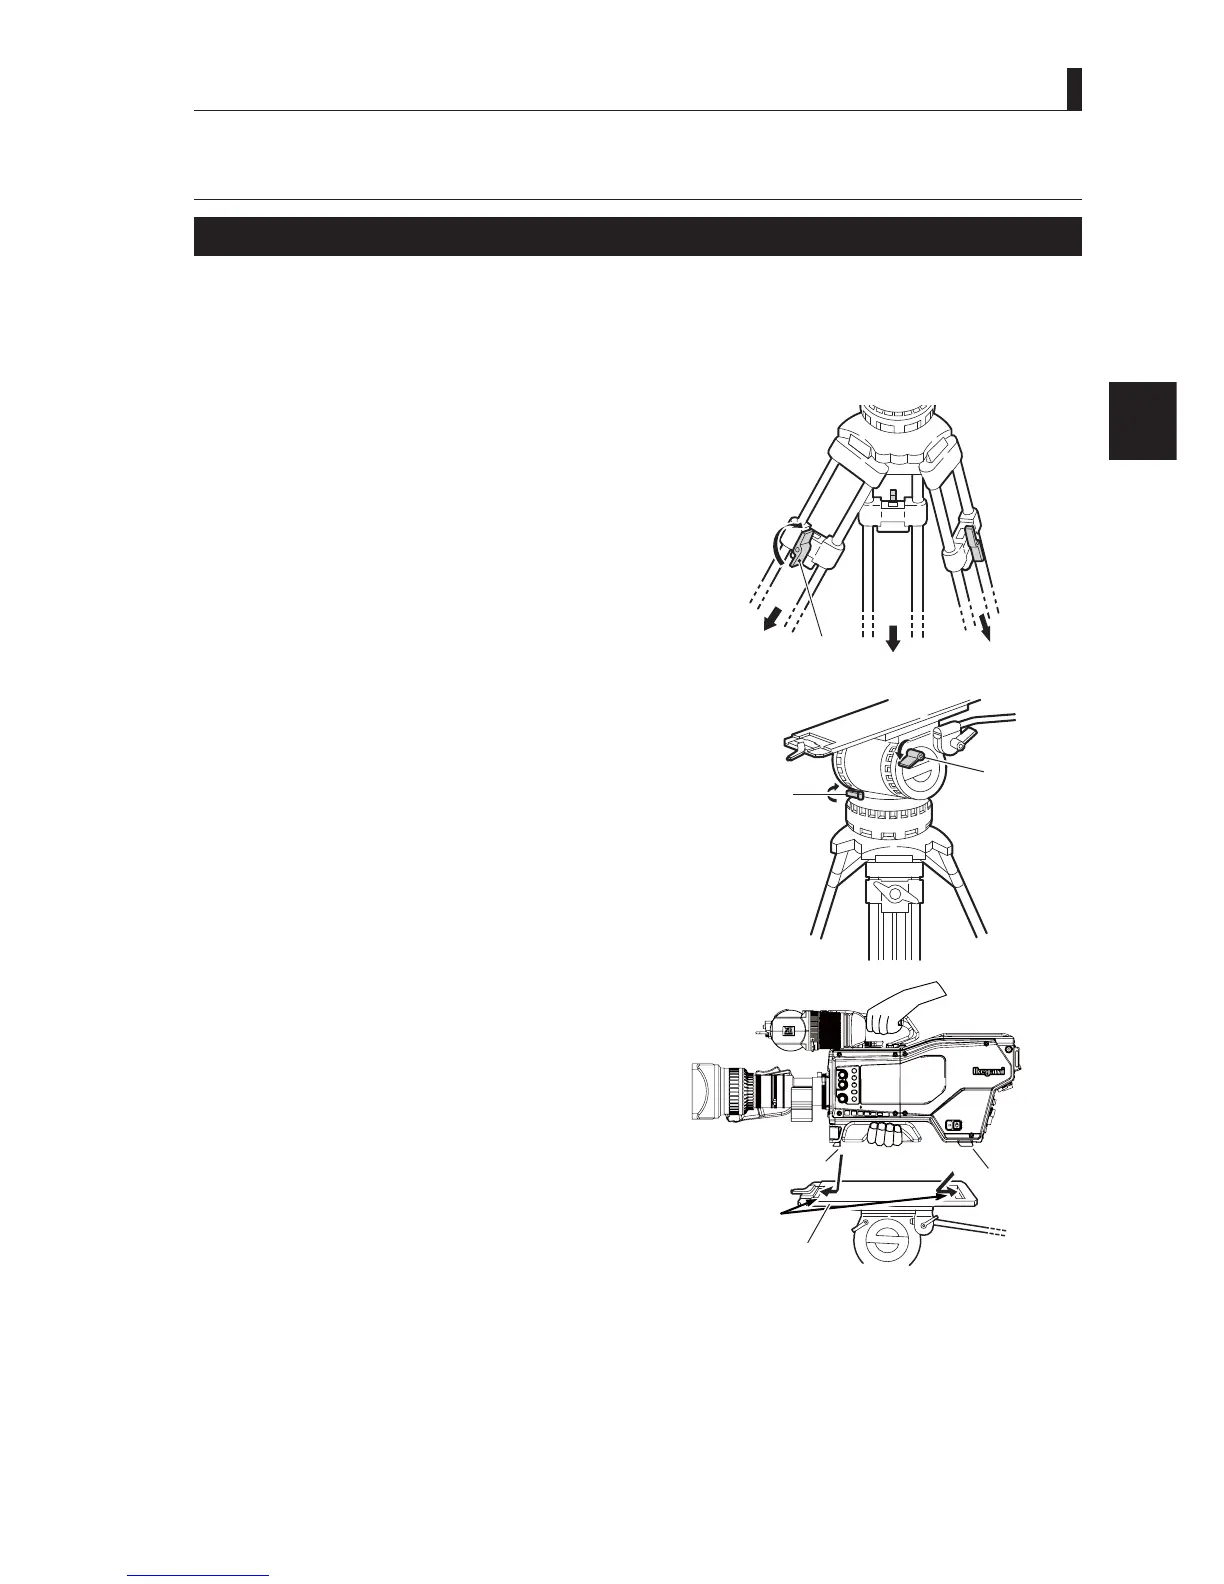
1 Loosen the fixing knob and extend the tripod legs.
$GMXVWWKHKHLJKWWRVXLW\RXUSUHIHUHQFHV
2 Check the level gauge on the pan head, and adjust
the ball mount for a level head.
3 Check that the Tilt lock and Pan lock are secured.
If the locks are not secured or loose, tighten them.
Caution:
%HVXUHWRWLJKWHQWKH¿[LQJNQREEHIRUHPRXQWLQJWKLV
product on the tripod.
If the tripod is not stable, the camera may fall off when
mounting, resulting in damages or injury.
4 Attach the tripod plate to the pan head. Insert the
edge of the rear wedge of the camera into the slot
on the mounting plate.
Push it toward the rear, to hook the edge.
1, 2:
Lock the legs after
adjusting the
height
Tripod
Fixing knob
Tilt loc
Pan lock
3:
Make sure the
tikt lock and
pan lock are
locked.
CCU
OFF
EXT
POWER
FILTER
HEAD
F2
F1
MIC
INCOM/ND
PGM/CC
MENU
VF
CHAR
Insert the
camera wedges.
Mount plate
Camera front wedge
Camera right view
Camera
rear wedge