40
UHK-430/CCU-430 1710 VER2 (E)
3.3 Connecting the CCU and Camera Head
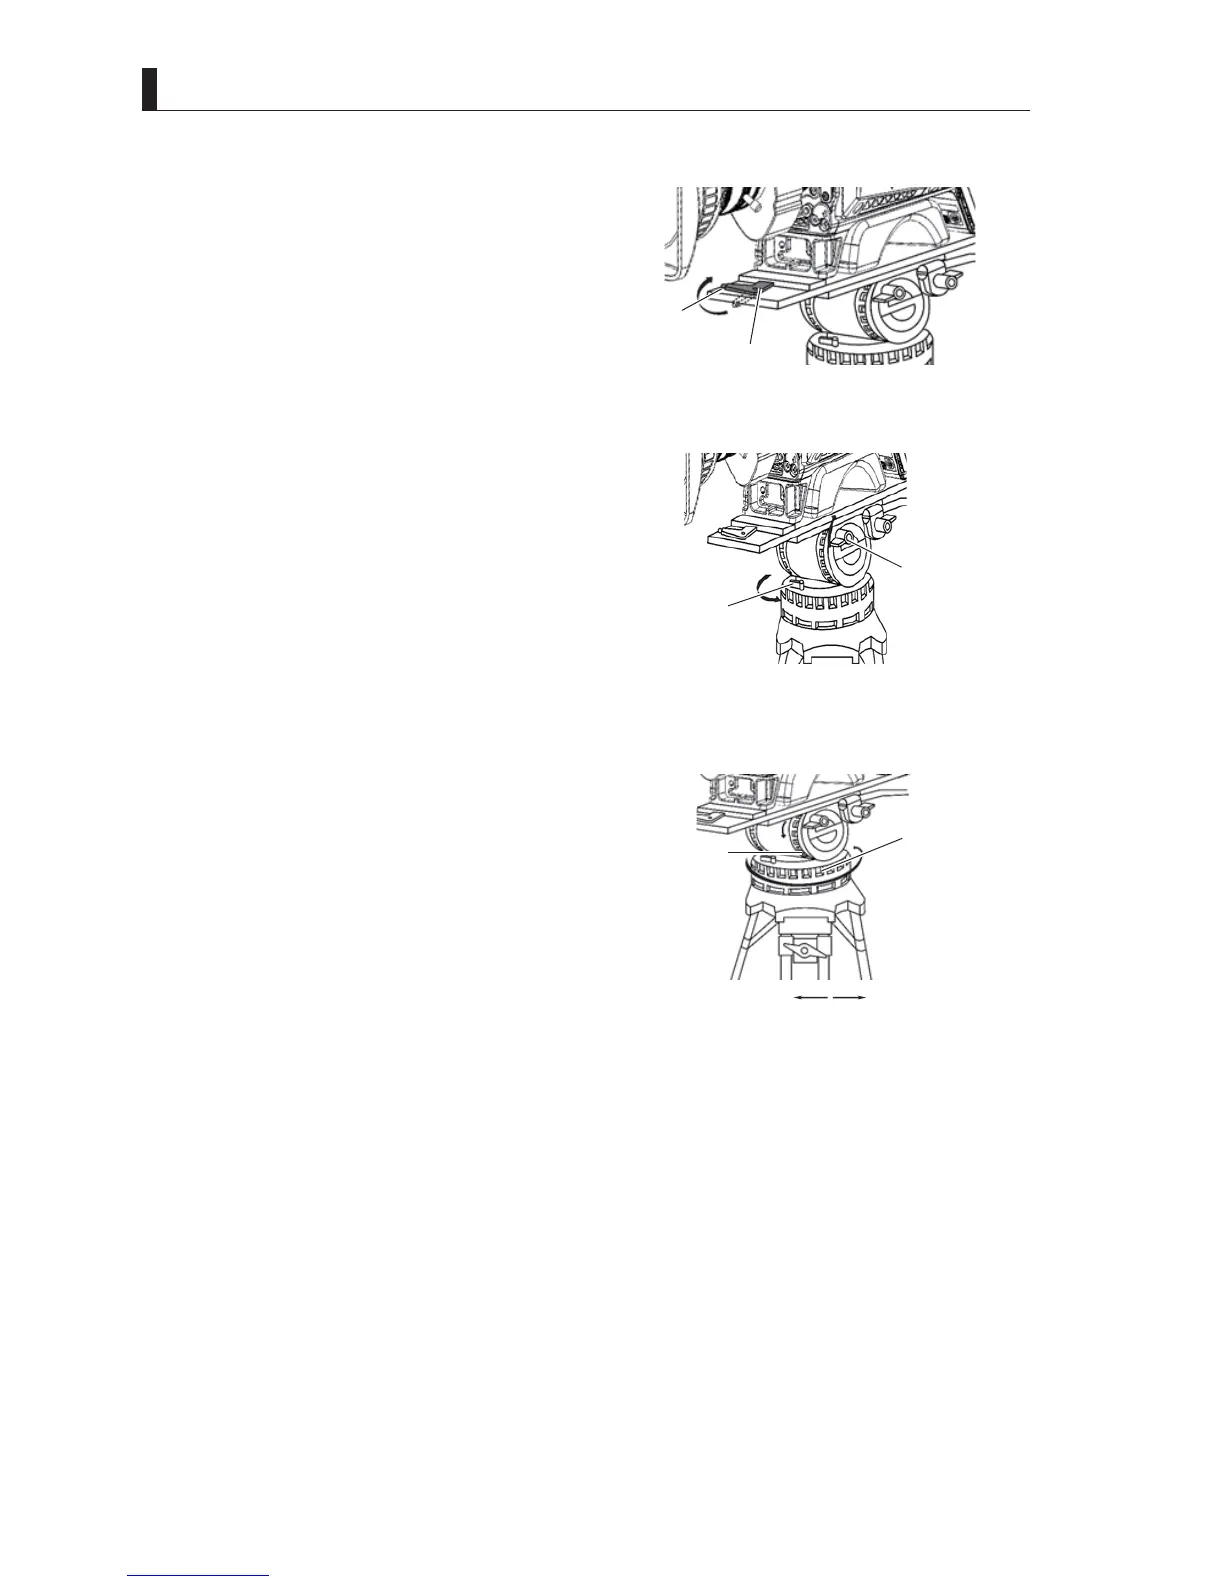
5 Lower the camera front wedge into its slot, and
tighten the lock lever to fix the camera.
7XUQLWXQWLO\RXKHDUDFOLFN<RXKHDUDFOLFNZKHQWKH
lock lever is locked.
6 Secure the camera on the tripod so that it does not
rattle.
Caution:
If the camera and tripod rattle, the camera may fall off,
resulting in damages or injury.
&DXVHVRIUDWWOLQJPD\LQFOXGH/RRVHORFNOHYHU
abnormality in the front/back edge, mounting brackets,
and tripod.
$OVRFKHFNLIWKHVKDSHRIWKHWULSRGPRXQWLQJSODWHLV
okay.
7 Loosen the Tilt lock and Pan lock to adjust the tilt
and direction of the camera.
The friction is less when the Pan brake and Tilt brake
are turned to the direction with a small number, so the
camera moves smoothly. On the other hand, the friction
is greater when they are turned to the direction with a
big number, so the camera does not rotate easily.
8 When the tilt and angle orientation of the camera
is determined, tighten the Tilt lock and Pan lock to
secure it.
Lock
Lock lever
5:Tighten the lock lever to fix the camera.
01234567
Tilte brake
Pan brake
Loosen Tighten
8:Tighten the Tilt lock and Pan lock
to secure it.
7:Loosen the Tilt lock and Pan lock to
adjust the tilt and angle orientation
of the camera.
Tilt lock
Pan lock
Camera right view