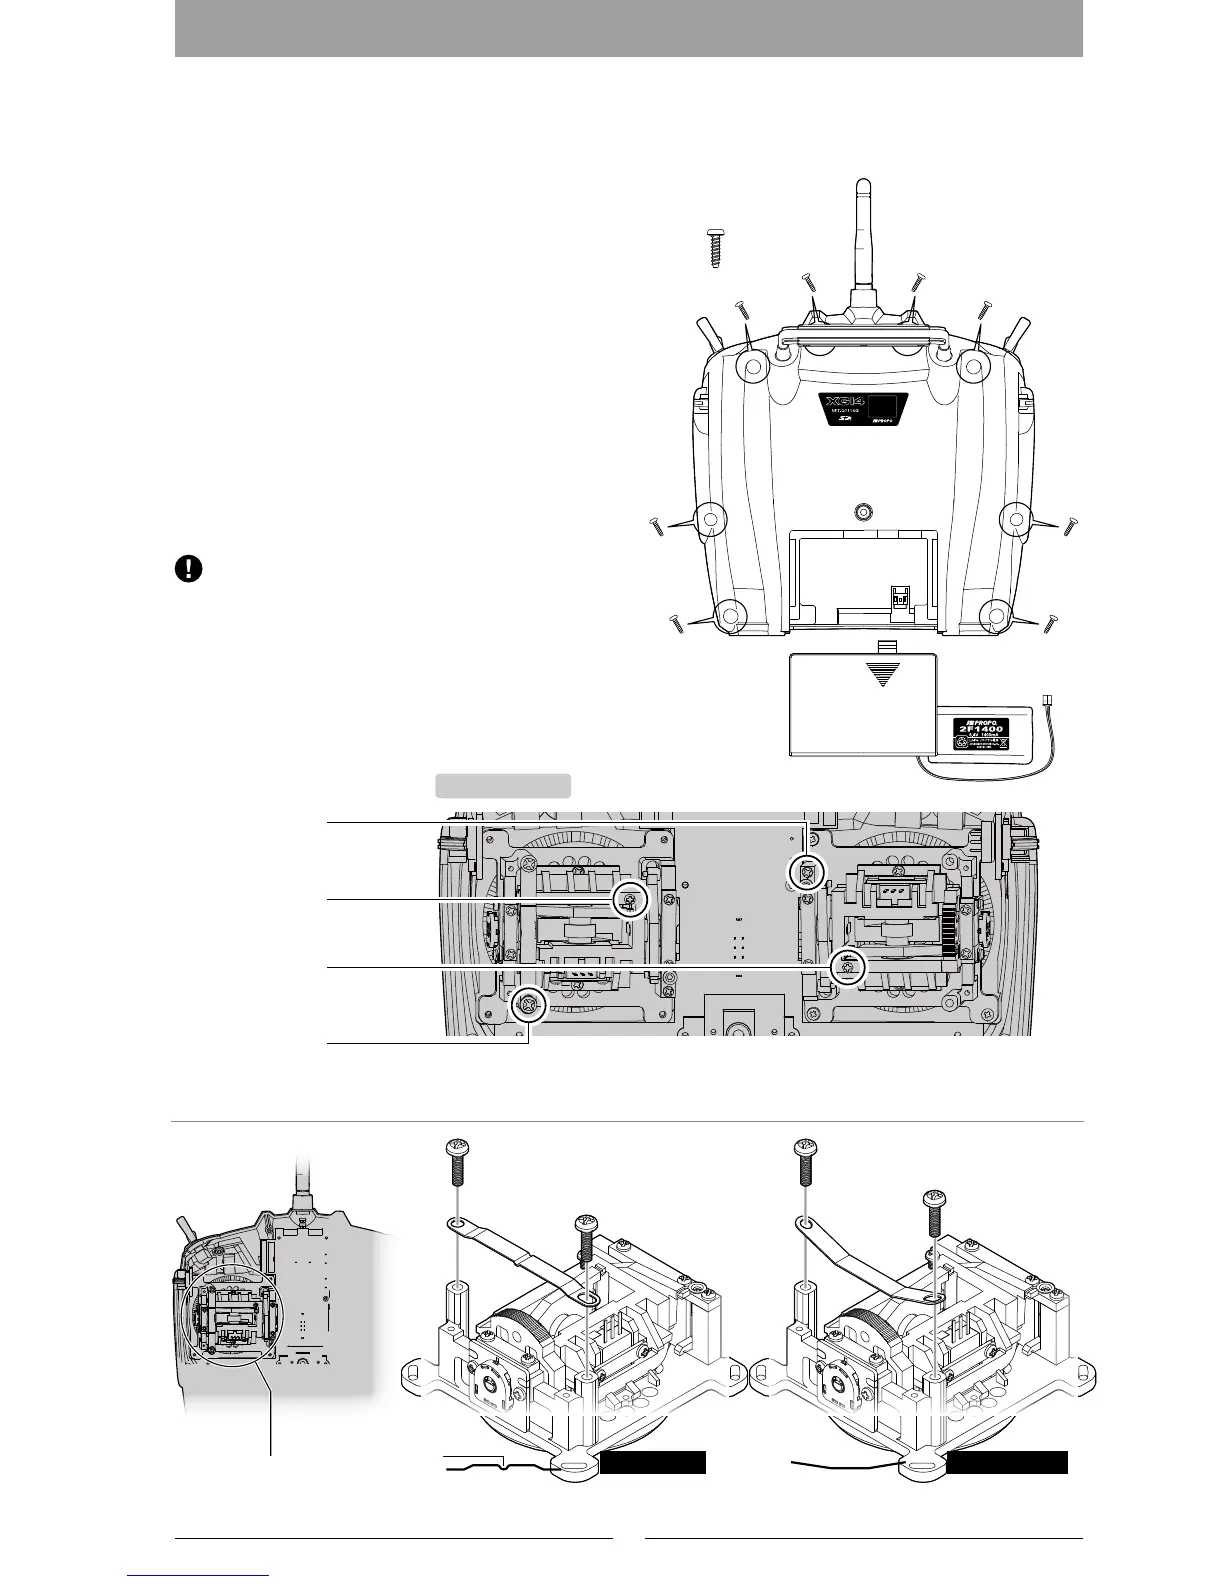
7
▋Notes▋on▋stick▋tension▋spring▋adjustment▋and▋the▋
throttle▋stroke▋travel▋adjustment▋plate
▋▋This▋allows▋adjustment▋of▋the▋
stick▋spring▋strength.
① Be certain to remove the battery before carrying
out any adjustments.
② Remove the screws in the eight(8)locations on
the rear case.
③ Adjust the springs to the desired spring tension.
By carefully adjusting each of the screws, you
can achieve a range of spring tensions.
④ Close the rear cover, and tighten the screws.
Take care of the interlocking of levers, etc.
If you prefer a ratchet on the throttle, replace the
spring plate as shown in the drawing on the left
at the bottom of this page.
The drawing on the right shows the default
setting, giving a smooth throttle transition.
NeverTouchthePrintedCircuitBoardor
anyrelatedpartsinsidethetransmitter.
For the Throttle
For the Aileron
For the Elevator
For the Rudder
Screws X 8
Detail of this area.
Direction of the springDirection of the spring
supporting surface
Direction of the springDirection of the spring
supporting surface
※ Touching the board may result in electric shock, uncontrolled microcomputer
operation, or damage to model data, and normal operation may become impossible.
For Airplane For Helicopter
CONVEX
Mode 1 Example
Screw to secure spring
Screw for spring adjustment
Screw to secure spring
Screw for spring adjustment
※Ratchet operation ※Smooth operation
 Loading...