EasyManuals Logo

Juniper MX104 Hardware Guide

Juniper MX104
282 pages
To Next Page IconTo Next Page
To Previous Page IconTo Previous Page
Page #135 background imageLoading...
Page #135 background image
5. Install a mounting screw into each of the open mounting holes aligned with the rack,
starting from the bottom.
6. Visually inspect the alignment of the router. If the router is installed properly in the
rack, all the mounting screws on one side of the rack should be aligned with the
mounting screws on the opposite side and the router should be level.
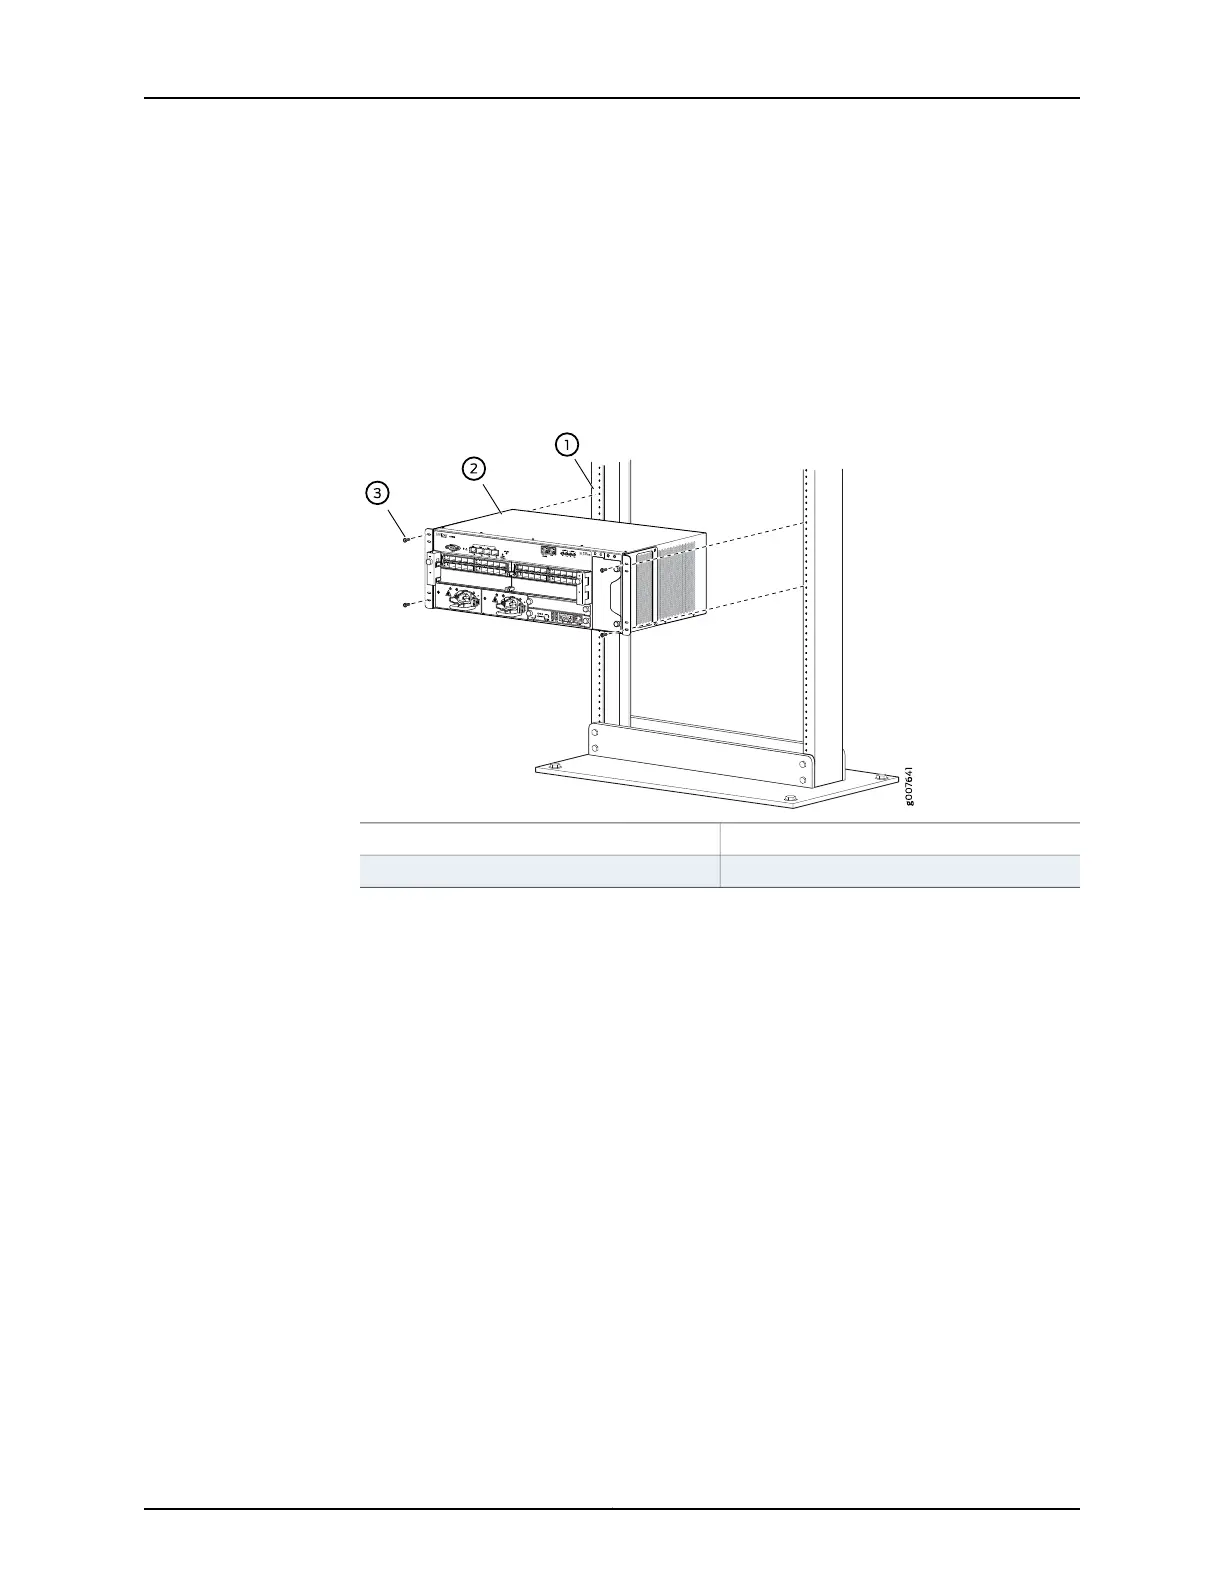
Figure 25: Install the Front-Mounted Router in the Rack
3—1— Mounting screwsRack
2—MX104 router
Related
Documentation
Preparing the Site for the MX104 Router Overview on page 71
Installing and Connecting an MX104 Router Overview on page 109
Connecting the MX104 Router to Earth Ground on page 113
111Copyright © 2017, Juniper Networks, Inc.
Chapter 14: Installing the MX104 Router

Table of Contents

Other manuals for Juniper MX104

Questions and Answers:

Question and Answer IconNeed help?

Do you have a question about the Juniper MX104 and is the answer not in the manual?

Juniper MX104 Specifications

General IconGeneral
Product NameMX104
Product SeriesMX Series
Switching Capacity80 Gbps
Throughput80 Gbps
Operating SystemJunos OS
Humidity5% to 90% non-condensing
Interfaces10 Gigabit Ethernet, Gigabit Ethernet
Power SupplyDual redundant AC or DC
CoolingFront-to-back airflow
Memory8 GB
Operating Temperature0°C to 40°C

Related product manuals