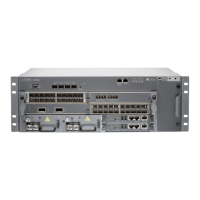
Replacing an MX104 DC Power Supply
1.
Removing an MX104 DC Power Supply on page 177
2.
Installing an MX104 DC Power Supply on page 179
Removing an MX104 DC Power Supply
To remove a DC power supply from the router, you need the following tools:
•
Phillips (+) screwdriver, number 2
•
ESD grounding wrist strap
Before you remove a power supply, be aware of the following:
NOTE: The minimum number of powersupplies must be presentin the router
at all times.
WARNING: Before performing DC power procedures, ensure that power is
removed from the DC circuit. To ensure that all power is off, locate the circuit
breaker on the panel board that services the DC circuit, switch the circuit
breaker to the off position, and tape the switch handle of the circuit breaker
in the off position.
CAUTION: To maintain proper cooling and prevent thermal shutdown of the
operating power supply unit, each power supply slot must contain either a
power supply or a blank panel. If you remove a power supply, you must install
a replacement power supply or a blank panel shortly after the removal.
NOTE: After powering off a power supply, wait at least 60 seconds before
turning it back on.
To remove a DC power supply (see Figure 60 on page 179):
1. Switch off the dedicated customer site circuit breaker for the power supply being
removed. Follow your site's procedures for ESD.
2. Make sure that the voltage across the DC power source cable leads is 0 V and that
there is no chance that the cables might become active during the removal process.
3. Verify that the status LED on the power supply is not lit.
177Copyright © 2017, Juniper Networks, Inc.
Chapter 23: Replacing Power System Components

 Loading...