EasyManuals Logo

Juniper MX104 Hardware Guide

Juniper MX104
282 pages
To Next Page IconTo Next Page
To Previous Page IconTo Previous Page
Page #172 background imageLoading...
Page #172 background image
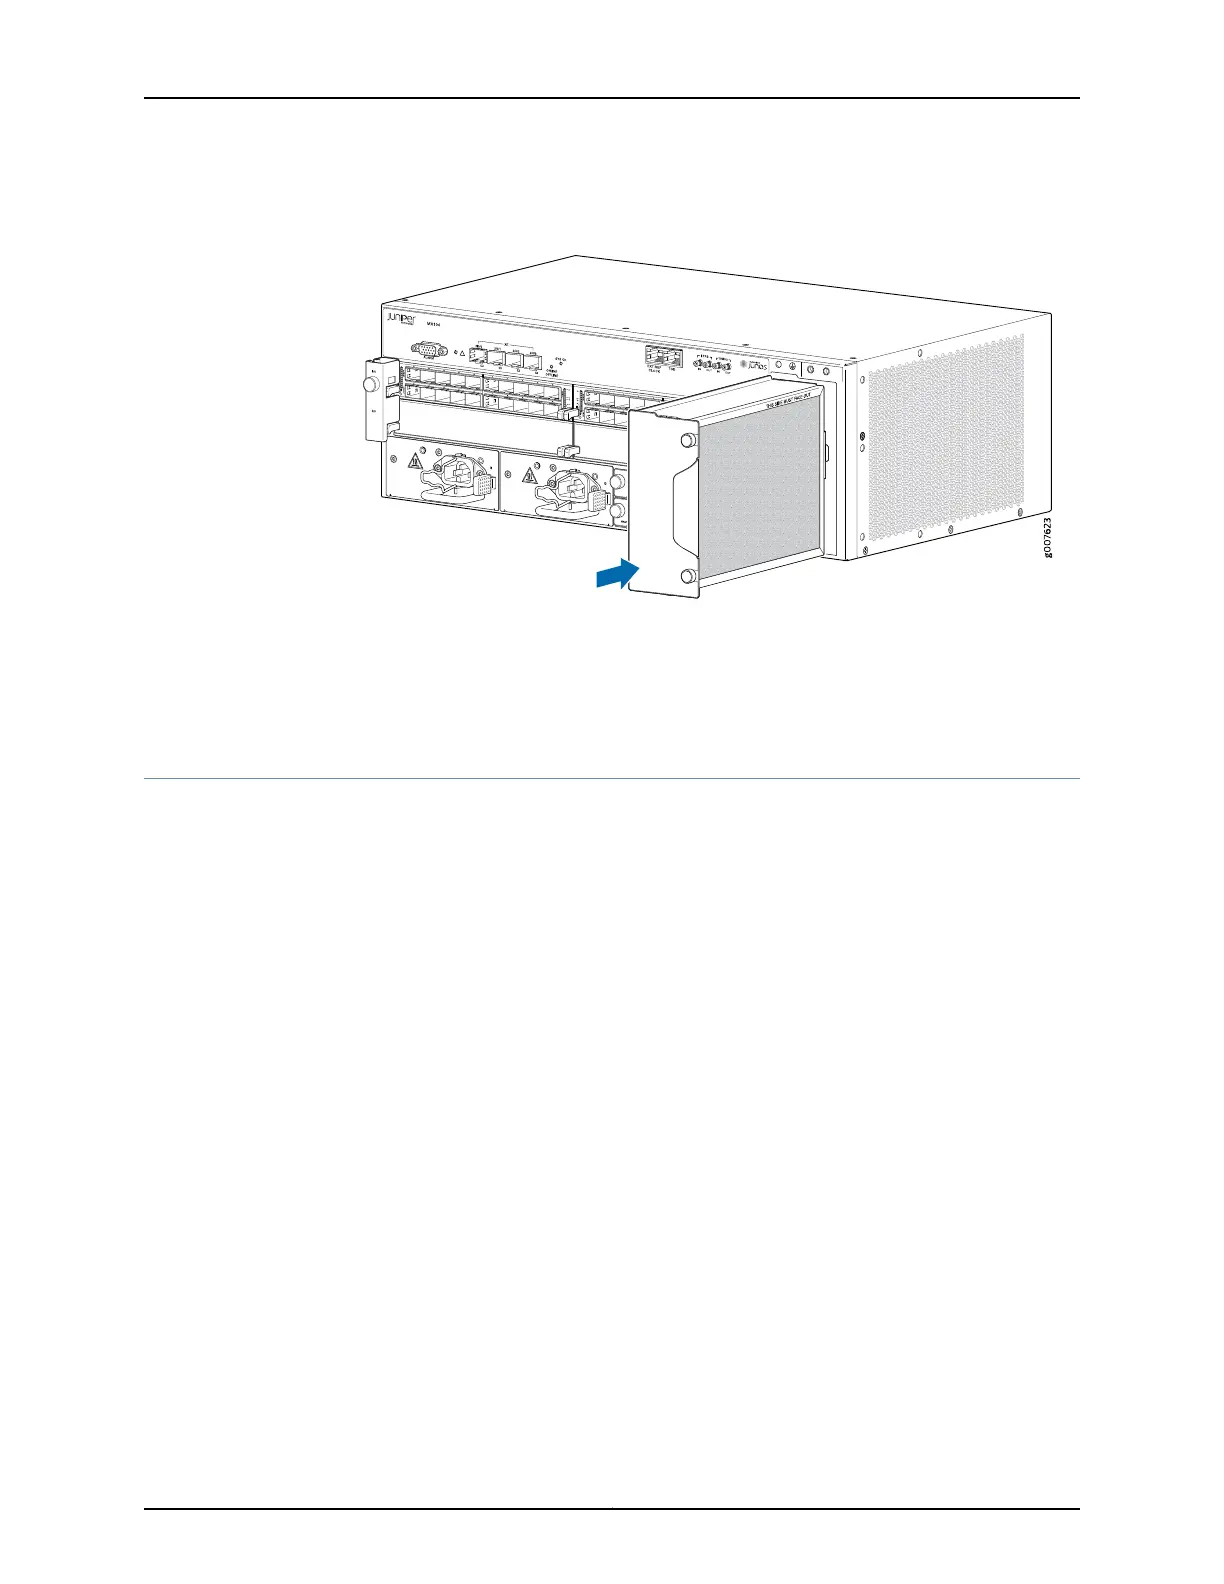
Figure 42: Installing the Fan Tray
Related
Documentation
MX104 Cooling System and Airflow Overview on page 19
Replacing an MX104 Air Filter on page 143
Installing an MX104 Fan Tray
To install the fan tray (see Figure 42 on page 148):
1. Attach an ESD grounding strap to your bare wrist and connect the strap to one of the
ESD points on the chassis.
2. Orient the fan tray in the slot so that the arrow is pointing up, and slide the fan tray
straight into the chassis.
3. Verify that the front of the fan tray is firmly seated in the chassis.
4. Tighten the captive screws on the fan tray faceplate to secure it in the chassis.
Copyright © 2017, Juniper Networks, Inc.148
MX104 3D Universal Edge Router Hardware Guide

Table of Contents

Other manuals for Juniper MX104

Questions and Answers:

Question and Answer IconNeed help?

Do you have a question about the Juniper MX104 and is the answer not in the manual?

Juniper MX104 Specifications

General IconGeneral
Product NameMX104
Product SeriesMX Series
Switching Capacity80 Gbps
Throughput80 Gbps
Operating SystemJunos OS
Humidity5% to 90% non-condensing
Interfaces10 Gigabit Ethernet, Gigabit Ethernet
Power SupplyDual redundant AC or DC
CoolingFront-to-back airflow
Memory8 GB
Operating Temperature0°C to 40°C

Related product manuals