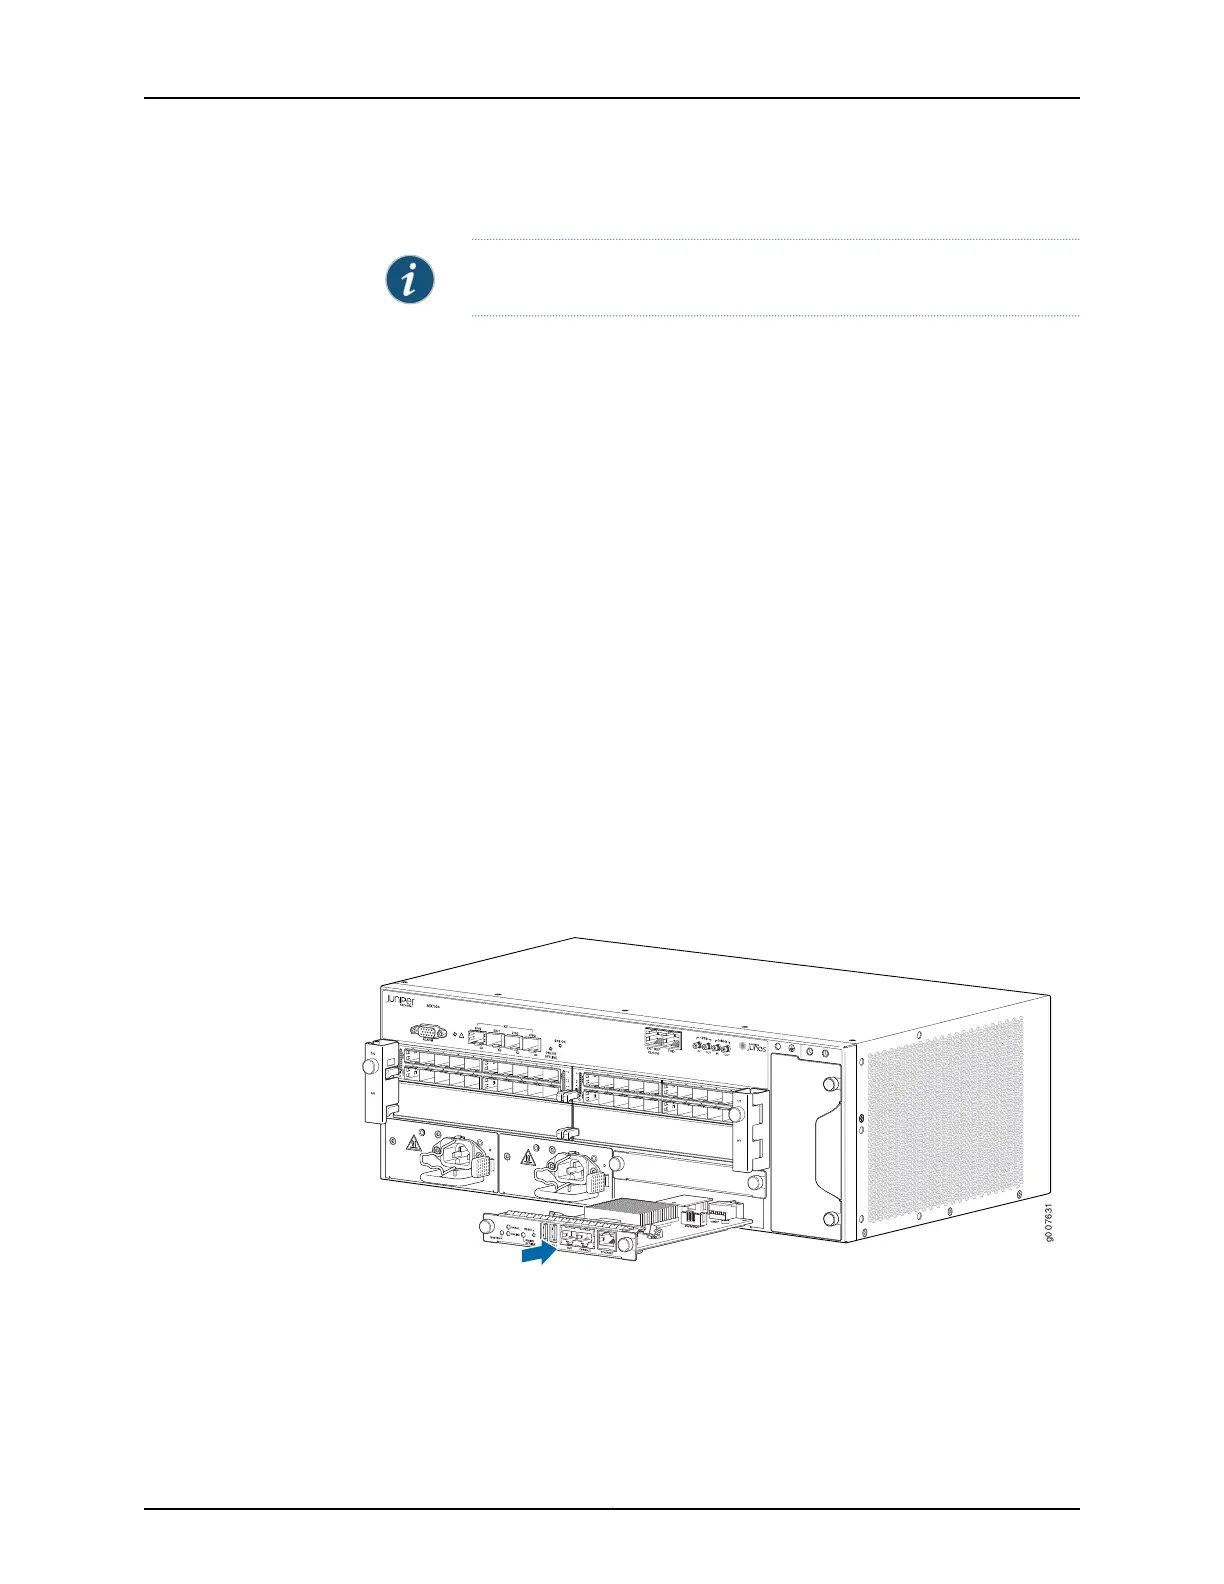
6. Connect the management device cables to the Routing Engine.
NOTE: The Routing Engine might require several minutes to boot.
7. After the Routing Engine boots, verify that it is installed correctly:
•
Check the LEDs on the Routing Engine. If the router is operational and the Routing
Engine is functioning properly, the green ONLINE LED lights steadily. If the red
OK/FAIL LED lights steadily instead, remove and install the Routing Engine again.
If the red OK/FAIL LED still lights steadily, the Routing Engine is not functioning
properly. Contact your customer support representative.
•
Check the status of the Routing Engine, using the show chassis environment
routing-engine CLI command:
user@ host > show chassis environment routing-engine
Routing Engine 0 status:
State Online Master
Temperature 34 degrees C / 93 degrees F
CPU Temperature 43 degrees C / 109 degrees F
Routing Engine 1 status:
State Online Standby
Temperature 33 degrees C / 91 degrees F
CPU Temperature 39 degrees C / 102 degrees F
If the router is operational and the Routing Engine is functioning properly, the state
shows Online Master or Online Standby. For more information about using the show
chassis routing-engine CLI command, see show chassis environment routing-engine.
Figure 46: Installing a Routing Engine
Related
Documentation
• MX104 Routing Engine Overview on page 21
• Maintaining the MX104 Routing Engines on page 192
157Copyright © 2017, Juniper Networks, Inc.
Chapter 21: Replacing Host Subsystem Components