NOTE: After powering off a power supply, wait at least 60 seconds before
turning it back on.
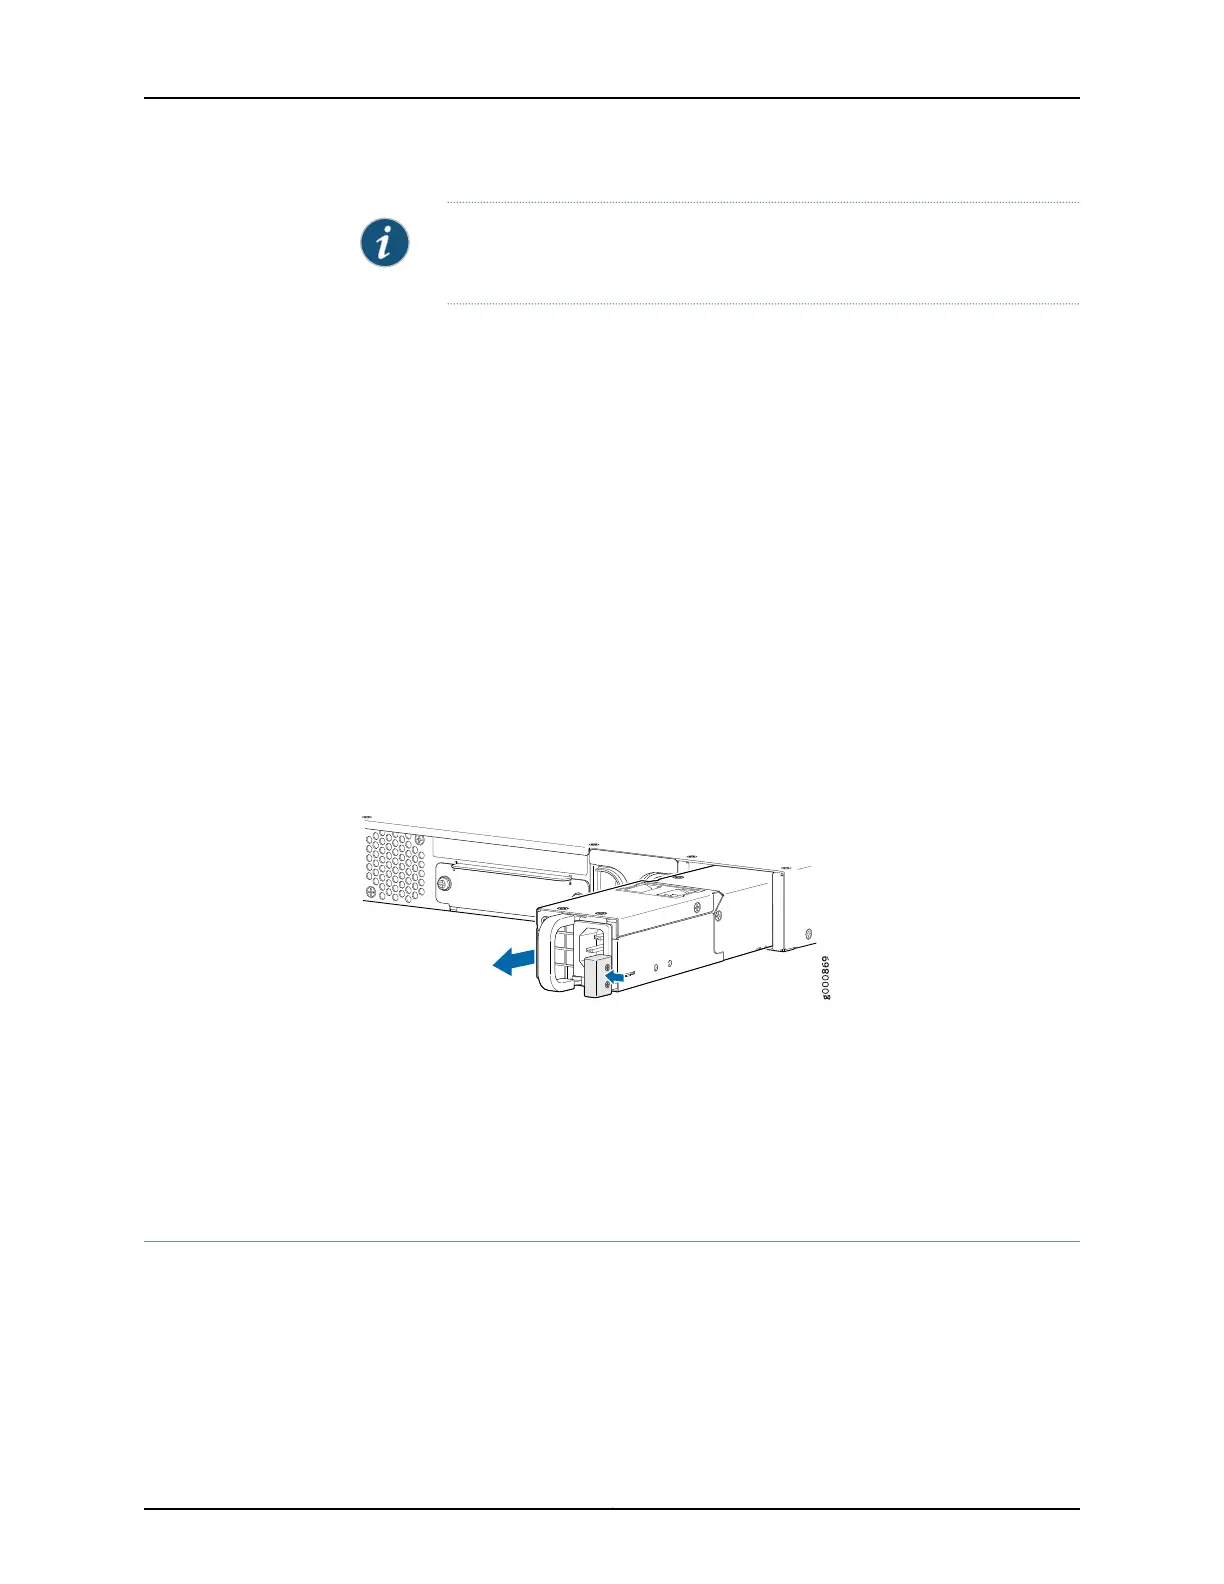
To remove an AC power supply:
1. Switch off the dedicated facility circuit breaker for the power supply, and remove the
power cord from the AC power source. Follow the electrostatic discharge (ESD) and
disconnection instructions for your site.
2. Attach an ESD grounding strap to your bare wrist and connect the strap to one of the
ESD points on the chassis. For more information about ESD, see “Preventing
Electrostatic Discharge Damage to the SRX1500 Services Gateway” on page 118.
3. Remove the power cord from the power supply.
4. Press the latch to the left of the power outlet (see Figure 17 on page 102).
5. Pull the power supply straight out of the chassis.
Figure 17: Removing an AC Power Supply from the SRX1500 Services
Gateway
Related
Documentation
SRX1500 Services Gateway Chassis Overview on page 5•
• Understanding the SRX1500 Services Gateway Back Panel on page 8
• Understanding the SRX1500 Services Gateway Power Supply on page 13
• SRX1500 Services Gateway AC Power Supply Electrical Specifications on page 33
Replacing a DC Power Supply on the SRX1500 Services Gateway
•
Removing a DC Power Supply Cable from the SRX1500 Services Gateway on page 103
•
Removing a DC Power Supply on the SRX1500 Services Gateway on page 103
Copyright © 2017, Juniper Networks, Inc.102
SRX1500 Services Gateway Hardware Guide