NOTE: If more than one power supply is being installed, ensurethe following:
•
Connect power cords to both the power supplies.
•
Connect each power supply to a DC power feed.
If both power suppliesare plugged in and receiving power, the RPSLED glows
solid green.
Related
Documentation
Installing the SRX1500 Services Gateway in a Rack on page 51•
• Connecting the SRX1500 Services Gateway to an AC Power Supply on page 65
• Connecting an AC Power Cord to the SRX1500 Services Gateway on page 66
• Replacing an AC Power Supply on the SRX1500 Services Gateway on page 101
• Installing a DC Power Supply on the SRX1500 Services Gateway on page 54
Installing a DC Power Supply on the SRX1500 Services Gateway
To install a DC power supply:
1. Ensure that the voltage across the DC power source cable leads is 0 V and that there
is no chance that the cable leads might become active during installation. To ensure
that all power is off, locate the circuit breaker on the panel board that services the DC
circuit, switch the circuit breaker to the OFF position (O), and tape the switch handle
of the circuit breaker in the OFF position.
2. Attach an electrostatic discharge (ESD) grounding strap to your bare wrist and connect
the strap to one of the ESD points on the chassis. For more information about ESD,
see “Preventing Electrostatic Discharge Damage to the SRX1500 Services Gateway”
on page 118.
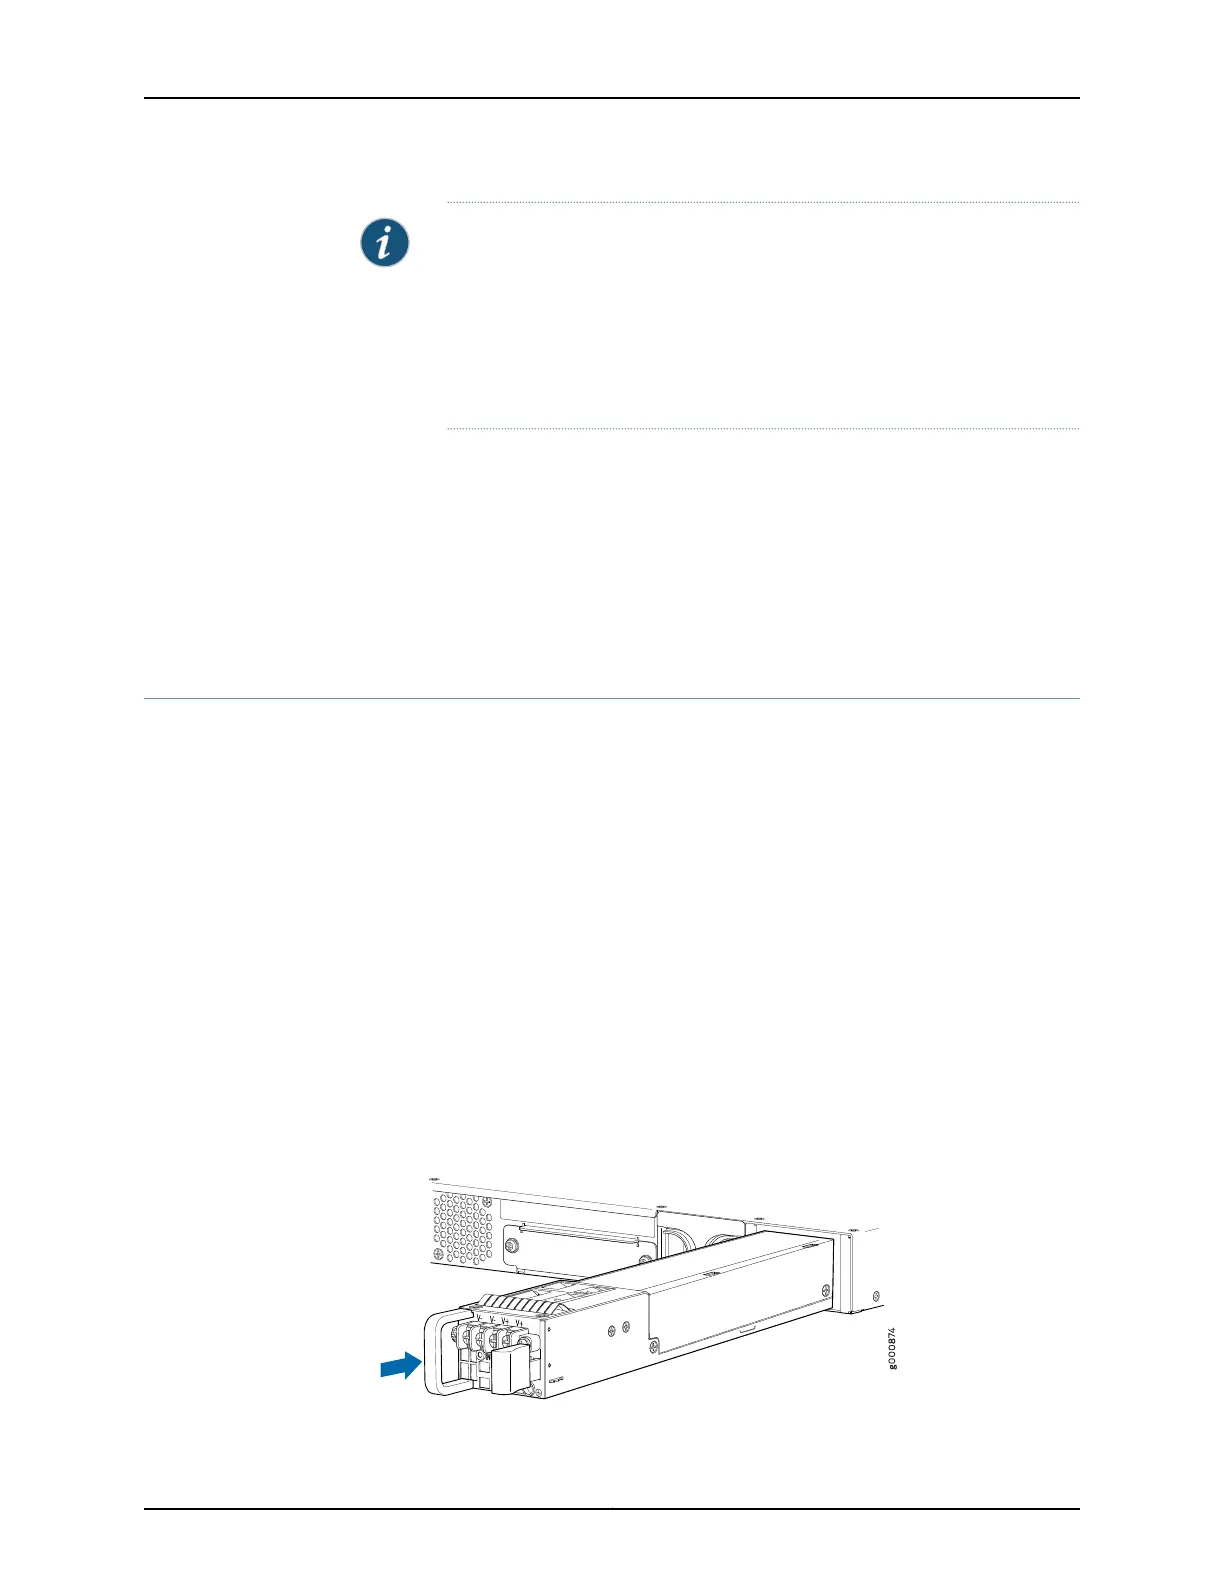
3. Orient the power supply so that the locking lever is on the left as shown in
Figure 12 on page 54.
Figure 12: Installing a DC Power Supply on an SRX1500 Services Gateway
Copyright © 2017, Juniper Networks, Inc.54
SRX1500 Services Gateway Hardware Guide