Konica Minolta 240f 2-5
2.1 Basic scanning
2
2 Specify advanced settings such as changing the file format, as necessary. For details, refer to page 3-5.
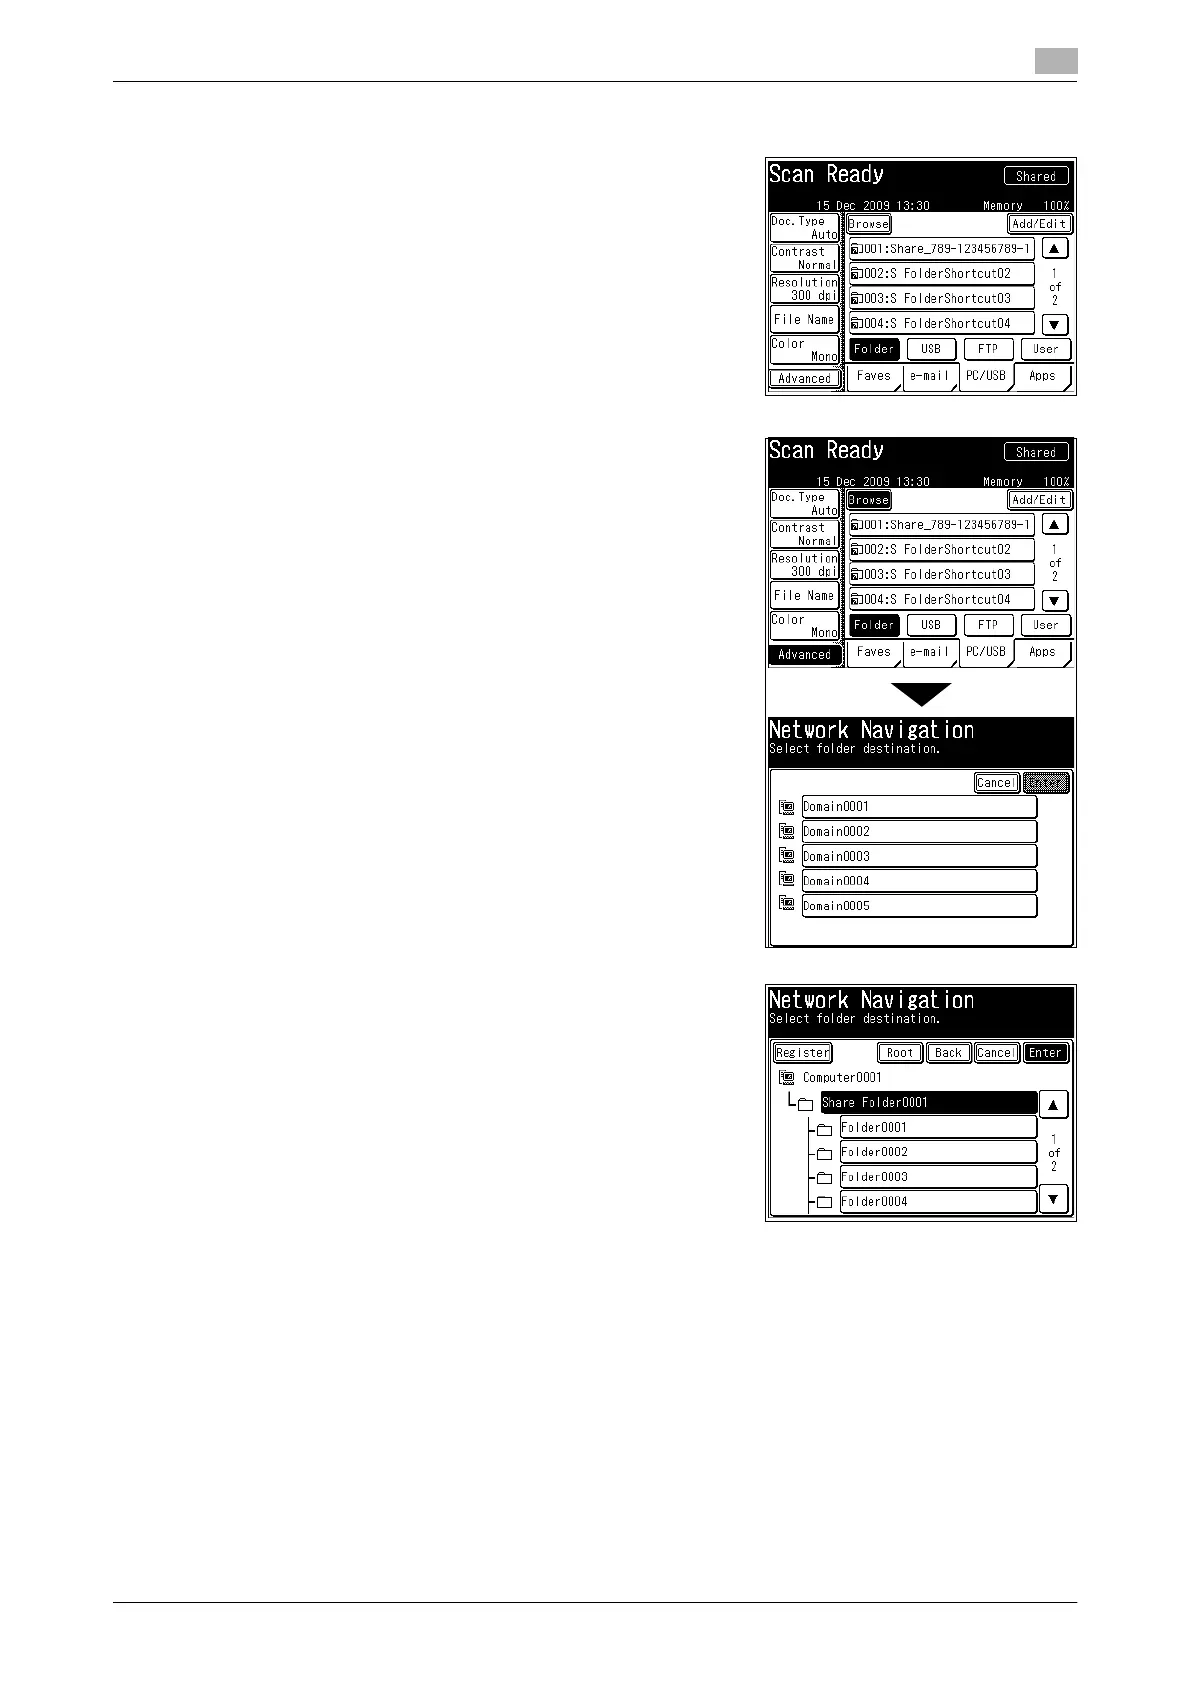
3 Press the [PC/USB] tab, and then [Folder].
4 Press [Browse].
The list of computers or networks is displayed.
% If the target folder has been registered as a shortcut in ad-
vance, select it from the list of shortcuts.
% If the target folder is registered in the [Faves] tab, you can
select it from the [Faves] tab.
5 Specify the shared folder to save the data to, and press [En-
ter].
% Press [Root] to return to the list of computers or networks.
% Press [Back] to return to the previous screen.
% Press [Cancel] to close the screen.
6 Repeat steps 4 and 5 to specify all the destinations.
% You can also specify e-mail addresses, FTP servers, user boxes, and the shared box as destina-
tions.
% To confirm a specified destination, press [Location]. For details on confirming destinations, refer to
page 6-15.
7 Press <Start>.
% If you selected a destination from the list of shortcuts, this step is not required.
% If you loaded the document in the ADF, this concludes the procedure.
 Loading...