Registering destinations
8
8-28 Konica Minolta 240f
8.1
Specifying the network settings
The following items are set when installing the Scan to Print Monitor, but can be changed as necessary.
1 Right-click the task tray icon of the Scan to Print Monitor, and select "Configuration".
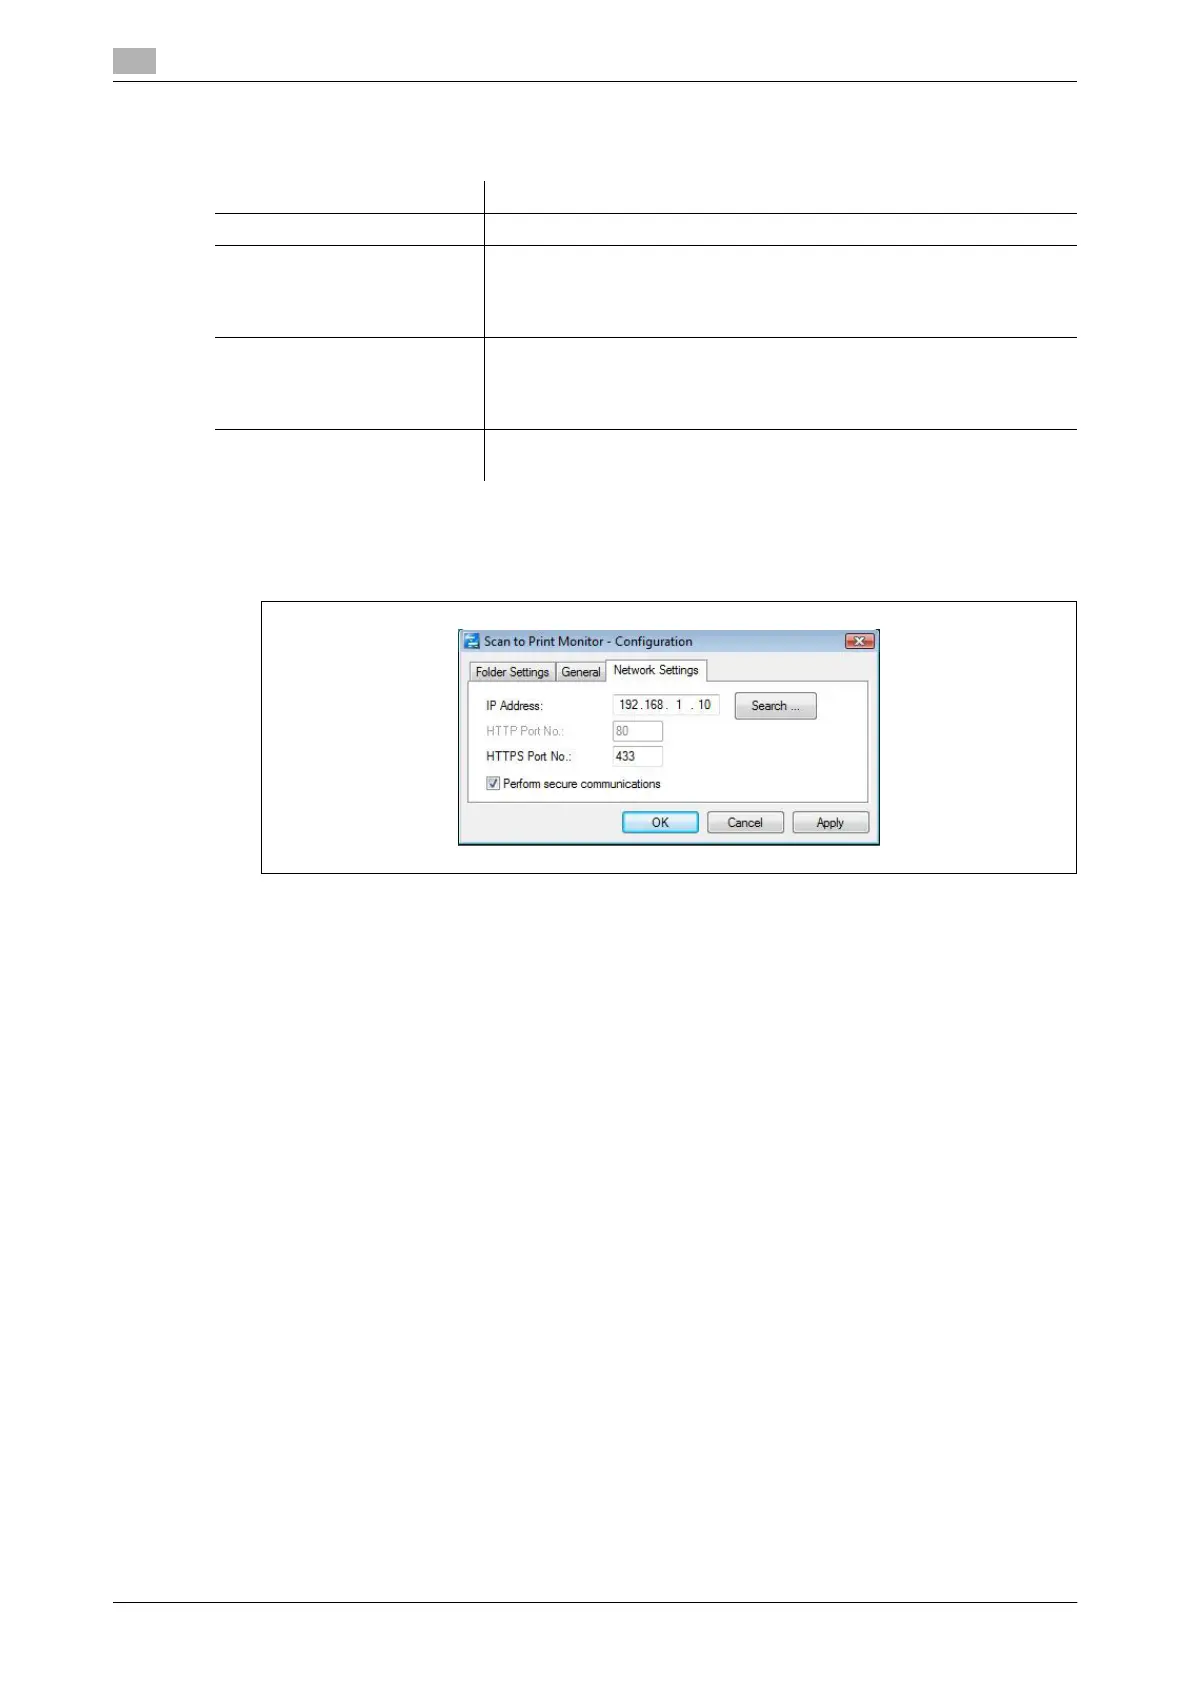
2 Select the [Network Settings] tab.
3 To change the IP address of the machine, enter the IP address.
% Click [Search] to automatically search for copiers on the network and select the MFP to use. Select
the IP address of this machine from the search results, and click [OK].
4 Edit the HTTPS port and HTTP port numbers.
% To edit the HTTP port number, deselect "Perform secure communications" first.
% To edit the HTTPS port number, select "Perform secure communications" first.
5 Click [OK].
Item Description
IP Address (I) Set the IP address of the machine.
HTTP Port No. (H) This setting is enabled when "Perform secure communications" is de-
selected.
Set the HTTP port number set in Message Board.
This is normally set to "80".
HTTPS Port No. (T) This setting is enabled when "Perform secure communications" is se-
lected.
Set the HTTPS port number set in Message Board.
This is normally set to "433".
Perform secure communica-
tions (L)
Select this to perform SSL communications.