Ch.7 Optional Functions
< 181 >
REGIUS Console CS-3 OPERATION MANUAL Ver. 1.10 2005.2
10
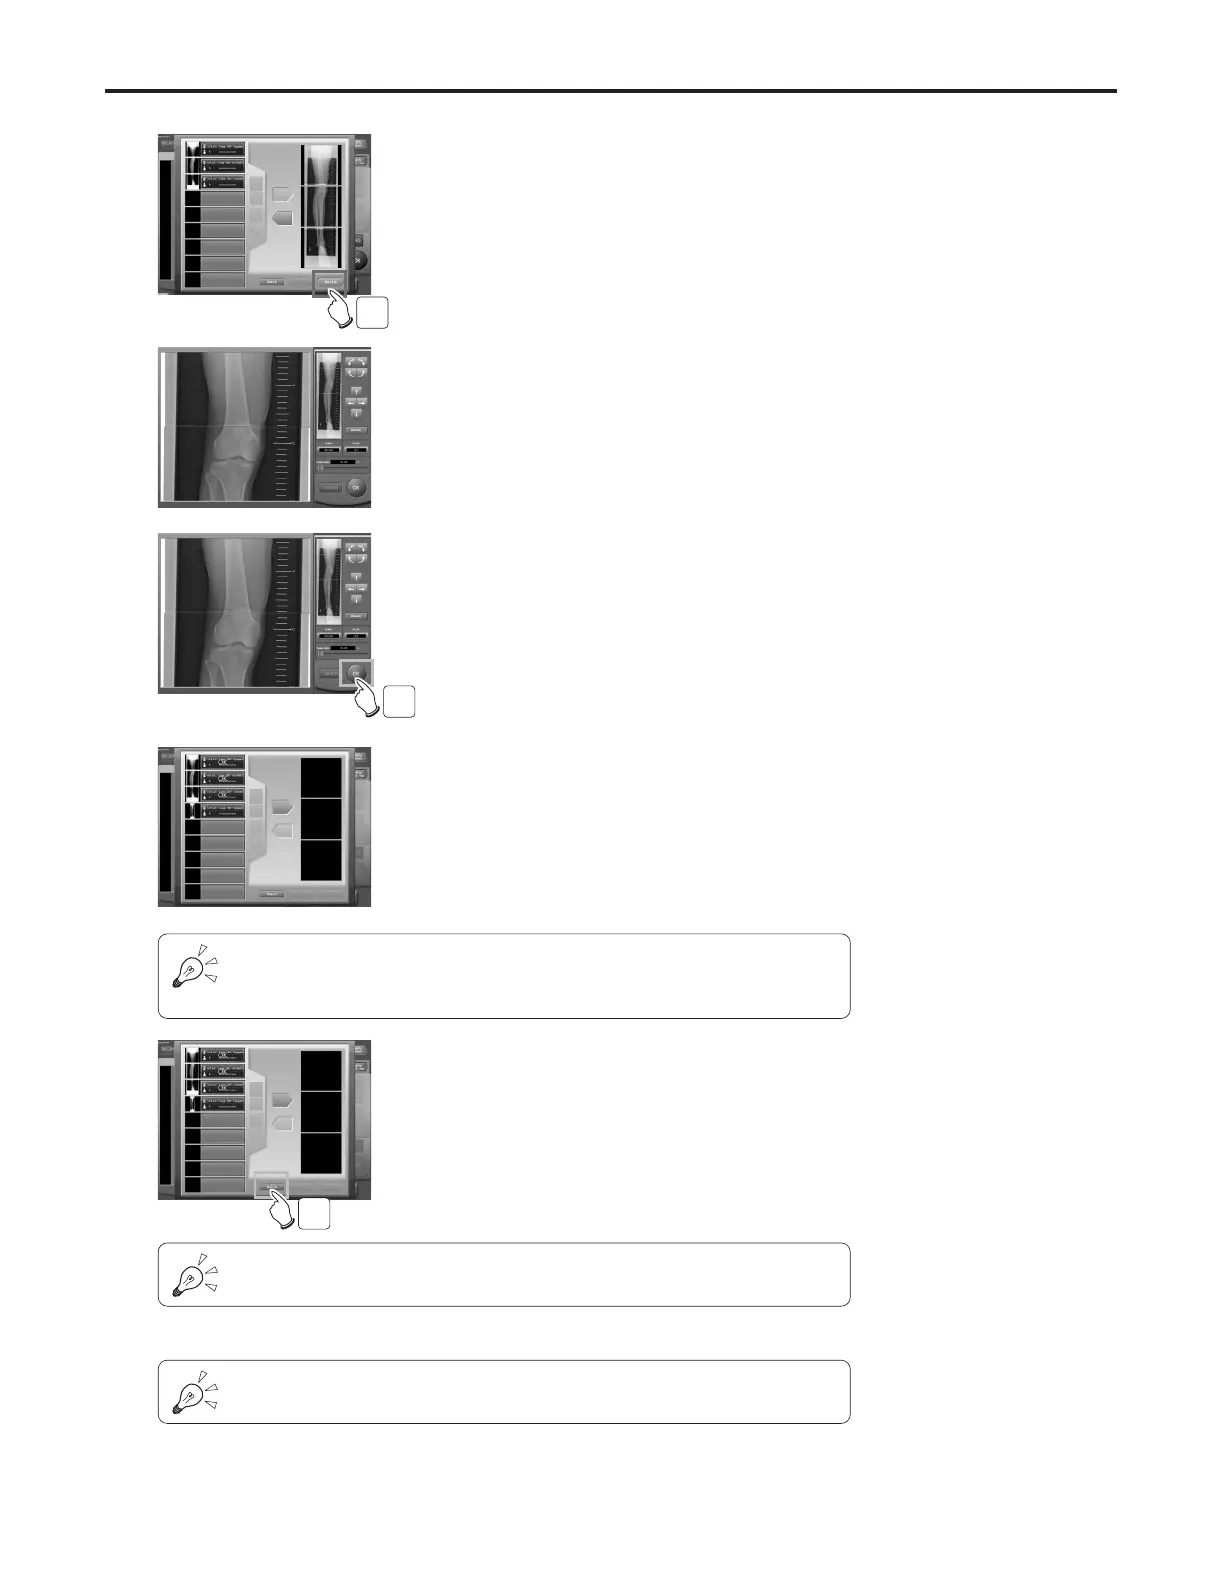
Adjust the borders of the images.
11Touch the [OK] Button.
• Composite image will be displayed after a message
“Save stitched image... Please wait a moment” is
displayed.
12
Repeat step 3~11 when there are more
images to be stitched.
11
Selecting the order for the image that has been stitched enables the [Rebuild] but-
ton. Touching the [Rebuild] button displays the “Composite Image Adjust” screen,
enabling readjustment of the stitch borders of the images.
13
Touch the [Exit] Button.
• Returns to the “Exam Check” screen.
14
Touch the [OK] button after confirming the order for
the stitched image that has been newly added.
• Composite image will be output.
13
Detailed data (image processing, print format, overlay) set to each image becomes
invalid. Set the detailed data again to the orders after they are stitched.
Please note the limitation for the stitched images (composite image).
• Only “Original”, “Flip”, “180º Rotate” or “180º Rotate+Flip” is selectable.
9 Touch the [Build] Button.
• “Composite Image Adjust” screen will be displayed
after a message “Stitching images... Please wait for
a moment” is displayed.
9

 Loading...


