Ch.4 Description of Screens
< 118 >
REGIUS Console CS-3 OPERATION MANUAL Ver. 1.10 2005.2
Enables setting of data to be overlaid on the screen and output position of that data.
Detailed Data Setting Screen (Overlay)
To select setting items
of detailed data, touch
the tab at the top right
of the screen.
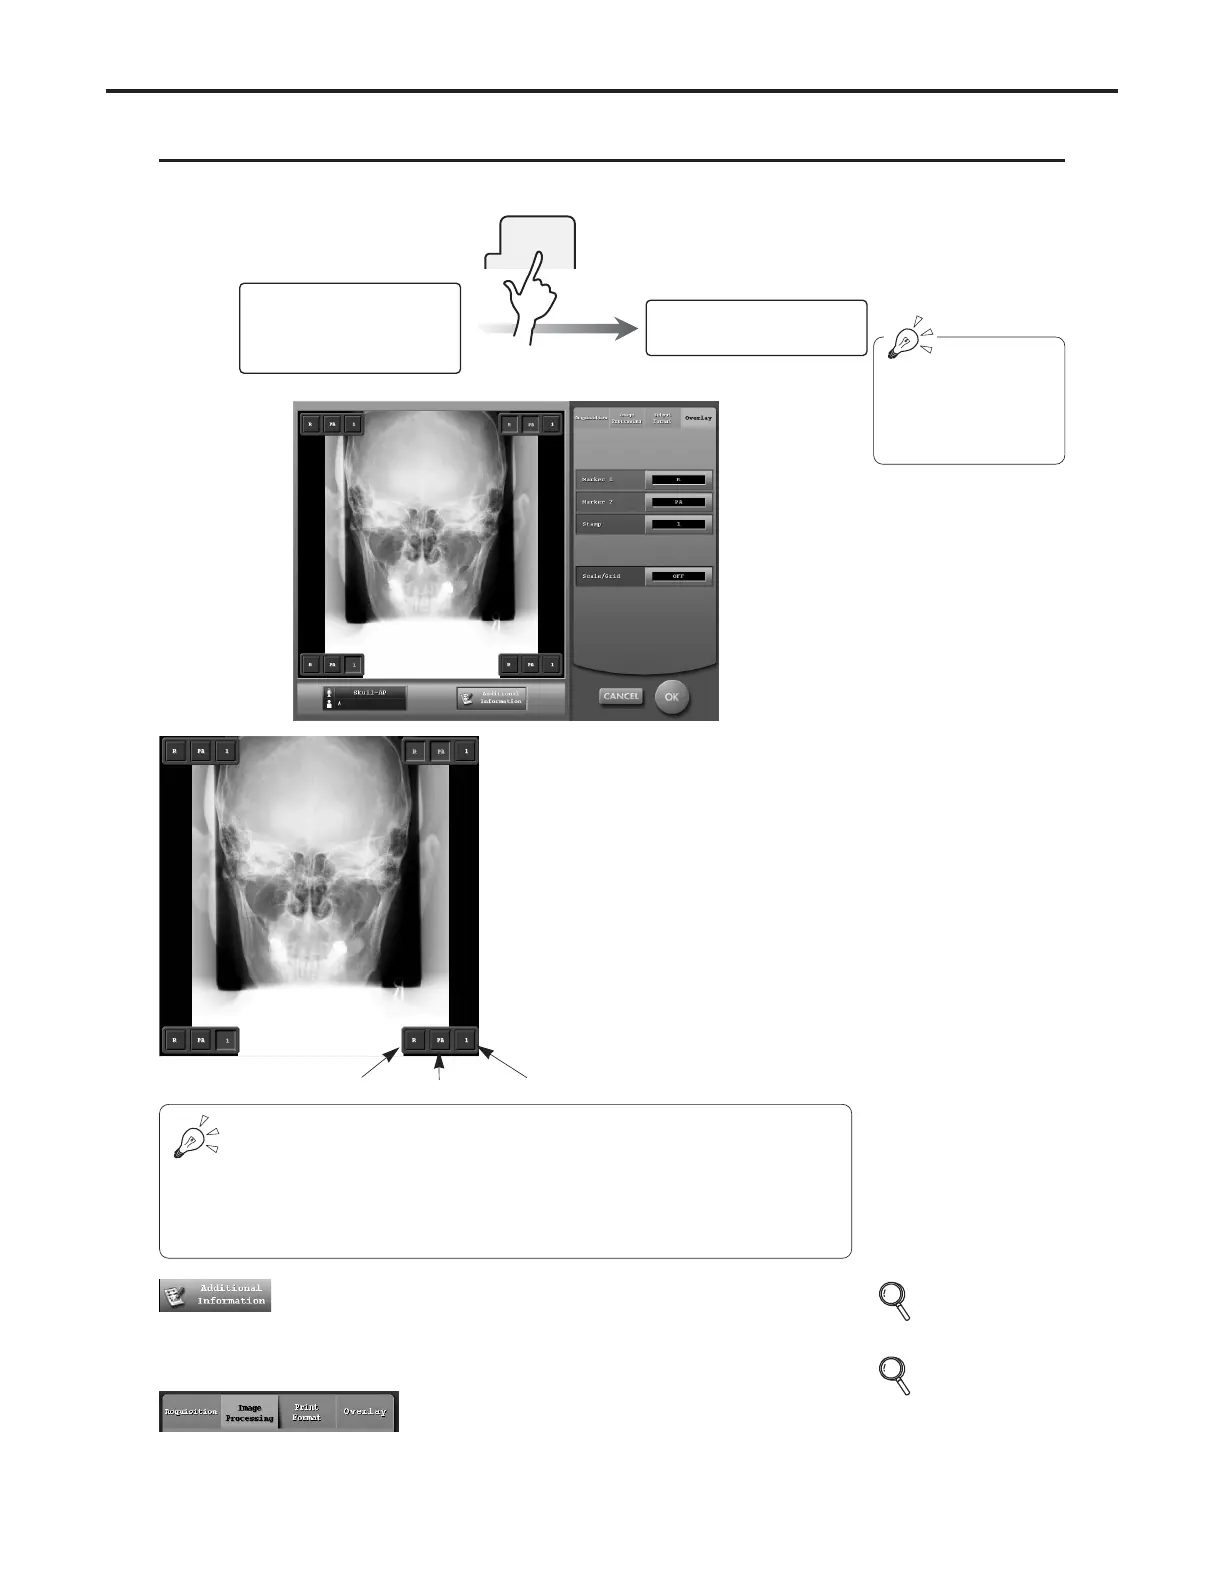
Detailed Data Setting Screen
(Acquisition)
(Image processing)
(Print Format)
(Overlay)
Detailed Data Setting Screen
(Overlay)
Image Display Field
< Prior to exposure >
Buttons to set the overlay position are displayed
on the 4 corners of the image read.
Each overlay item will be output on the film
where the button in green colour is displayed.
The overlay output position may be changed by
touching the button for a different position.
< After exposure >
The button for setting of the overlay output posi-
tion on the image read is displayed.
The procedure for changing the output position
is identical to that described above (prior to
exposure).
Marker1 position
Marker2 position
Stamp position
[Additional Information] Button
Used to input additional information relating to the
image after exposure.
• The additional information screen is displayed.
Tab for Selection of Setting Items
Used to select items to be set on the detailed data set-
ting screen.
Touching the tab will result in display of the setting
screen for that item.
p.126 Additional
Information
Screen
p.101, 103, 111, 118
Detailed Data
Setting Screen
(Acquisition)
(Image Processing)
(Print Format)
(Overlay)
Overlays can be positioned as follows when the output is made with two frames
for one image or two frames for two images.
Marker1,2 Marker 1 and 2 can be positioned for each frame. The position select-
ed on the image area corresponds to the position on the frame.
Stamp Only one stamp per film (image data) can be positioned. The position
selected on the image area is for whole area on the film (image data).

 Loading...


