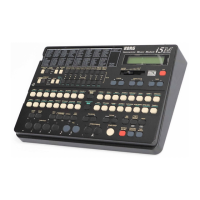
Getting Started• Front and Rear Panels
8
• FULL UPPER button
One or two tracks (Upper 1 and/or Upper 2) play on
the entire keyboard.
9 KEYBOARD ASSIGN section
These buttons select the realtime tracks (Upper 1,
Upper 2, Lower) in the Arrangement Play and Back-
ing Sequence modes. The Upper 2 and Lower are
alternative, one excludes the other on the keyboard.
10 VOCAL/GUITAR section
The VOCAL/GUITAR section applies effects to the
signal of a microphone, a guitar or a line source
(mono) coming to the INPUT-IN connector. The sig-
nal is then mixed with the sound of the internal
sound generation and sent to the OUTPUT outlets.
In Vocal mode it harmonizes the voice with the notes
received over the MIDI channel dedicated to har-
monisation. According to the factory settings, the
notes are received over channel 5.
The VOCAL/GUITAR section works in the Arrange-
ment Play, Backing Sequence and Song Play modes.
The settings are saved in the Keyboard Set. See “The
Vocal/Guitar section” on page 39.
• VOLUME knob
It controls the level of the VOCAL/GUITAR section
on the OUTPUT outlets.
• SIGNAL led
The SIGNAL led changes color according to the sig-
nal level. If it is off, there is no signal or the signal
level is very low. If it is green the signal is present. If
it is orange, the signal is close to saturation. If it is
red, the signal is saturated.
Warning: The signal cannot be saturated. If the led is
red, adjust the input gain with the GAIN knob in the
control panel.
• A/B switch button
It selects the operating mode of the A/B switch
between A and B.
• A/B knob
Programmable knob. It controls the value of the
parameter assigned to the A or B function (see
page 65). The A or B operating mode can be selected
with the A/B switch button.
Note: The knob does not work until the last value of
the controlled function is reached. For example, if the
knob is on “0” and the current parameter value is “5”,
the knob will not work until it reaches “5”.
• C button
Programmable button. It can act as “mute” for the
VOCAL/GUITAR section, the effects or the harmon-
isation.
Note: When you turn the instrument on, the VOCAL/
GUITAR section is deactivated. Select one of the Key-
board Sets to activate it. If you have connected a micro-
phone, choose a Keyboard Set in the bank A. If you
have connected a guitar, choose a Keyboard Set in the
bank B (clean settings) or C (overdrive settings).
11 PROGRAM/ARRANGEMENT section
These buttons are used to select programs and
arrangements.
To select a program (single sound) press PRO-
GRAM/ARRANG to light the PROGRAM led. Press
one of the BANK (A, B, C, D, E, F) buttons to choose
the bank, then select a two-digit number between 11
and 88 using the NUMBER buttons to choose the
program.
To select the DRUM bank press twice the F(USER/
DRUM) button until the abbreviation “Dr” shows in
the display. The Drum programs range from Dr11 to
Dr28.
To select an arrangement, press PROGRAM/
ARRANG to light the ARRANG led. Press one of the
BANK (A, B, USER) buttons to choose the bank, then
select a two-digit number between 11 and 88 using
the NUMBER buttons to choose the arrangement.
If the program or arrangement to be selected belongs
to the same bank of the selected program or arrange-
ment, only select the two-digit number without
pressing the BANK button.
In the Arrangement Play mode you can use the
Arrangement Preview and Program Preview func-
tions to show the program or arrangement name in
the display before selecting it.
Press a BANK button, if necessary press a NUMBER
button to select the tens, then select the program or
arrangement using the TEMPO/VALUE buttons
and press ENTER/YES to confirm.
12 VOLUME/PROGRAM buttons
These buttons are normally used to adjust the track
volume of the tracks and to mute it. To raise the vol-
ume press the upper button, to lower it press the
lower button. To mute a track press the upper and
lower button together. To take off the mute, press
one of the buttons briefly.
Arrangement Play mode: these buttons select the
tracks and change the volume. When a track has
been selected you can set a different program for
that track (see PROGRAM/ARRANG section).
Backing Sequence mode: these buttons select the
tracks and change the volume. To select the Extra
Tracks first press the TRACK SELECT button and
then the VOLUME buttons.
Song Play mode: these buttons select the MIDI chan-
nels (tracks) of the SMF and change the volume. To