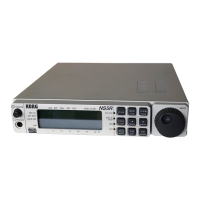
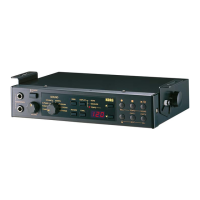
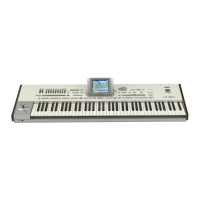
Getting Started • Front and Rear Panels
9
go from channels 1-8 to channels 9-16 (and vice
versa) press the TRACK SELECT button.
Song Edit mode: these buttons select the tracks and
change the volume. To go from tracks 1-8 to tracks 9-
16 (and vice versa) press the TRACK SELECT but-
ton.
Program mode: these buttons modify the value of
the parameters indicated under each button.
13 TRACK SELECT button
Arrangement Play mode: mutes the ACC1, ACC2,
ACC3 tracks.
Backing Sequence mode: switches between the
arrangement tracks and the Extra Track.
Song Play mode: switches between the channels 1-8
and the channels 9-16 of the SMF. (In Song Play
mode channels and tracks are the same).
Song Edit mode: switches between tracks 1-8 and
tracks 9-16.
14 CURSOR buttons
These buttons move the cursor among the parame-
ters that appear in the display. Before modifying the
value of a parameter, the cursor must be positioned
on the value that needs to be modified (flashing
text).
15 TEMPO/VALUE buttons
These buttons modify the tempo or the parameter
value selected in the display. The TEMPO or VALUE
indicators show up in the display when they are
functioning.
16 EXIT/NO button
This button is used to go back to Page 1 of the cur-
rent operative mode and to return to the higher level
from the subpages (pages in which the indication of
previous or next page is not shown next to the num-
ber page).
The second function (NO) is to be used to give a neg-
ative reply to questions that may appear in the dis-
play.
Arrangement Play, Backing Sequence and Song
Play modes: takes you back to Page 1 of the mode.
Page 1 of the Arrangement Play mode: calls up the
settings of the realtime tracks saved in the Arrange-
ment.
Song Play mode: takes you back to the previous
page after pressing a VOLUME/PROGRAM button
to choose a track.
Song Play-JukeBox mode: makes you exit from the
JukeBox mode.
Song Edit mode: calls up Page 2 of the mode.
Disk/Global mode subpages: takes you back to the
top page.
17 ENTER/YES button
By pressing this button you can give a positive reply
to questions that may appear in the display and to
start some operations in the Disk/Global mode
(Load, Save, Format, MIDI Setup…).
Song Play mode: by pressing this button when the
cursor is on the name of a song, the song will be
inserted in the JukeBox list and the JukeBox mode
activated.
18 PAGE buttons
These buttons select the previous (-) or the next (+)
page in the current mode. The page number appears
on the right of the display. Two arrows appear before
or after the number to indicate the presence of previ-
ous (<) or next (>) pages.
If no arrows appear before and after the page num-
ber, you are in a subpage of the Disk/Global mode.
To exit press EXIT/NO (see page 19).
19 MEMORY-CHORD/TIE button
Arrangement Play and Backing Sequence modes:
keeps the accompaniment chord after taking your
hand off the keyboard.
Backing Sequence-Step Recording mode: inserts a
tie (ties the last note played to the next note that is
going to be played).
20 MEMORY-LOW/HAR/REST button
Arrangement Play and Backing Sequence modes: if
the Lower track is controlled by the Global channel,
this button keeps the Lower track notes after taking
your hands off the keyboard. (See “Page 14: Lower
memory” in the Disk/Global mode).
Arrangement Play, Backing Sequence, Song Play
modes: keeps the harmonization notes coming over
the Harmony channel (see page 142 and following).
Backing Sequence-Step Recording mode: creates a
pause.
21 BASS INV./< (Bass Inversion/backwards) button
Arrangement Play and Backing Sequence modes:
with this function the lowest note of a chord played
in inverted form will always be detected as the main
note of the chord. Thus, you can specify to the
arranger composite chords such as Am7/G or “F/
C”. When the Chord Scanning is FULL, the bass note
will not change until another bass note is played.
Backing Sequence-Step Recording mode: this but-
ton is used to go to the previous step.
22 SPLIT POINT/> (Split Point/Forward) button
Arrangement Play and Backing Sequence modes:
selects the split point (division of the keyboard).
Hold down the button and play the note you wish to
become the split point. This note and all the notes to
the right of it are part of the Upper range, the notes
to its lefts are part of the Lower range.