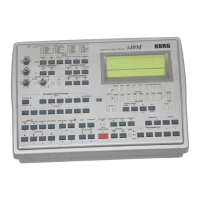
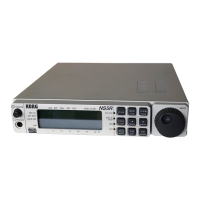
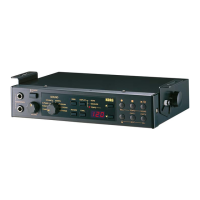
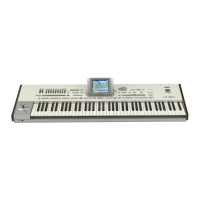
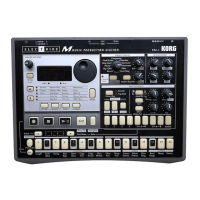
Getting Started• Front and Rear Panels
10
The split point can be saved in the Global in order to
remain available also after you turn the instrument
off and on again. (See “Page 22: Write Global” on
page 152).
Note: The split point is particularly useful when the
i40M is connected to a MIDI keyboard. It only works if
the MIDI controller transmits through the special Global
channel (see page 45).
Backing Sequence-Event Editing mode: goes to the
next step.
23 FADE IN/OUT button
If the accompaniment is not playing, this button
fades it in (the volume gradually increases from zero
to the maximum value). If the accompaniment is
playing, this button fades it out (the volume gradu-
ally decreases from the maximum value to zero). You
do not need to press START/STOP to start or stop
the accompaniment.
24 TEMPO (Tempo Lock) button
Led lit up: when you change the arrangement the
tempo will not change. The tempo can be manually
changed by using the TEMPO/VALUE buttons.
25 RESET/INS button
Backing Sequence, Song Play, Song Edit modes:
this button returns the sequencer to the first mea-
sure.
Arrangement Play and Backing Sequence modes:
restarts the chord scanner and returns to the begin-
ning of the measure.
The second function of the (INS) button is to insert a
Step Recording event, or an empty space where the
cursor is positioned when you wish to write a name.
Note: In any situation this button can be used as “MIDI
Panic”. Press it when a note gets stuck to unblock it.
26 TAP TEMPO/DEL button
You can set the tempo with this button. The tempo is
updated in the display.
The second function of the (DEL) button is to cancel
the event that has been selected in Step Recording,
or to cancel a letter where the cursor is positioned
when you wish to write a name.
27 REC/WRITE/LYRICS
(Recording/Writing/Lyrics) button
Backing Sequence and Song Edit modes: this but-
ton enters the record mode.
Arrangement Play and Program modes: this will
access the Write page where you can save your mod-
ified Arrangement, Keyboard Set o program.
Song Play mode: switches through the display
modes Lyrics 1 (lyrics 1), Lyrics 2 (lyrics 2), Play
(standard execution information).
Note: The Lyrics modes are only available if the SMF
contains the lyrics. The Lyrics 2 mode is only available
with some SMF.
Global mode: recalls the Write Global page.
28 SINGLE TOUCH button
Led lit up: when an arrangement is changed, the
programs of Upper 1, Upper 2 and Lower tracks are
recalled and saved in the new arrangement.
29 SUSTAIN button
Arrangement Play, Backing Sequence, Program,
Song Play modes: increases the length of the notes
(by extending the program sustain).
30 ENSEMBLE button
Arrangement Play and Backing Sequence modes:
harmonizes the melody played with your right hand
with the chords played with your left hand. The
Chord Scanning must be LOWER.
31 TRANSPOSE buttons
These buttons change the transposition (in semi-
tones) of the instrument. The transposition value
temporarily appears on the right side of the display.
In order to cancel the transposition you must press
both buttons together.
32 OCTAVE buttons
These buttons change the transposition (in octaves)
of the track selected in the display. In order to cancel
the transposition you must press both buttons
together.
33 VARIATION 1, 2, 3, 4 buttons
Arrangement Play and Backing Sequence modes:
these buttons select one of the four style variations.
Backing Sequence-Step Recording mode: these but-
ton are used to specify the length of the note being
input (the value of the notes is shown under the but-
tons).
34 FILL 1/2 (Fill-in) buttons
Arrangement Play and Backing Sequence modes:
pressing one of these buttons during performance
will add a fill-in.
Backing Sequence-Step Recording mode: these but-
tons are used to specify the length of the note being
input (the value of the notes is shown under the but-
tons).
35 INTRO/ENDING buttons
Arrangement Play and Backing Sequence modes:
pressing one of these buttons before you begin play-
ing will cause an introduction to be played after you
press START/STOP. Pressing one of these buttons
during a performance will cause an ending to be