Procedure
Step 1. If the security bezel is installed, remove it first. See “Remove the security bezel” on page 350.
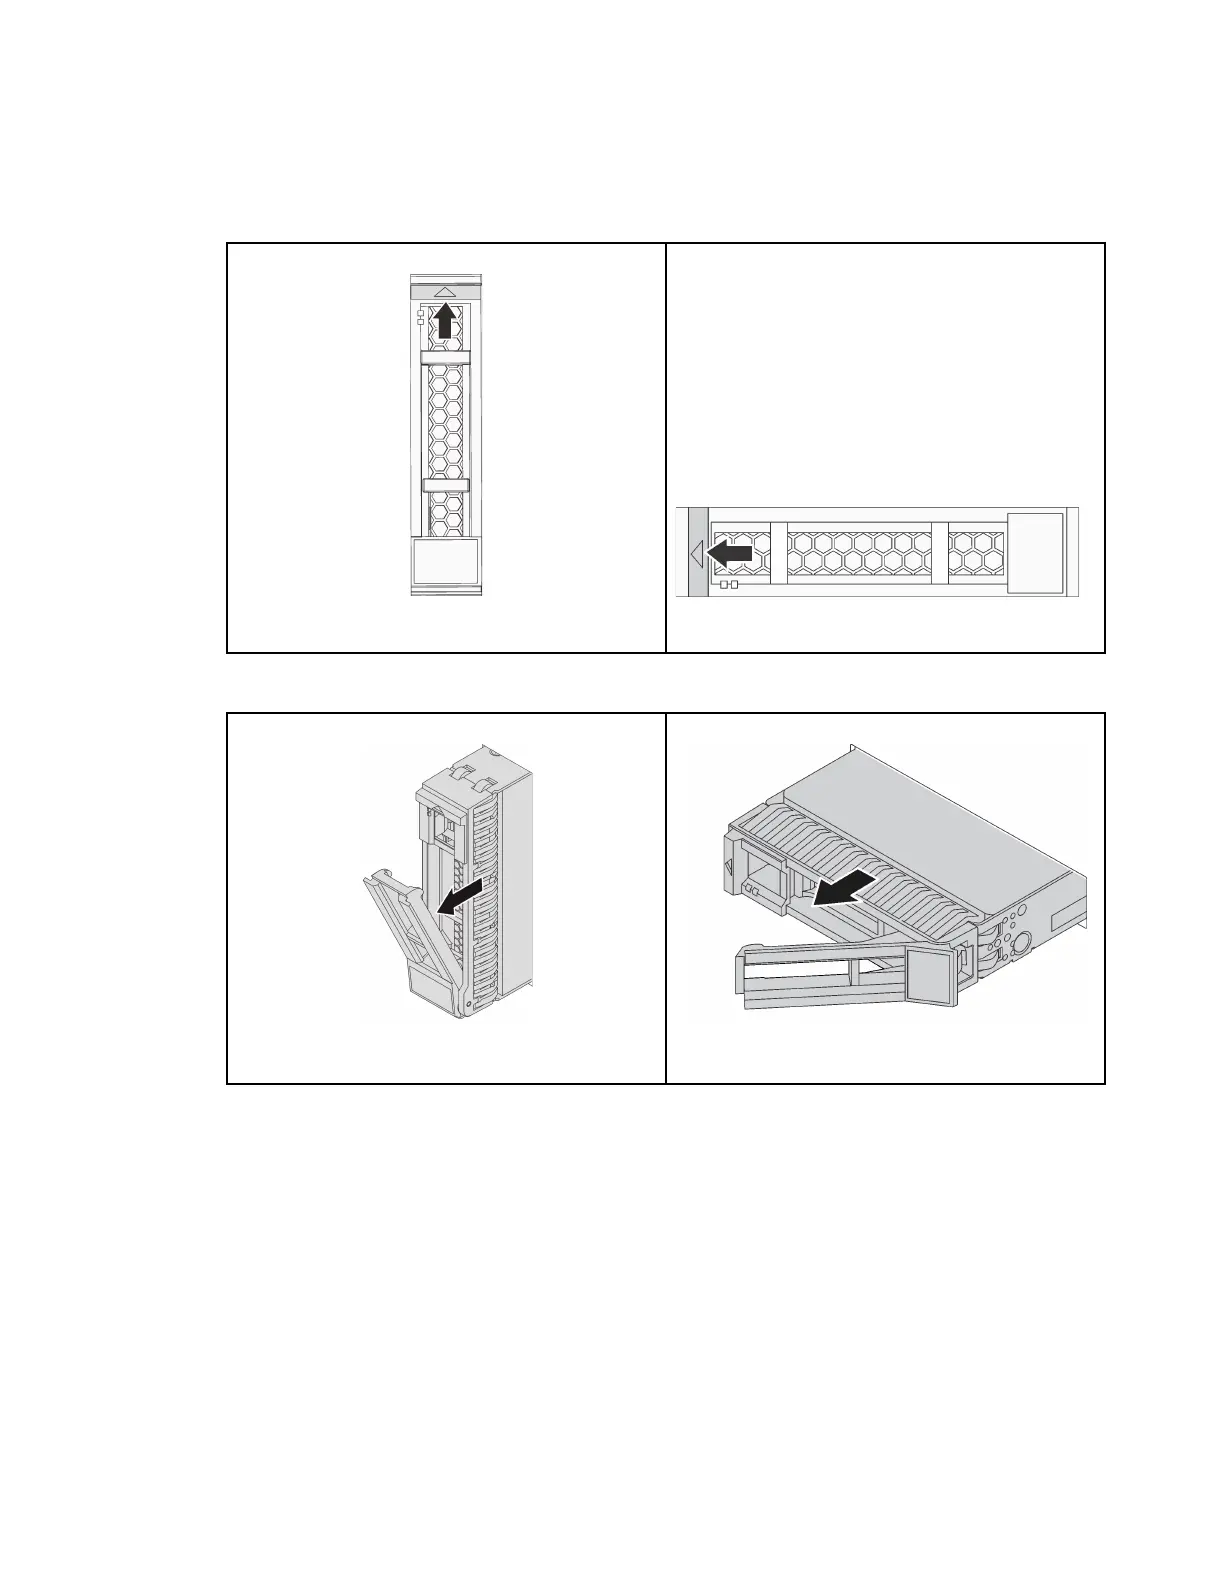
Step 2. Slide the release latch to the left to open the drive tray handle.
Figure 172. 2.5-inch hot-swap drive Figure 173. 3.5-inch hot-swap drive
Step 3. Grasp the handle and slide the drive out of the drive bay.
Figure 174. 2.5-inch hot-swap drive
Figure 175. 3.5-inch hot-swap drive
After you finish
1. Install a new drive or drive filler to cover the drive bay. See “Install a hot-swap drive” on page 227.
2. If you are instructed to return the defective component, follow all packaging instructions and use any
packaging materials that are provided.
Install a hot-swap drive
Use this information to install a hot-swap drive.
About this task
Attention:
• Read “Installation Guidelines” on page 185 to ensure that you work safely.
Chapter 4. Hardware replacement procedures 227

 Loading...


