A video for this task is available at:
• Youtube:
https://www.youtube.com/playlist?list=PLYV5R7hVcs-DqVplE36HIvdM_sq_Auw3U
• Youku: https://list.youku.com/albumlist/show/id_59643657.html
Procedure
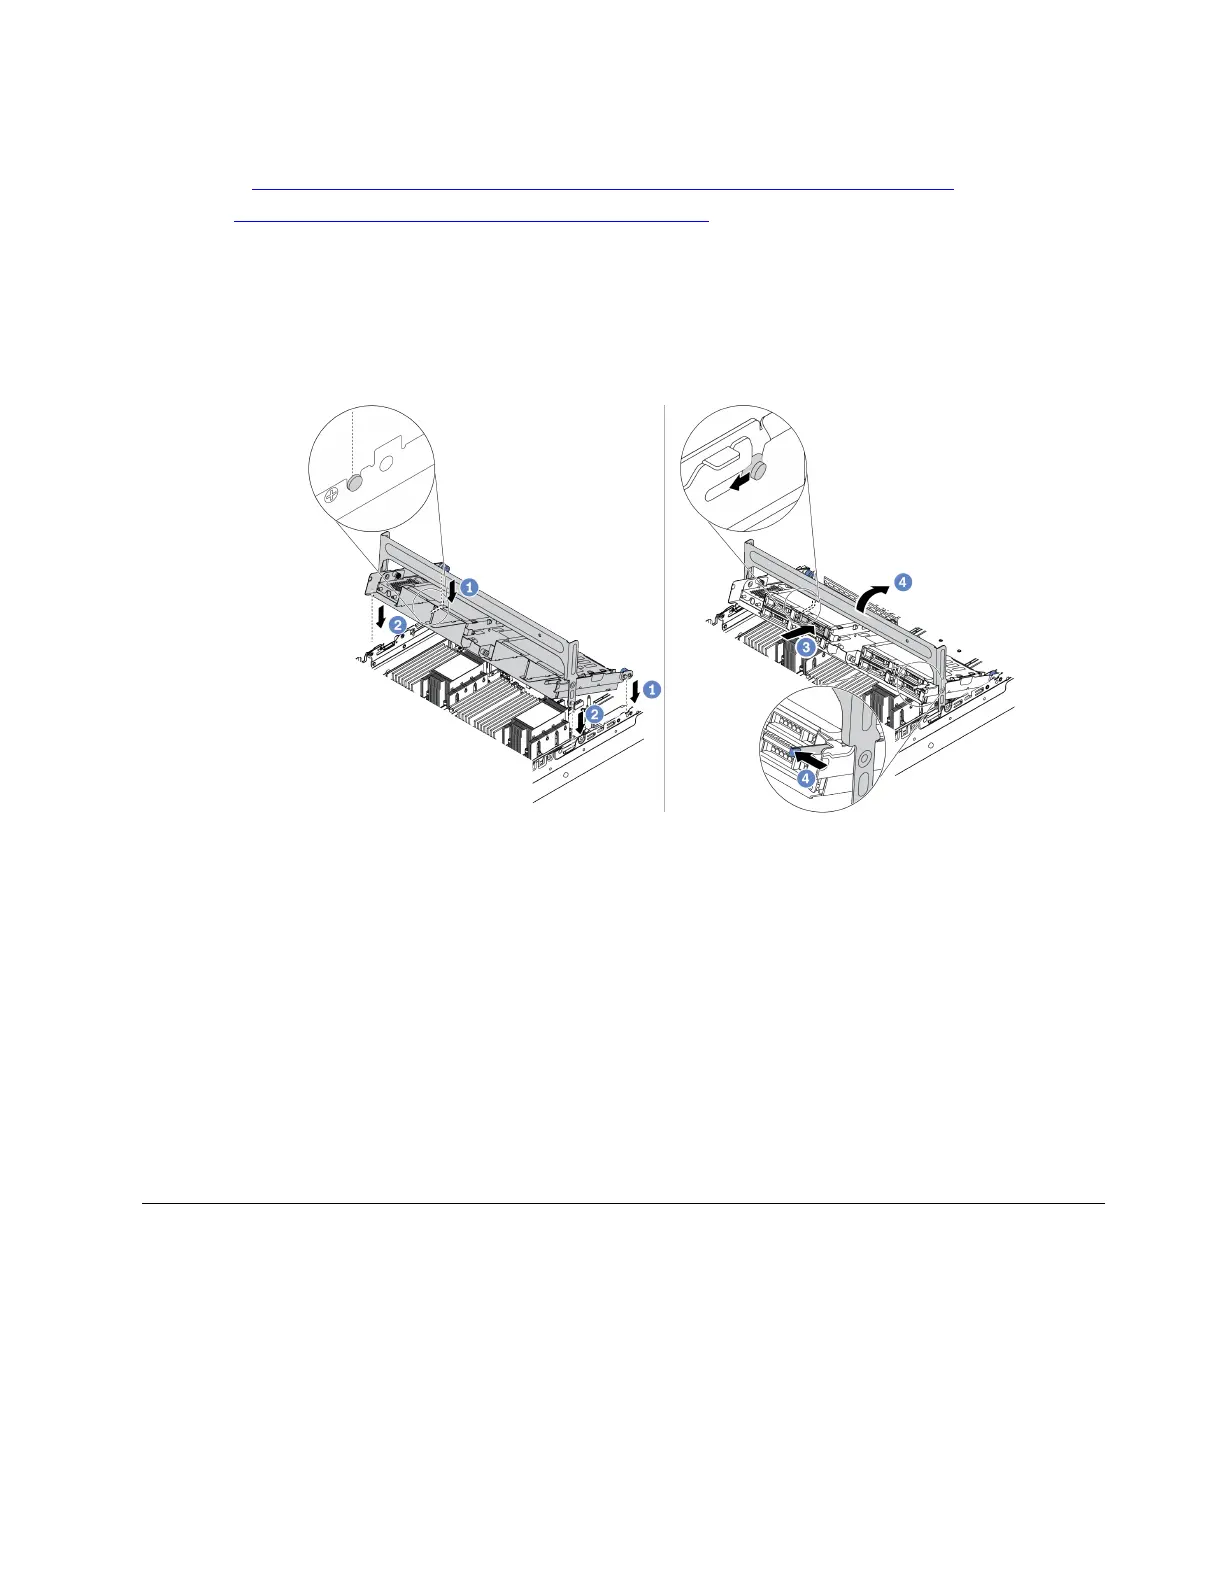
Step 1. Install the middle drive cage and drives.
Note: The illustration shows installing the middle 2.5-inch drive cage. The procedure is the same
for installing the middle 3.5-inch drive cage.
Figure 205. Installing the middle drive cage and drives
a. Align the pins on the middle cage with the corresponding slots on the chassis.
b. Lower the drive cage down into place.
c. Install drives into the middle drive cage. See “Install a hot-swap drive” on page 227.
d. Rotate the handle to close it.
Step 2. Connect cables from the drive backplanes to the system board or RAID/HBA adapters. See
Chapter 3 “Internal cable routing” on page 71.
After you finish
Complete the parts replacement. See “Complete the parts replacement” on page 381.
OCP 3.0 Ethernet adapter replacement
Use this information to remove and install the OCP 3.0 Ethernet adapter.
• “Remove the OCP 3.0 Ethernet adapter” on page 277
• “Install the OCP 3.0 Ethernet adapter” on page 279
Remove the OCP 3.0 Ethernet adapter
Use this information to remove the OCP 3.0 Ethernet adapter.
Chapter 4. Hardware replacement procedures 277

 Loading...


