Install a super capacitor module on the middle drive cage
Use this information to install a super capacitor module on the middle 2.5-inch drive cage.
About this task
Attention:
• Read “Installation Guidelines” on page 185 to ensure that you work safely.
• Power off the server and disconnect all power cords for this task.
• Prevent exposure to static electricity, which might lead to system halt and loss of data, by keeping static-
sensitive components in their static-protective packages until installation, and handling these devices with
an electrostatic-discharge wrist strap or other grounding system.
A video for this task is available at:
• Youtube:
https://www.youtube.com/playlist?list=PLYV5R7hVcs-DqVplE36HIvdM_sq_Auw3U
• Youku: https://list.youku.com/albumlist/show/id_59643657.html
Procedure
Step 1. Touch the static-protective package that contains the new RAID super capacitor module to any
unpainted surface on the outside of the server. Then, take the new RAID super capacitor module
out of the package and place it on a static-protective surface.
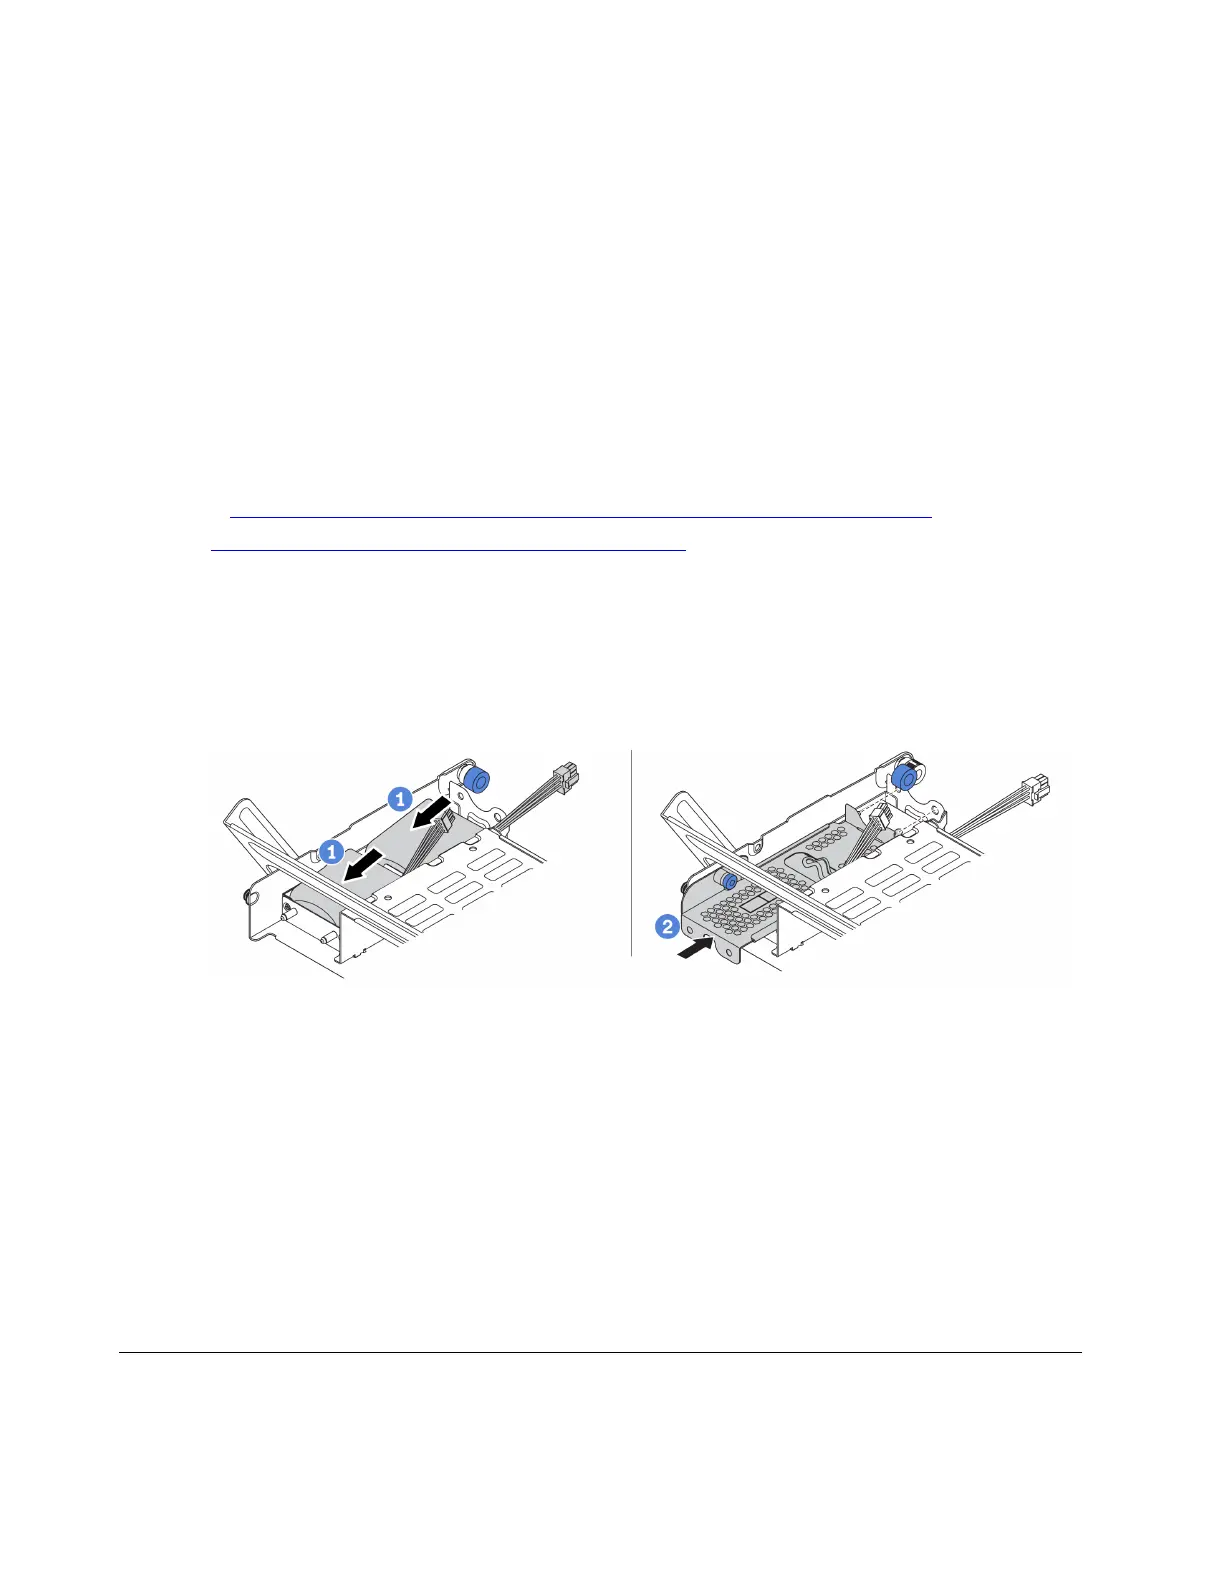
Step 2. Install the super capacitor module.
Figure 250. Installing the super capacitor module
a. Put a super capacitor module into the holder, and press it down to secure it into the holder.
b. Align the pins on the metal cover with the holes in the super capacitor holder, pull out the blue
latch on the cover, and slide the cover into the holder until the pins pass through the holes.
Then, release the blue latch to lock the cover into place.
Step 3. Connect the super capacitor module to an adapter with the extension cable that comes with the
super capacitor module. See “RAID super capacitor modules” on page 80.
After you finish
Complete the parts replacement. See “Complete the parts replacement” on page 381
Rearwall bracket replacement
Use this information to remove and install a rearwall bracket.
322
ThinkSystem SR650 V2Maintenance Manual

 Loading...


