Before commissioning
- 38 -
04.19909.1709.9-05
When converting the torch to another elec-
trode diameter, please observe the follow-
ing.
The collet 62, collet body 63 and electrode 60 must
have the same diameter.
The gas nozzle 64 must be matched to the electrode
diameter.
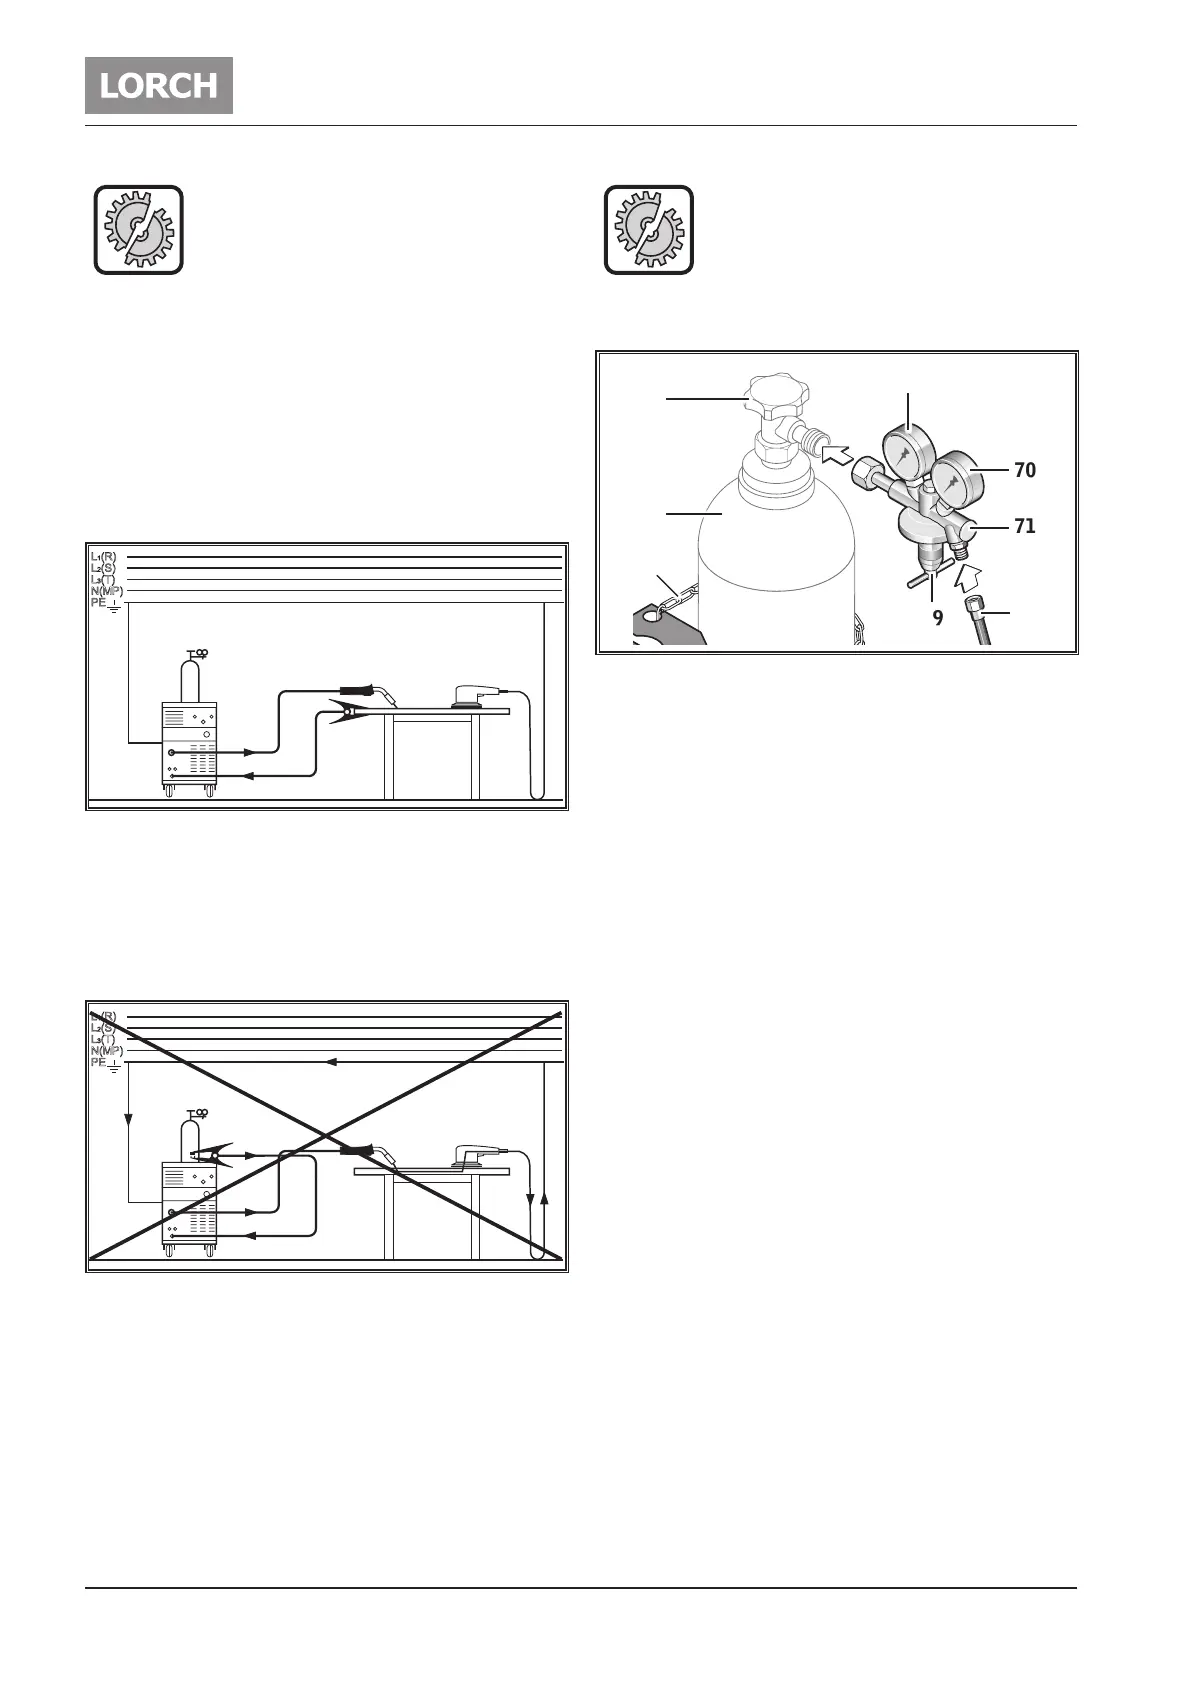
Connecting the ground cable
 Connect the component guide to the connection
socket of the component guide 6 and secure the ca-
ble by turning it to the right.
Fix the ground clamp
Abb. 4: Connecting the ground cable - Correct!
 Mount the ground clamp in the immediate vicinity of
the welding point such that the welding current can-
not nd its own way via machine components, ball
bearings or electrical circuits.
 Connect the ground clamp rmly to the welding
bench or the workpiece.
Abb. 5: Connecting the ground cable - Incorrect!
 Do not place the ground clamp on the welding ma-
chine or the gas cylinder; otherwise the welding cur-
rent will be carried via the protective conductors and
it will destroy these.
Connect the power supply
The machine is suitable for operation on the mains sup-
ply or on a current generator.
 Plug the mains plug into the appropriate socket.
The mains voltage and tolerance as well
as the fuse protection must correspond to
the technical specications. (see Technical
Data)
Connect the shielding gas cylinder
68
69
66
65
67
72
71
70
Abb. 6: Shielding gas cylinder
 Secure the shielding gas cylinder 66, e.g. by using a
securing chain 67.
 Briey open the gas cylinder valve 65 several times
in order to blow out any dirt particles present.
 Connect the pressure reducer 71 to the inert gas cyl-
inder 66.
 Screw the shielding gas hose 72 to the pressure re-
ducer 71 and open the shielding gas cylinder 66.
 Press the gas test button 59 and set the gas ow rate
using the setting screw 69 on the pressure reducer.
9 The gas ow rate is indicated on the ow meter 70.
Rule of thumb:
Gas nozzle size = litres/min.
9 The cylinder content is indicated on the content ma-
nometer 68.
 Loading...