Starting up
- 49 -
04.19 909.1709.9-05
Tiptronic operation
 Use the button 20 to select the Tiptronic operating
mode.
 Use the rotary knob 34 to select the desired Tiptronic
job.
 Use the selector switches 32 or 33 to switch between
Tiptronic jobs and all main parameters.
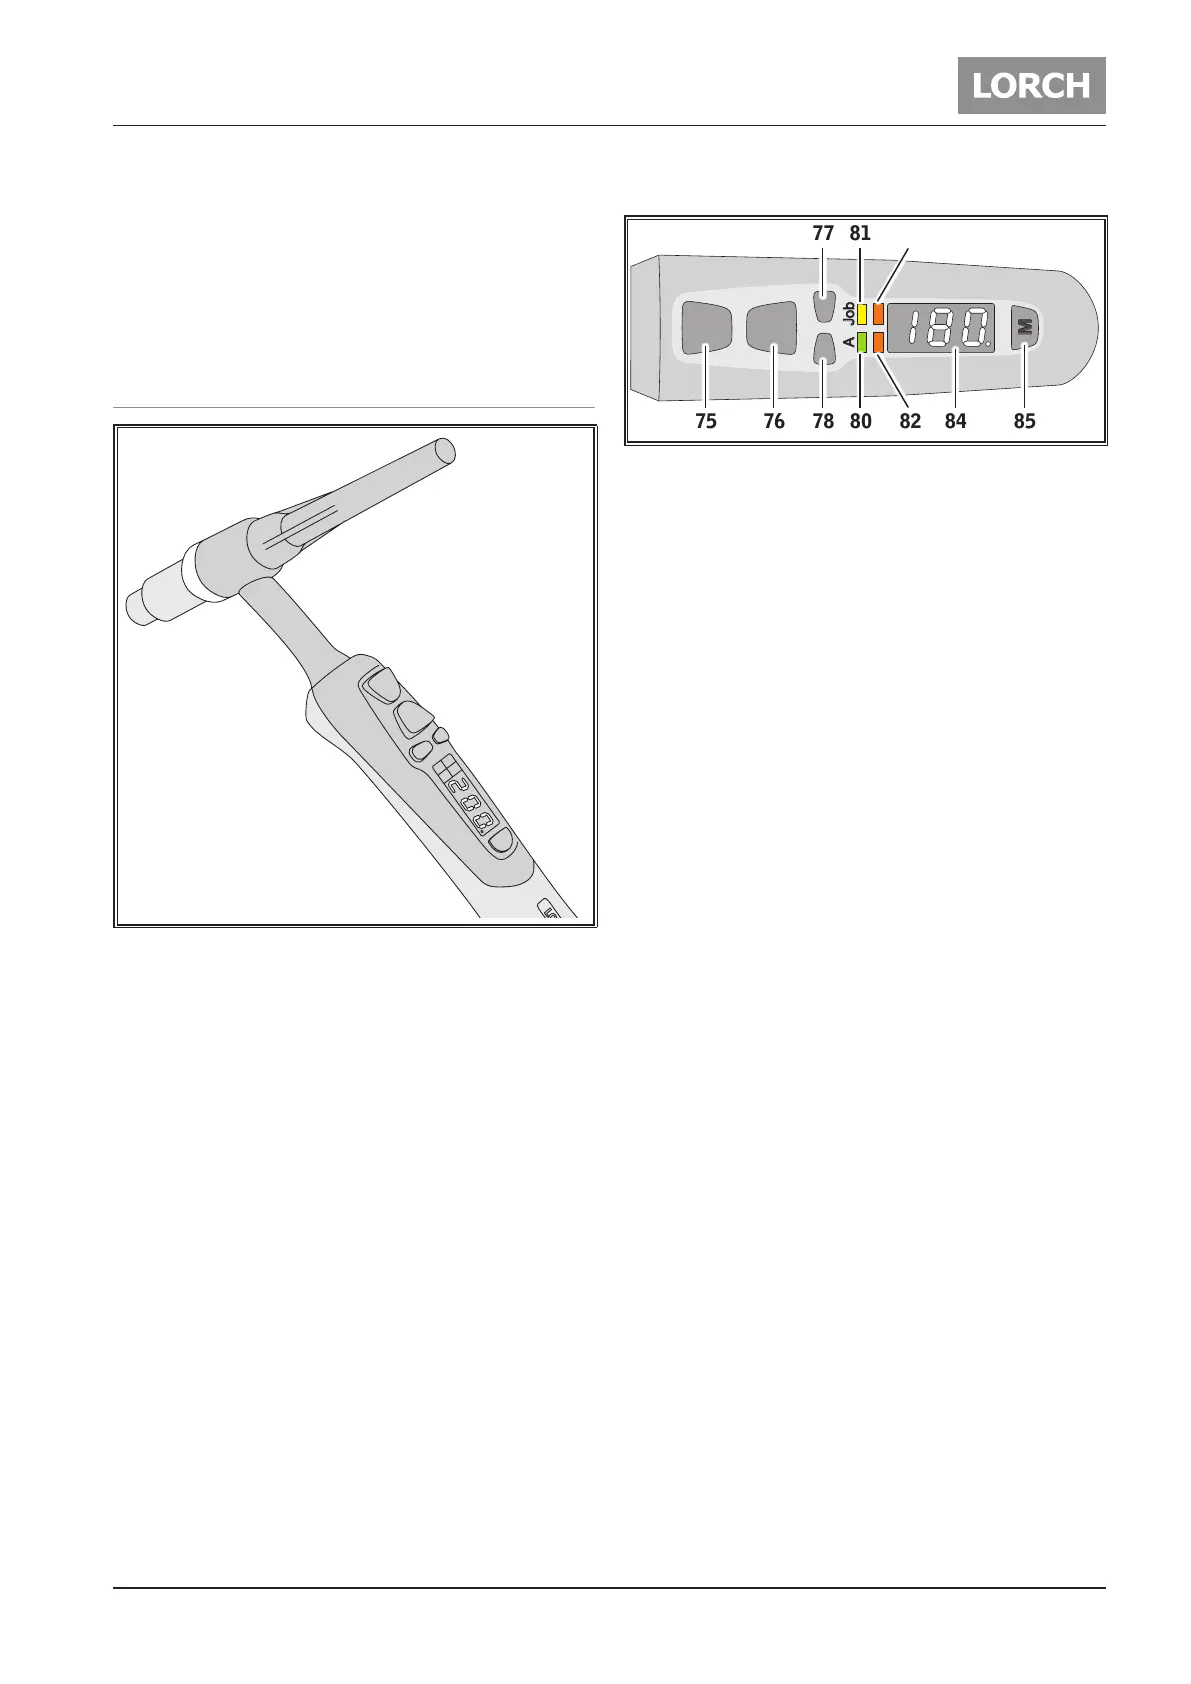
14.9 Torch
Abb. 9: Powermaster-torch of the i-LTG/i-LTW-series.
Torch switch functions
M
Job
A
75 76 78
77
80
81
82
83
84 85
Abb. 10: Torch switches
75 Torch switch Start/Stop
for starting and stopping the welding process.
76 Torch switch second current
for calling up the second current I2.
(For additional functions see “2. torch button” in
Chapter „14.3 Secondary parameters“ on page
44)
77 Torch switch up
to increase the parameter values.
78 Torch switch down
to decrease the parameter values.
80
LED ampere:
is lit if the welding current is readable in the display
(84).
81 LED Job:
is lit if a job is visible in the display (84).
82 Powermaster LED 3:
Free selectable parameters can be saved here.
Initial parameter is “second current I2”.
83 Powermaster LED 4:
Free selectable parameters can be saved here.
84 Display: shows parameter values.
85 Mode button:
switch between the parametes LED 80 to LED
83.
Press 7 seconds to change the display (84) to
right or left hand mode. Index is a dot at the bot-
tom right.
Press 2 seconds to unlock the mode-button for 15
seconds (with activated sub-parameter “Power-
master LED lock” (PLL)).
 Loading...