214713 52 Revision A
1014366
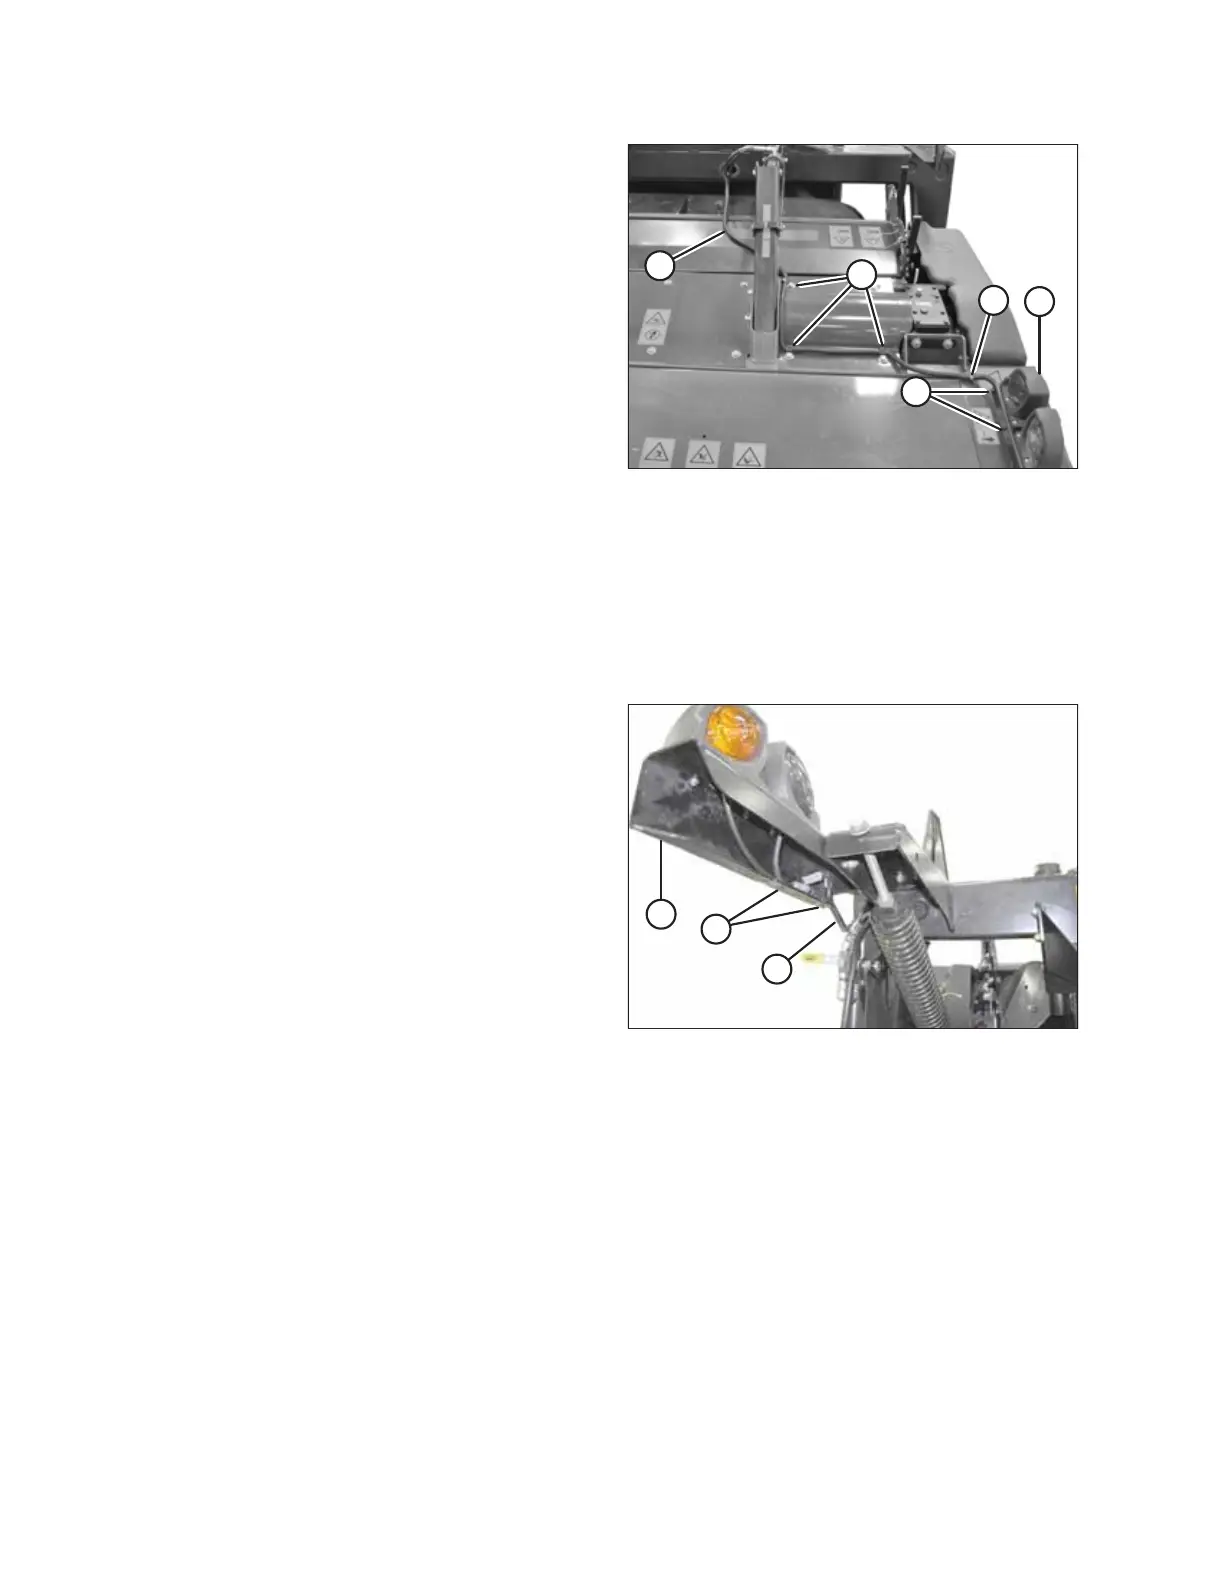
A
B
C
D
E
Figure 3.105: Harness Routing – R113 Shown
(R116 Similar)
8. Route harness (A) to light (B) on header as shown.
9. Retrieve p-clips, plastic clamps, and cable ties from
shipping bag.
10. Remove bolts (C) on header at locations shown.
11. Secure harness (A) with p-clips, existing bolts (C), and
plastic clamp (D) into existing holes.
NOTE:
4.0 m (13 ft.) header: Harness for disc mower is
secured with one plastic clamp (D).
NOTE:
4.9 m (16 ft.) header: Harness for disc mower is
secured with two plastic clamps (D).
12. Secure harness (A) to light bracket with two
cable ties (E).
13. Push excess harness into carrier frame.
14. Connect plug P401 and P404 into the light (B).
Connecting Right Side Transport Harness
1011292
A
B
C
Figure 3.106: Transport Light
1. Route transport harness (A) from opening into light
bracket (B) and plug into light connectors.
2. Secure harness (A) to light bracket with two cable
ties (C).
3. Push excess harness into carrier frame.
ASSEMBLING THE DISC MOWER (WITH OR WITHOUT THE DEALER-INSTALLED TRANSPORT)