B D
A
C
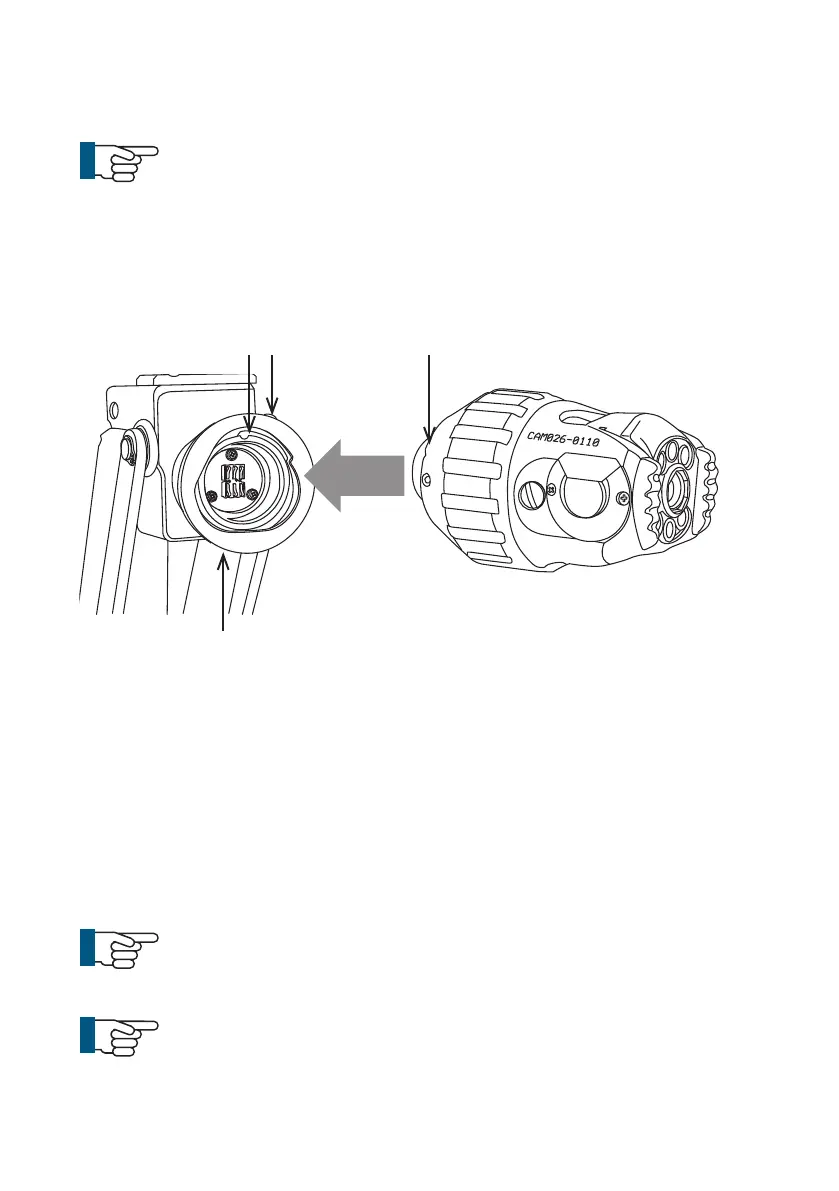
Connection of Camera to Crawler
NOTE!
Ensure that power to the crawlerd is switched OFF before
connecting or disconnecting the camera by using the ALL-
STOP button on the CCU. A red light will illuminate next to
this button when power to the crawler is OFF.
Connect the camera to the crawler as illustrated:
1 Ensure the connections are free of debris, dirt and moisture.
2 Ensure the locking ring (A) is rotated fully clockwise, as viewed in the
diagram.
3 Notice the orientation of the camera (D). Orientation pin on camera
locates here (B). Fit the camera.
4 Turn the retaining ring (A) anti-clockwise, as viewed in the diagram, to
lock the camera onto the crawler.
5 Turn the grub screw (C) to lock the retaining ring in position using 3mm
Allen Key.
6 Removal is the opposite of tting.
NOTE!
Always t the protective caps when the crawler, camera or
auxiliary module are not in use to protect from damage,
ingress of dirt and moisture.
NOTE!
Grub screw has a mushroom head and cannot be fully
removed. DO NOT OVERTIGHTEN!
34
Version LMinicam Proteus