13-13
Chapter 13 ADJUSTMENT AND OPERATION
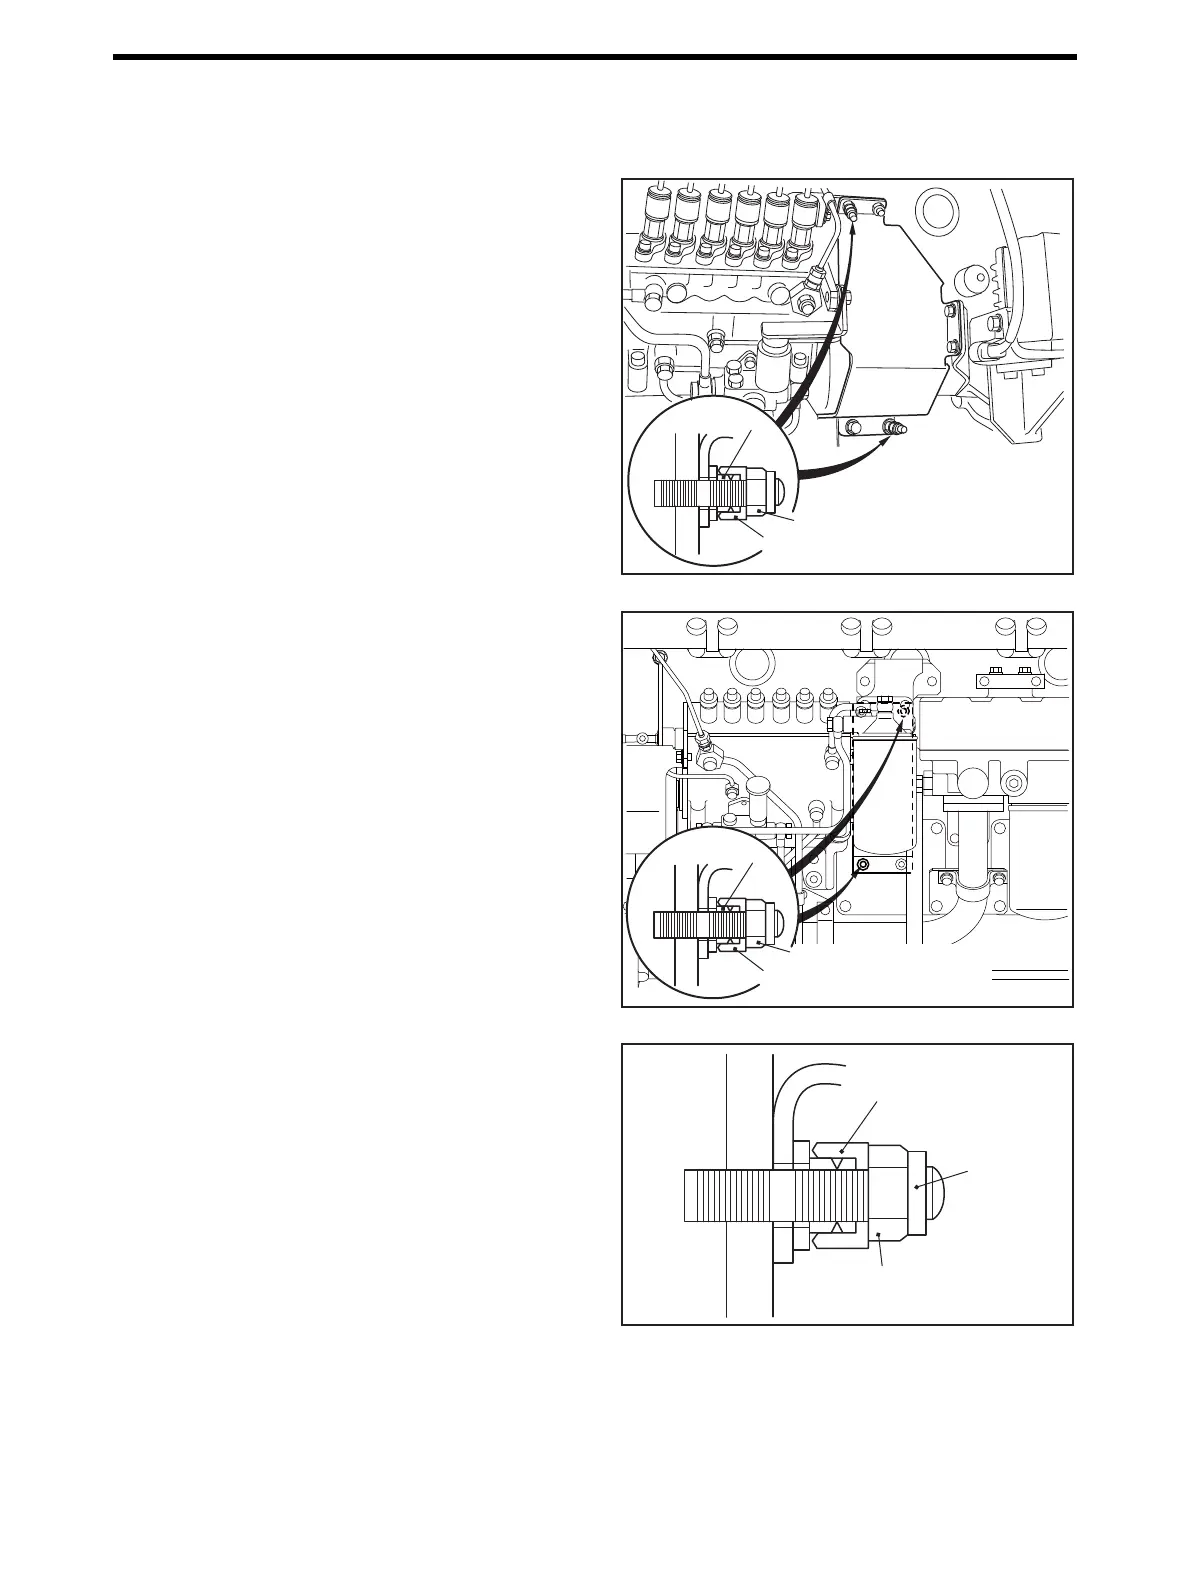
3.6 Seal
After all performance tests and adjustments are completed, stop the engine, and seal the specified part between governor actua-
tor and fuel injection pump rack.
3.6.1 Tamper Proof - Remove
Tamper proof nut is composed of double structure, and can-
not be removed by rotating.
To remove, cut the outer cylinder nut and remove the inner
nut.
Tamper Proof (Left) - Remove
Tamper Proof (Right) - Remove
3.6.2 Tamper Proof - Install
(1) Tighten the tamper proof nut to the specified torque,
and make sure that the inner nut is separated.
(2) Tighten the self lock nut to the specified torque, and
caulk the end of the nut.
Tamper Proof - Install
Self-locking nut
Inner nut
Outer cylinder nut
(Tamper proof nut)
Self-locking nut
Outer cylinder nut
(Tamper proof nut)
Inner nut
Self-locking
33 ± 3.3 N·m {3.4 ± 0.34 kgf·m}
[24.3 ± 2.43 lbf·ft]
Caulking
Tamper proof nut
(Outer cylinder nut)
35 ± 5.0 N·m
{3.6 ± 0.51 kgf·m}
[25.8 ± 3.69 lbf·ft]

 Loading...