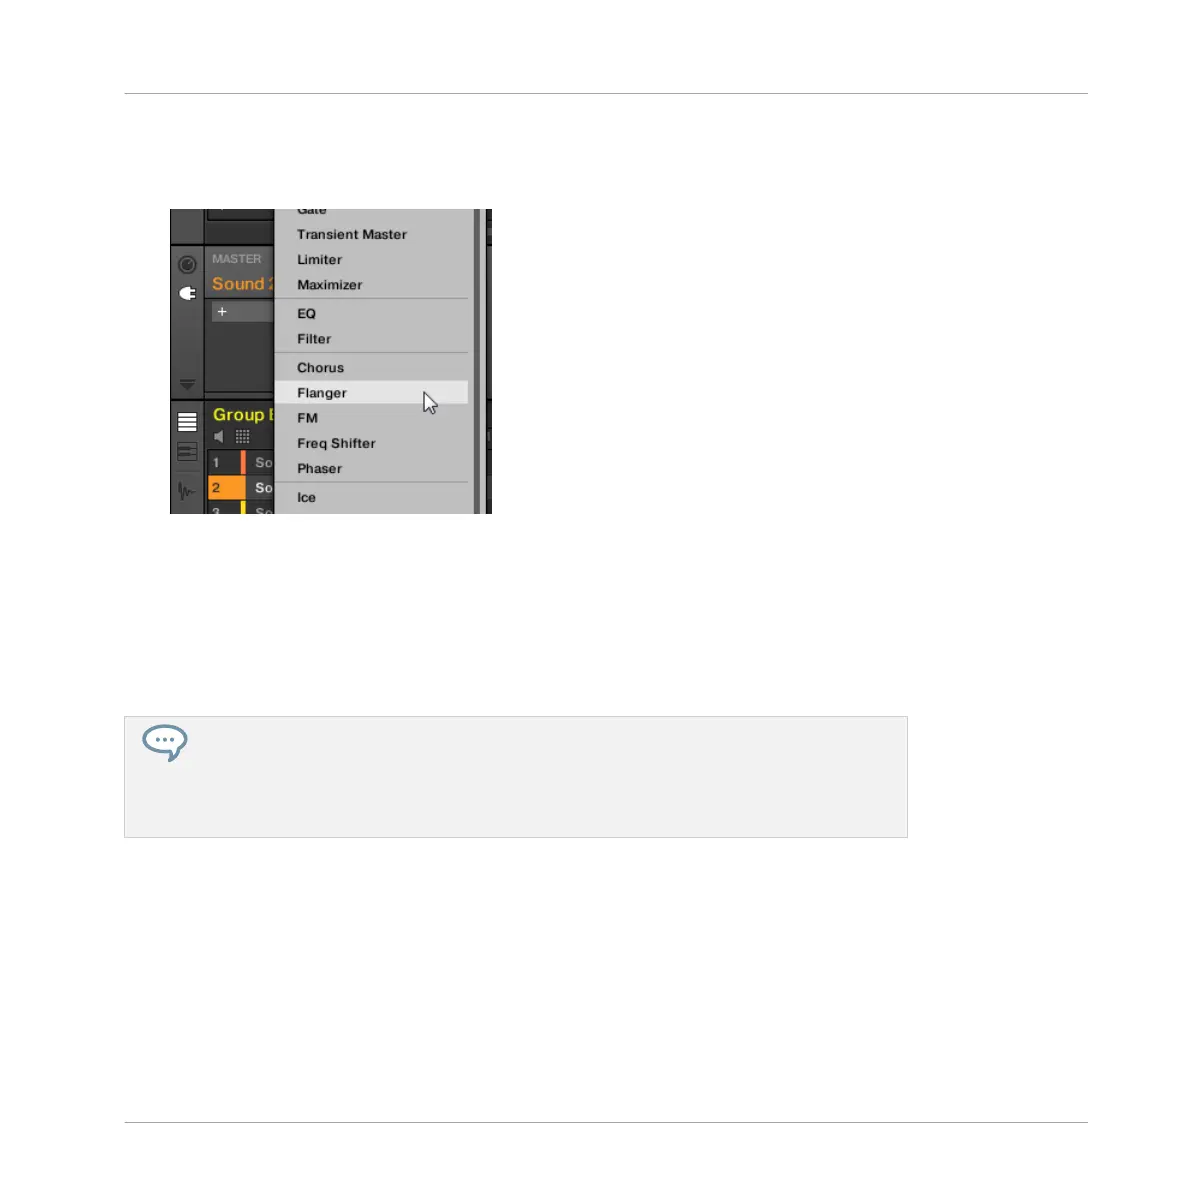
3. Click the slot with the “+” icon at the top of the Plug-in List.
This opens the Plug-in menu where you can select the desired Plug-in for loading (see be-
low for a detailed description of the entries contained in the Plug-in menu).
→
Upon your selection the selected Plug-in sits at the top of the Plug-in List, in the first
Plug-in slot of the Sound (in our example). In addition, some Native Instruments and Ex-
ternal Plug-ins will automatically open in a floating window (see section ↑6.3.1, Opening/
Closing Plug-in Windows for more on this).
You will notice that the “+” sign has moved to the next slot. Clicking it would allow you to load
a Plug-in into the next Plug-in slot of that Sound, and so on.
Instead of using the Plug-in menu to load a Plug-in with its default settings, you can
also use the Browser to load a particular preset for a Plug-in. In particular, this can
come in handy to insert a new Plug-in between two existing Plug-ins of the Plug-in List.
Please refer to chapter ↑3.2, Searching and Loading Files from the Library for more in-
formation.
Removing and Replacing a Plug-in
Once you have loaded a Plug-in into a Plug-in slot, the slot shows the name of the loaded
Plug-in, preceded by an icon describing the type of Plug-in (Instrument or Effect), and fol-
lowed by a down-pointing arrow:
Working with Plug-ins
Plug-in Overview
MASCHINE STUDIO - Manual - 293