SECTION 5
DISASSEMBLY AND ASSEMBLY
107
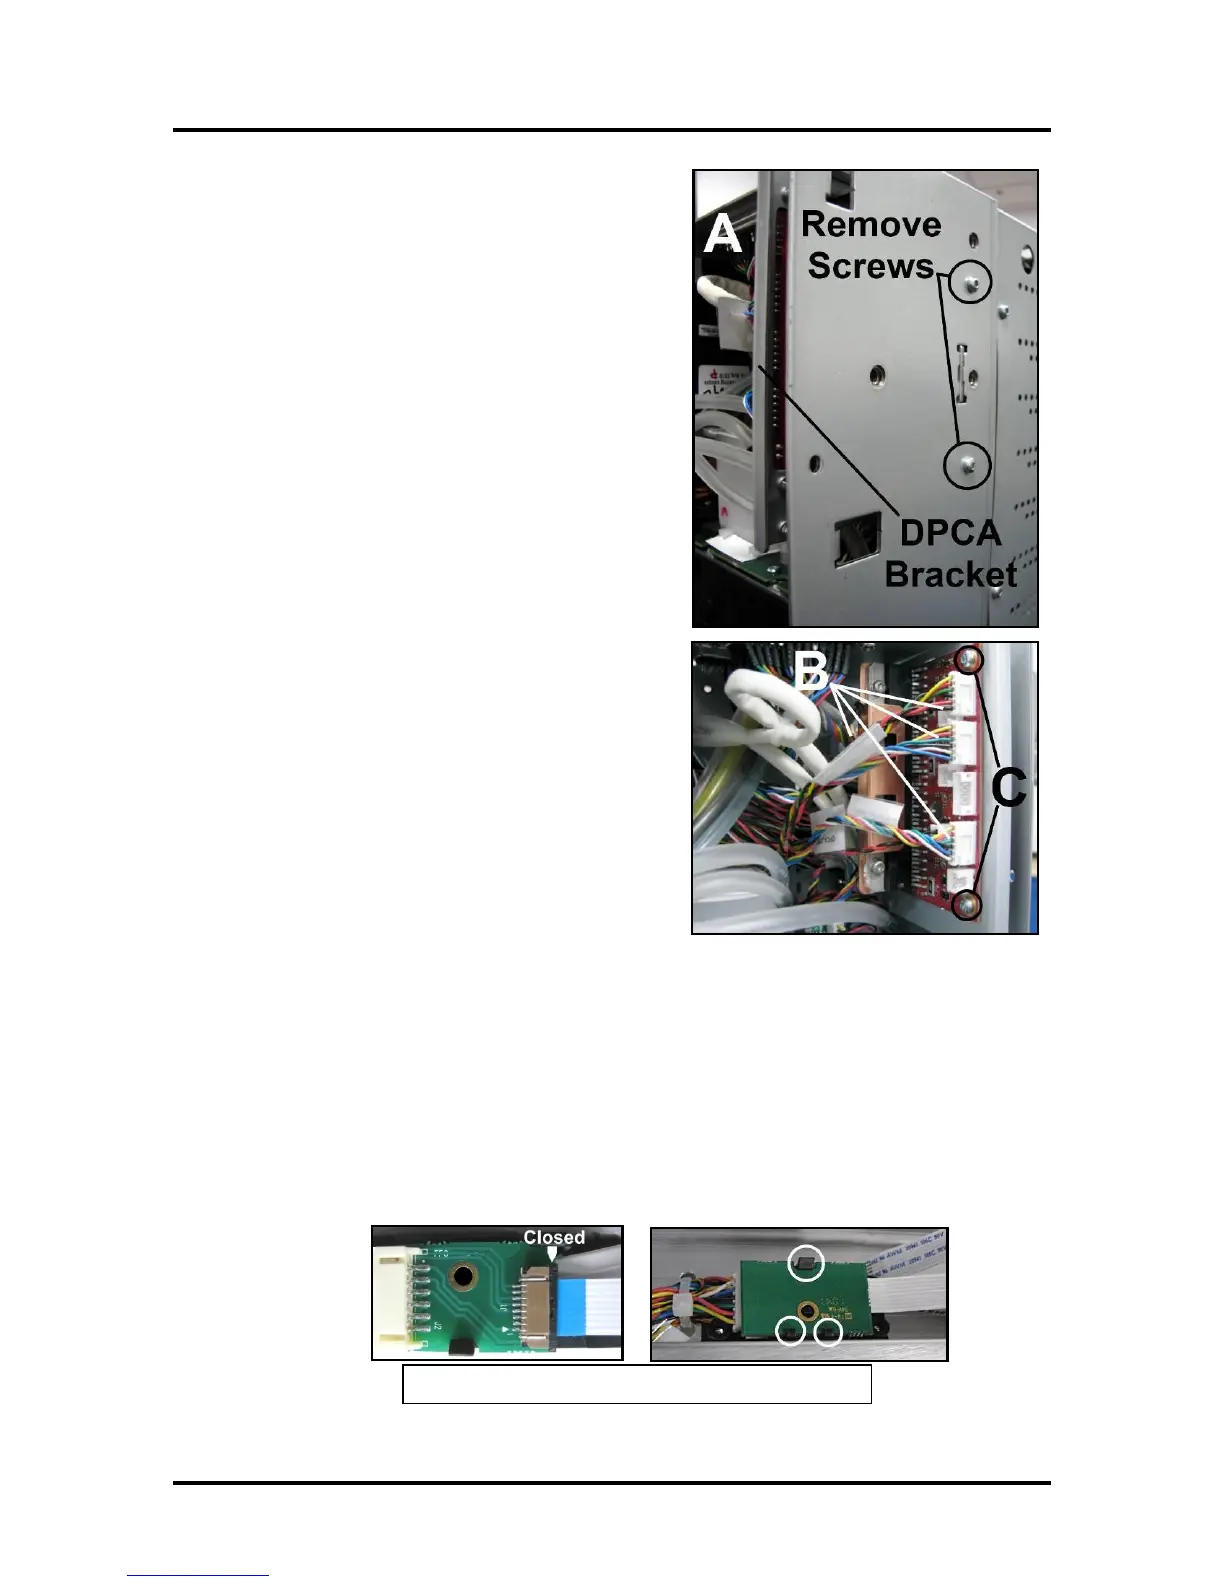
Replacing DPCA Board
[A] Remove (2) screws on the outside of the chassis that
attach the Circuit Board Bracket to chassis.
[B] Carefully move the DPCA Assembly out to unplug
the wire harness connectors. NOTE: Make sure you
know which connectors go with which socket.
[C] Remove the (3) screws attaching the DPCA to the
bracket.
Remove DPCA Board.
Install in reverse order.
Troubleshooting Tip: The most likely cause for a DPCA board failure is a short in one of the cables
or components (motors) that connects to this board. Please be sure to check all connections to/from the
DPCA board for proper connection and for possible Pinched/damage wires.
In particular, check to be sure the ribbon cable that connects between the Service Station and Print
Engine is securely and squarely connected at both ends. A misalignment at these cable connections can
cause a short or intermittent short.
Also verify that the wiper motor assembly is clean. Debris and coagulated ink can stall the wiper
motor, pulling excessive current and damaging the board.
If you skip these steps the new DPCA board may be destroyed as well.
Check Service Station, Ribbon Cable Connections.

 Loading...

