SECTION 5
DISASSEMBLY AND ASSEMBLY
132
Accessing Items Under the Clamshell Assembly
Provides access to parts under the Clamshell Assembly.
1. Remove the (4) screws attaching the clamshell to the
chassis (1 at each corner).
2. Gently lift the Clamshell Assembly from the chassis
– Take care not to pinch or damage any wires or
ink hoses.
NOTE: Remember to reinstall the ground cable when
reattaching Clamshell Assembly to chassis. Check
that no wires or hoses are being snagged or pinched.
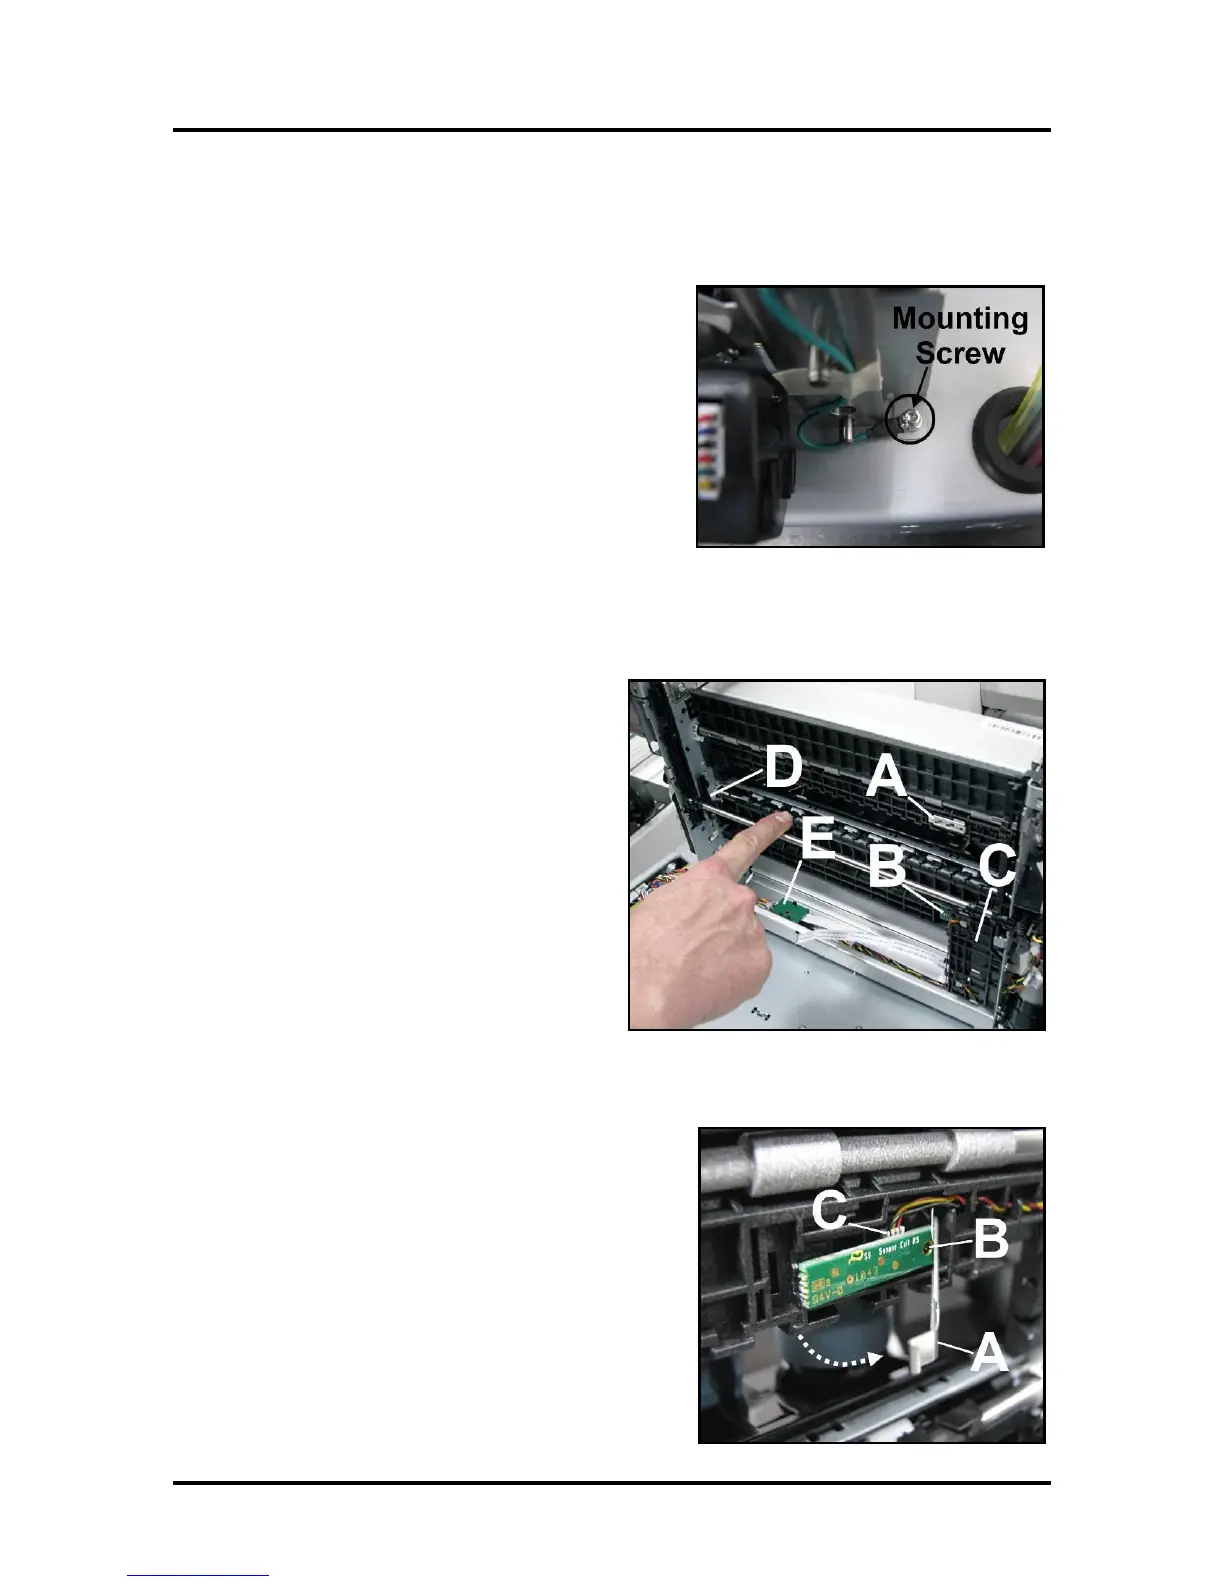
Clamshell Assembly Components -- Underside
[A] Exit Sensor
[B] Paperpath Entry Sensor Receiver
[C] Service Station PCA Sled
[D] Wiper Lifter Arms (Left & Right)
[E] Wiper Motor PCA and Flex Cable
Replacing Paperpath Exit Sensor
The Paperpath Exit Sensor is a “reflective style” sensor
located in the lower Clamshell.
[A] Unlatch Exit Sensor Cover.
[B] Carefully pull Sensor off locating pin.
[C] Turn Sensor over and unplug wiring harness.
Install in reverse order.

 Loading...

