SECTION 4
MEASUREMENTS & ADJUSTMENTS
55
Print Engine Drive Belt Tension Adjustment
This procedure should be followed whenever the belt, motor, or components that the belt drives, have been
disturbed/adjusted/replaced. It may also be necessary to periodically perform this adjustment on machines
in the field (belt may stretch from use).
NOTICE:
If belt is set too tight. This adds excessive force for the motor to drive the media transport system;
which can cause “DataPath_Underrun” messages. In addition the Transport Motor may over-heat and
be damaged. We have also seen cases where the belt stretched and fell off the drive sprockets or the
belt broke.
If belt is too loose. This causes irregularities with media transport; which can cause
distortion/degradation of print, “Paperpath PaperJam” messages and “DataPath_Underrun” messages.
Tools Needed: #1 & #2 Philips, T10 Torx Screwdriver, Drive Belt Tension Tool (42-110-54)
Procedure
NOTE: Images shown with print engine removed from
printer frame, for clarity. You do NOT need to remove the
print engine from the printer frame.
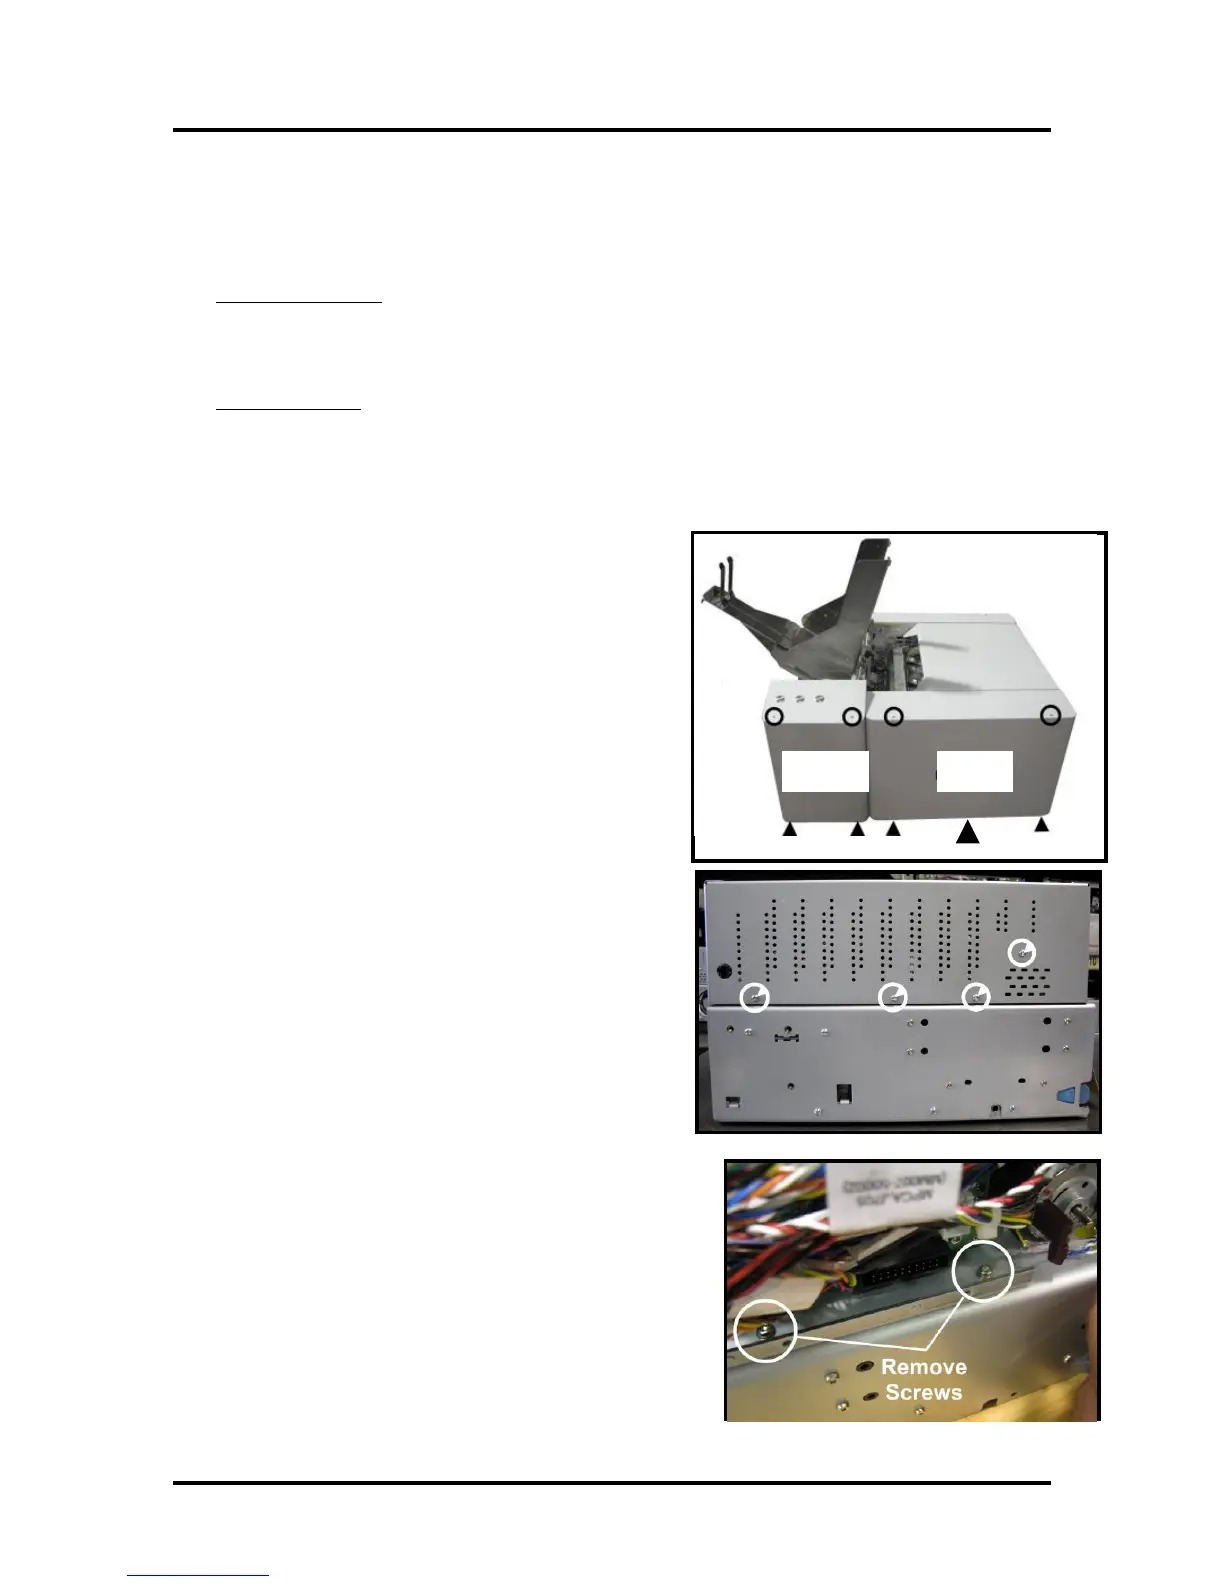
1. Power-down and unplug the printer.
2. Remove the Operator Side Cover.
You don’t need to remove the Control Panel Side Cover.
3. Disconnect the cables (USB, Network, Power) from the
left side of the MPCA (Main PC Board).
4. Remove the T10 Torx screws (4 or 5), that secure the
MPCA cover, and remove the cover. Set aside.
5. Remove the three T10 Torx screws (one screw not shown)
from the bottom of MPCA panel.
TIP: You may need to use a 90 degree ratchet wrench with
a T10 Torx bit, to access these screws.

 Loading...

